This feature allows administrators to customize job templates that standardize job creation across your organization. By setting up detailed job templates, you can ensure consistency, save time, and streamline the job creation process for all users.
With a few simple configurations, you can preassign users, set default field values, and add customized input fields — all within a centralized template.
This guide will walk you through how to configure and manage Job Templates effectively so your team can create jobs faster, with fewer errors and better structure.
Benefits:
- Standardize job information across your organization
- Reduce manual data entry with prepopulated fields
- Customize templates for different job types and departments
- When everyone uses the same format, it’s simpler to share, review, and work together.
Navigate through the system using the steps below:
-
At the desktop site's navigation bar, go to Template Settings and select "Job Templates".
Open Job Templates Here: https://system.caction.com/reminder/templatev2
Note: Users must have access to the Template Settings menu to perform these actions. Those without access should request permission from their administrator.
-
Template Info Section
This section provides basic information about the job template:
Terms Description Category Choose the job category (e.g. sales enquiry, site visit, etc.) Template Short Code Code starting with the specified alphabet for identification (e.g. J) Template Name Name of the template (e.g. Job) 
-
The "Prepopulate Assigned User During Job Creation" feature automatically assigns users to jobs created under this category. For example, adding a user here will auto-assign them when a "Sales Enquiry" job is created.

-
"Address Prepopulate Settings" configures how addresses are handled in the job form:
Field Description Display "Address not required" Checkbox to show or hide the option to mark the address as not required. Prepopulate Option Select the option to prepopulate address (e.g. Prepopulate the main customer address in the list.) No Prepopulation Required Select the option to manually pick the address. 
-
"Default Field Prepopulate Value Settings" allows setting default values for various fields:
Field Description Description Set a default description for the job. Attachment Specify any default attachments. Start Date Time Set a default start time for the job. End Date Time Set a default date time for the job. Integration Code Code that can be used to filter and search for the job. 
-
"Custom Field Settings" allows adding and configuring custom fields for the job template:
Field Description Custom Field Elements Different types of custom fields: instruction, text, text area, number, date, date time, dropdown, multiple checkbox, attachment. Custom Field View Area to preview and edit custom fields added to the job template. 
-
Click the "Save" button on the right side of the page.

-
Enter notes about the changes made (Optional)
*Note: Saving these changes will apply them across the team.
-
Click the "Save" button to apply the template setting.

-
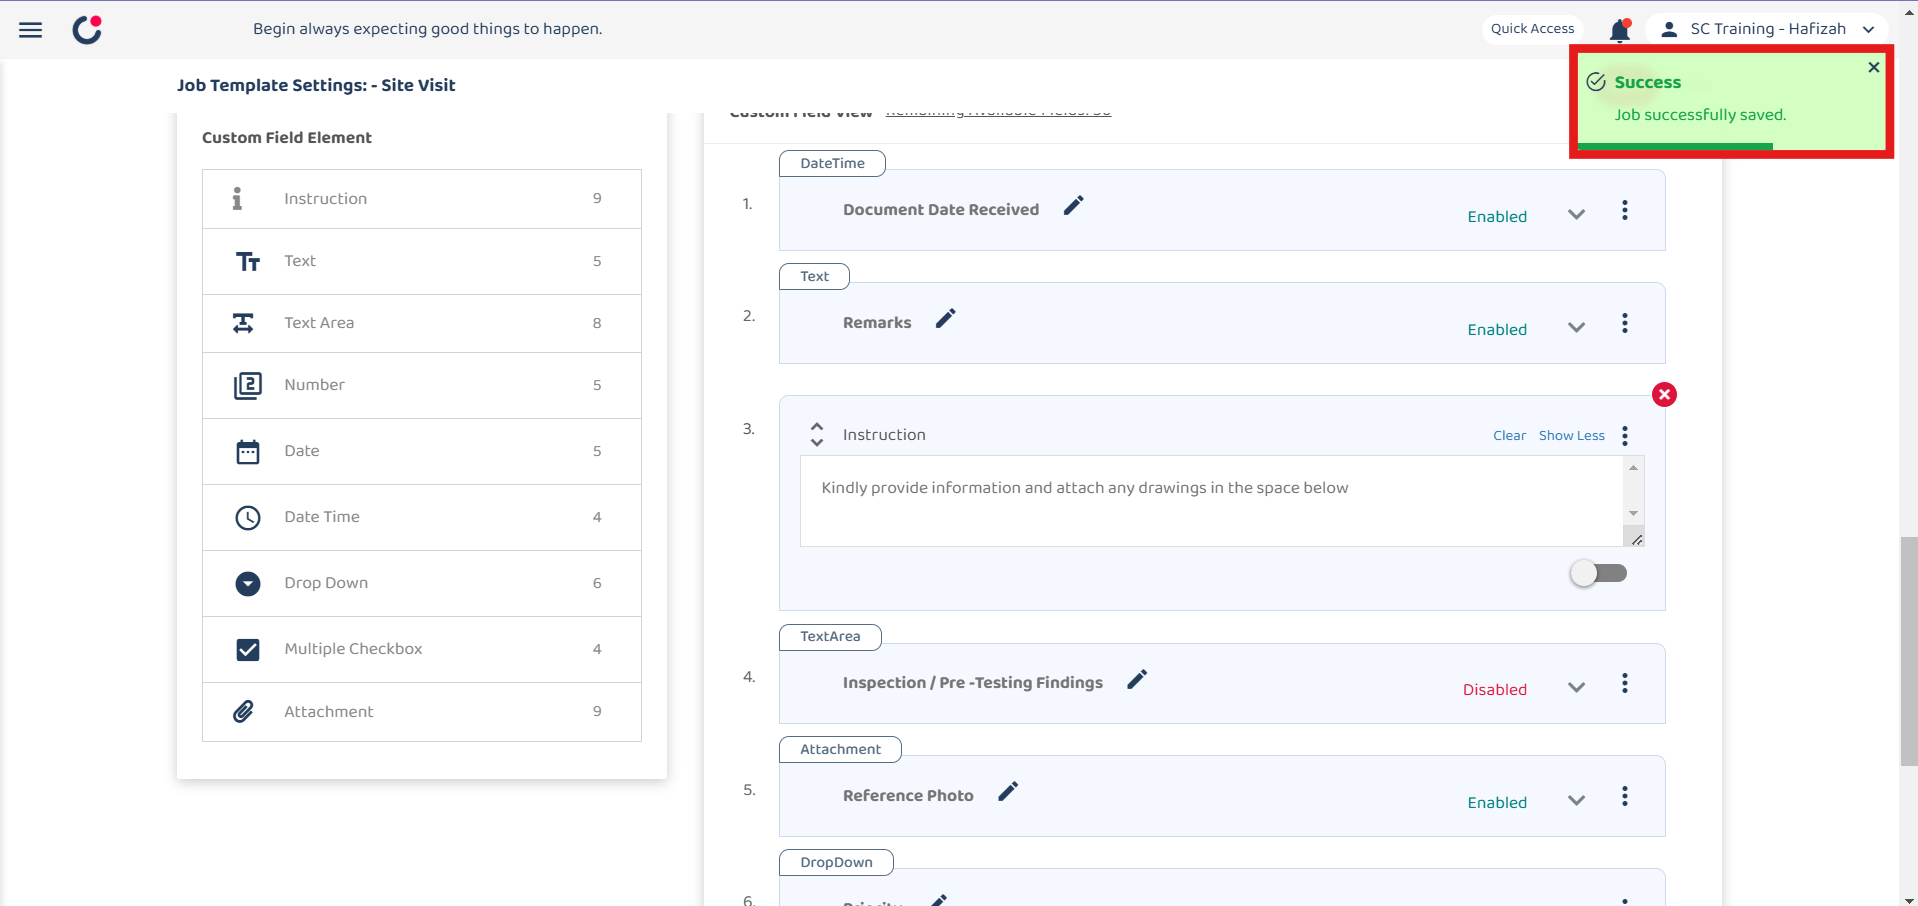
A confirmation message will appear indicating the job template settings have been saved successfully.

| Field | Description |
|---|---|
| Version History | View the changes and version of the template setting. |
| Save to all categories | Apply changes to all existing job categories. |
| Copy From | Copy from other category and apply to current job category. |
| Apply To | Apply this field configuration to any category of your choice. |
- Click the three dots icon and there are three options shown.

The system can store up to 16 versions in total, with a maximum of 15 pinned versions, while unpinned versions will be automatically replaced when they become the oldest.
Pinned versions remain protected until manually unpinned.
-
Navigate to the job template page where template details and settings are displayed in the left section, while the version history appears in the right section.

-
Hover over a version in the history panel to reveal the pin or unpin icon.

-
Click the pin or unpin icon to manage version protection status.
Note: Use the refresh button above to update the version history list if needed.

-
To restore a previous template version, click on the desired version log in the history panel.

-
Click the "Restore" button when prompted.

-
A confirmation message will appear indicating the template has been restored successfully.

"Save to all categories" creates a separate version for each category. When restoring from a specific category, it will only affect that category and not overwrite other categories.
-
Enter notes describing the changes being applied to all category templates.

-
Be aware that pre-populated values will not be included in this operation.

-
Click the "Yes, apply to all" button to confirm.

-
A confirmation message will appear indicating the current category template has been successfully saved to all categories.

-
To verify, click the category selector and choose a different category (e.g., "service contract").

-
When the selected category loads, open the version history to view the log entry showing that the changes from the previous category were applied.

"Copy From" allows users to copy template settings from another category into the current category template.
-
After clicking the "Copy From" option, a category selection interface will appear.

-
Select the source category to copy settings from and click the "Apply" button.

-
A confirmation message will appear indicating the template has been successfully copied.

"Apply To" allows users to apply specific field configurations to selected categories. This feature is available for both Default and Custom fields.
-
Locate the "Apply To" option in the default and custom field settings (accessible via the three dots icon).

-
Click the three dots icon and select "Apply To" from the menu.

-
Select the target categories to apply the field configuration to.

-
Click the "Save & Apply" button to confirm.

-
A confirmation message will appear indicating the field has been successfully applied to the selected category template fields.

Related Articles
 Help Center