 Help Center
Create professional, printable PDFs for your digital forms using customizable layouts, visibility controls, and page formatting tools.
Use the PDF Template Customization settings to define how each digital form appears when exported or shared in PDF format. This guide walks you through the steps to configure the template and generate a PDF for any form category.
Benefits
- The PDF template customization feature allows you to create consistent, branded documents for a professional business appearance.
- The flexible layout options let you prioritize important information according to your specific business needs.
- The visibility controls for headers and sections help create streamlined documents focused only on essential information.
- The comment section controls allow you to include or exclude timestamp and ownership information based on your transparency preferences
Navigate to the section by clicking it.
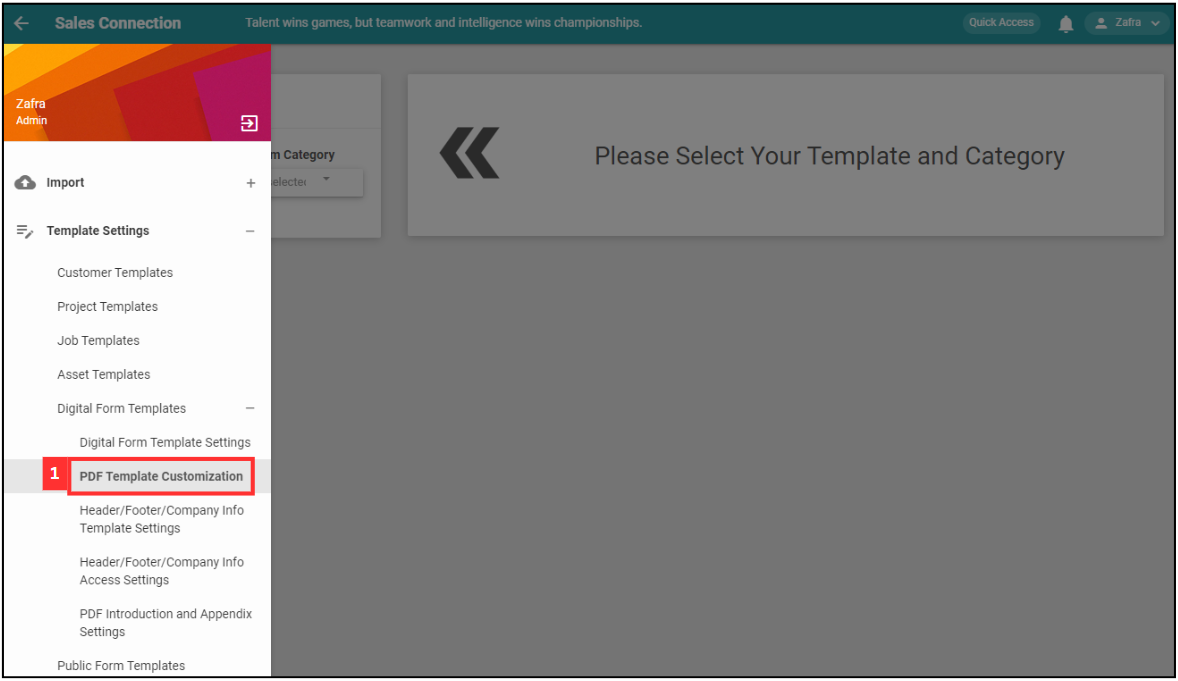
- At the desktop site’s navigation bar, go to Template Settings > Digital Form Templates > PDF Template Customization.
Set Up PDF Template Here:
https://system.caction.com/DigitalFormSetting/templatecustomisation
-
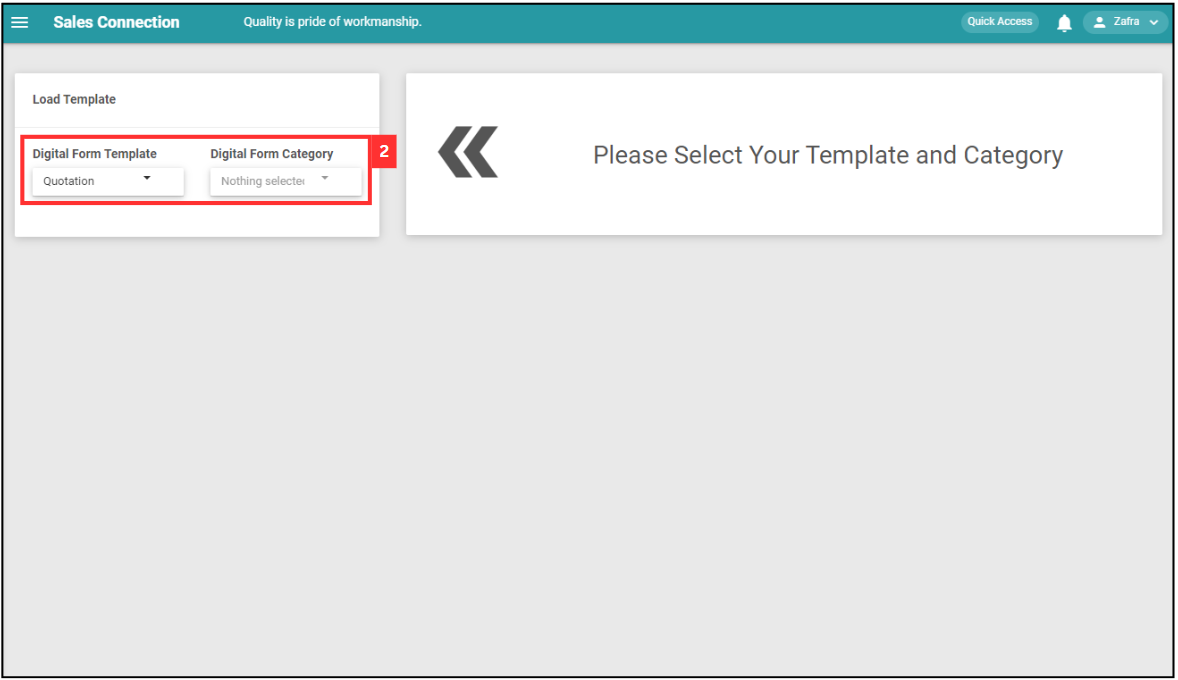
Click on the “Digital Form Template” and “Digital Form Category” that needs to create PDF.
-
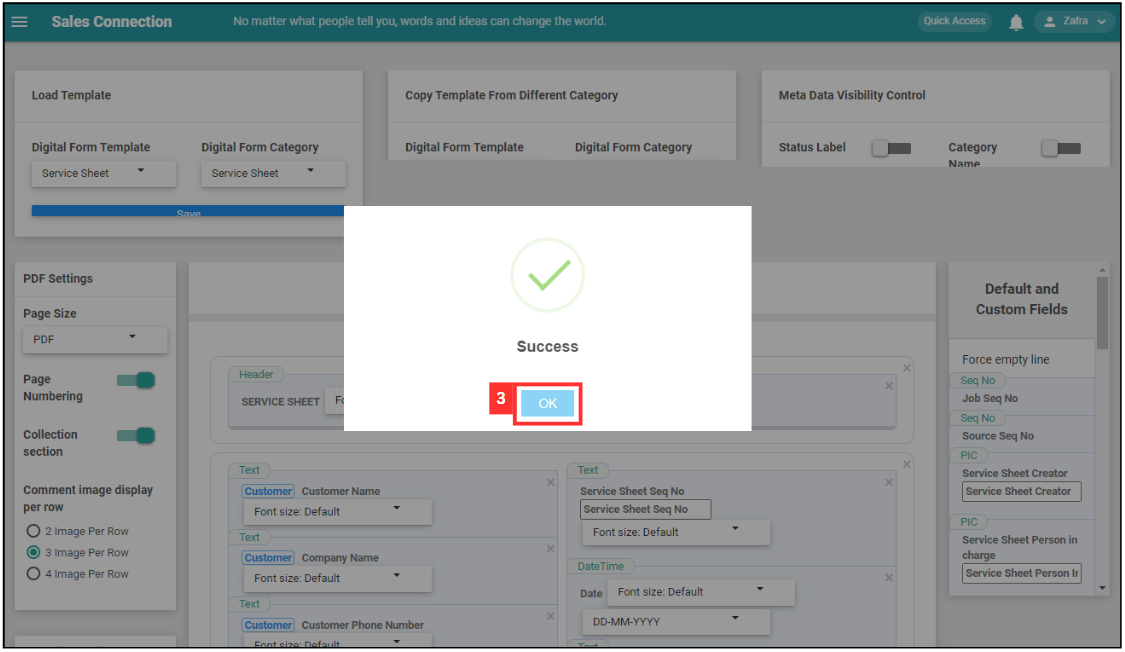
Click “OK” and the digital form has been selected.
-
“Load Template” is used to choose the digital form that needs to change PDF template settings.
No Field Name Description a Digital Form Template Select the type of digital form to load. b Digital Form Category Specify the category of the digital form. 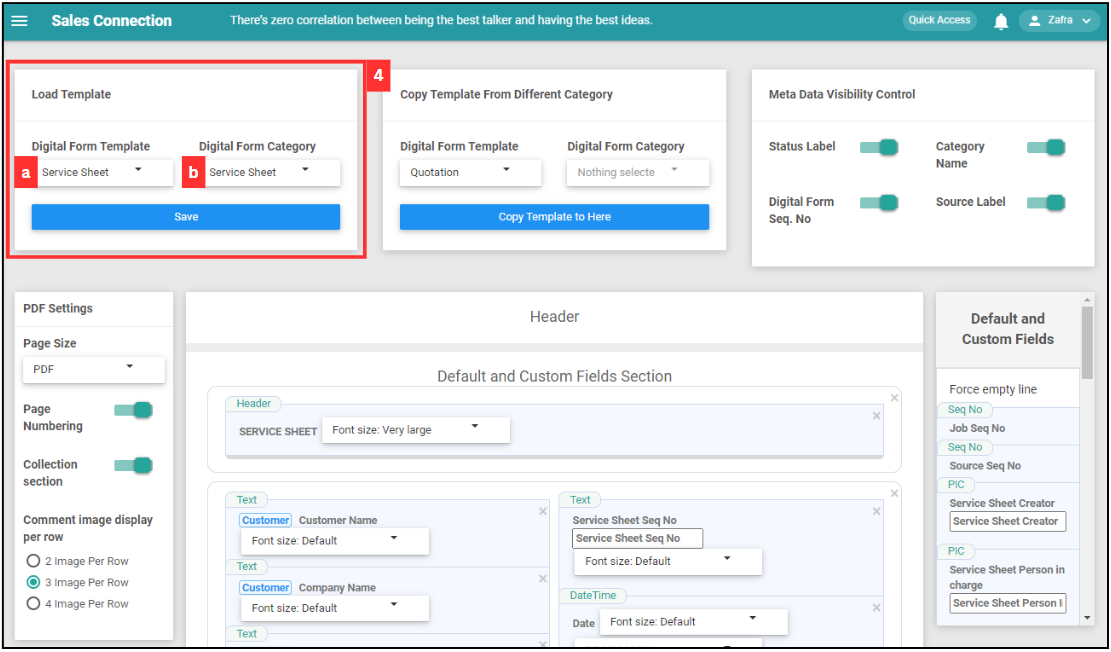
-
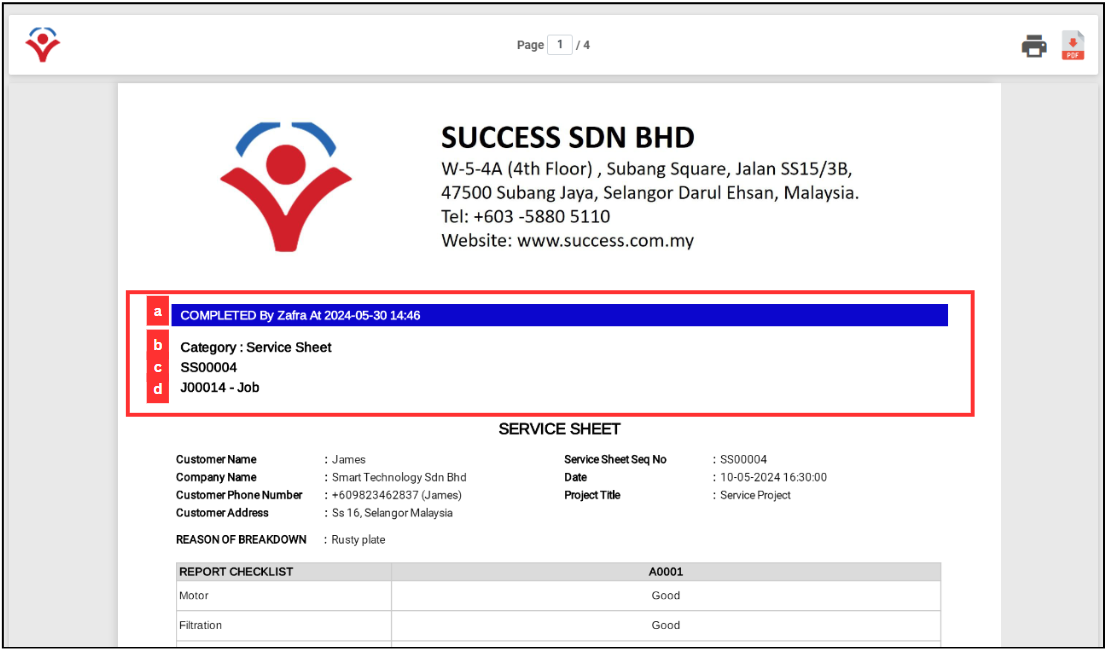
“Meta Data Visibility Control” will show the details of the digital form on top of the PDF.
No Field Name Description a Status Label Display status label in PDF of Digital Form. b Category Name Display category label in PDF of Digital Form. c Digital Form Seq. No Display DF Seq No label in PDF of Digital Form. d Source Label Display Source information in PDF of Digital Form. 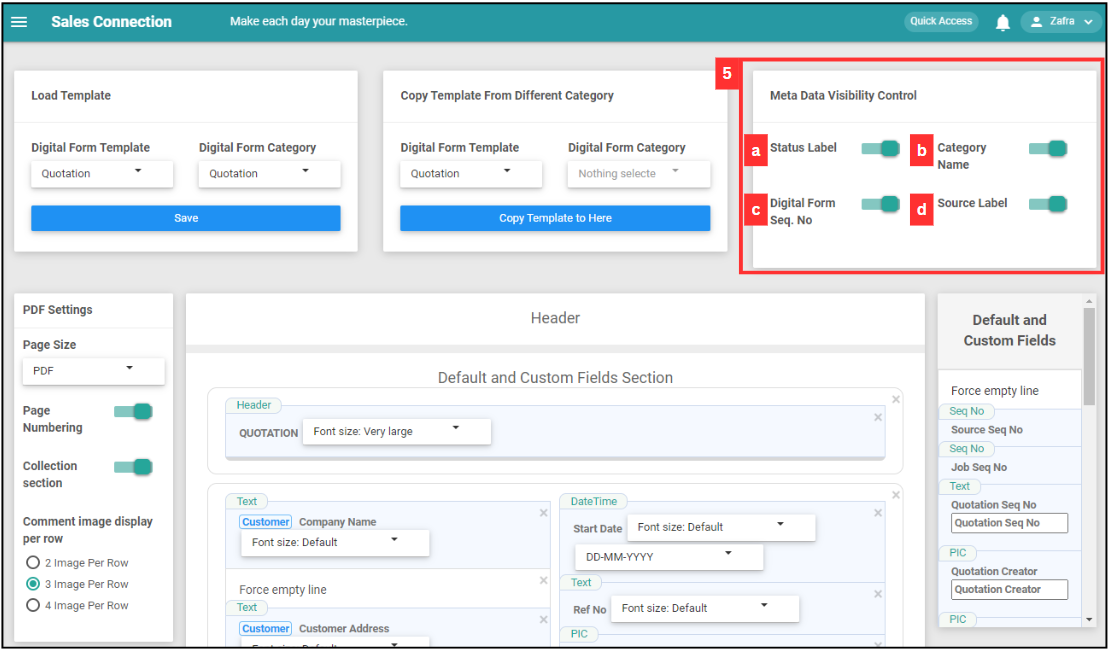
This section will be shown here in PDF and its position cannot be changed.
-
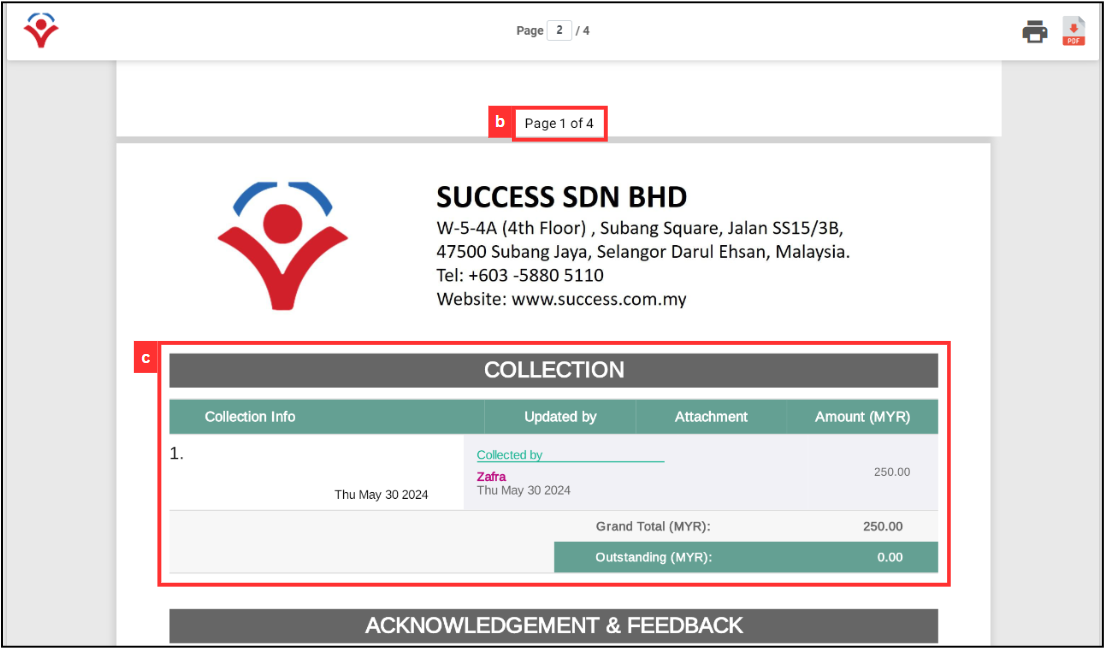
“PDF Settings” is represented as below.
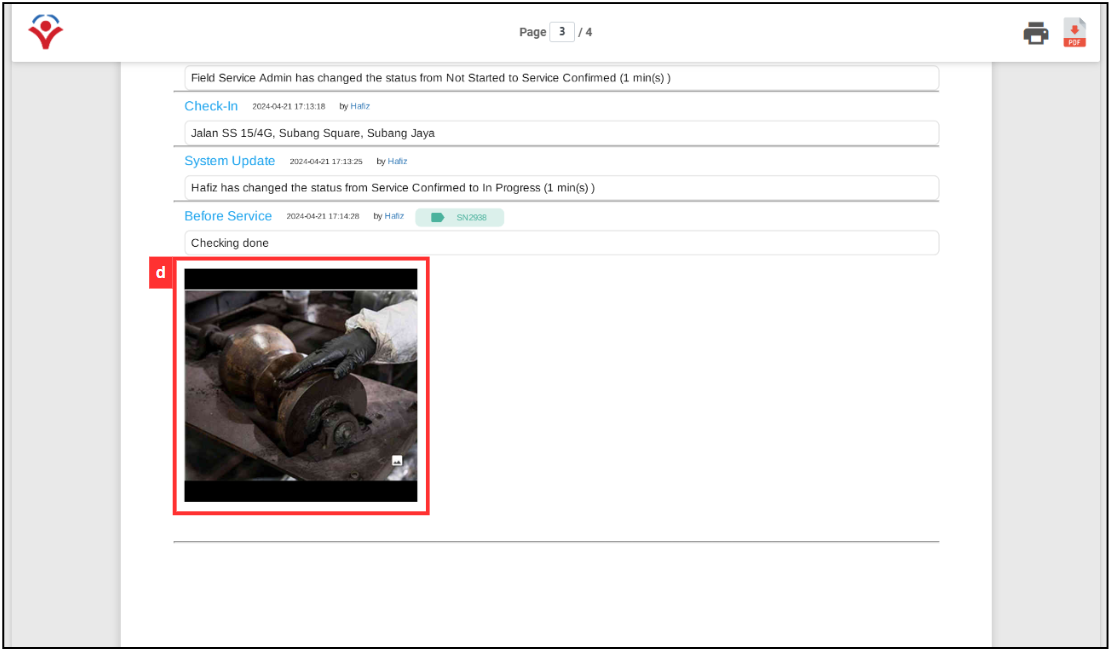
No Field Name Description a Page Size Select the size of the PDF (standard PDF or receipt size). b Page Numbering Choose whether to display page numbers in PDF. c Collection Section Choose whether to display payment collection section in PDF. d Comment Image Display per Row Determine how many images should be displayed per row in the comment section. 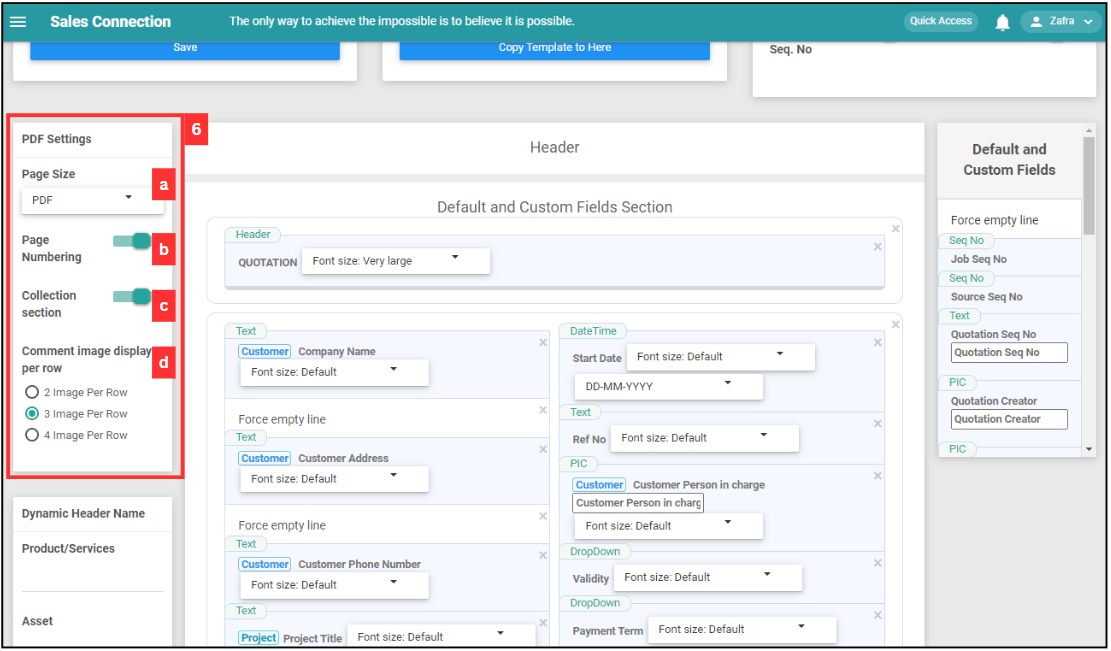
Page numbering, collection section, and comment image display settings will be shown as the images below.
-
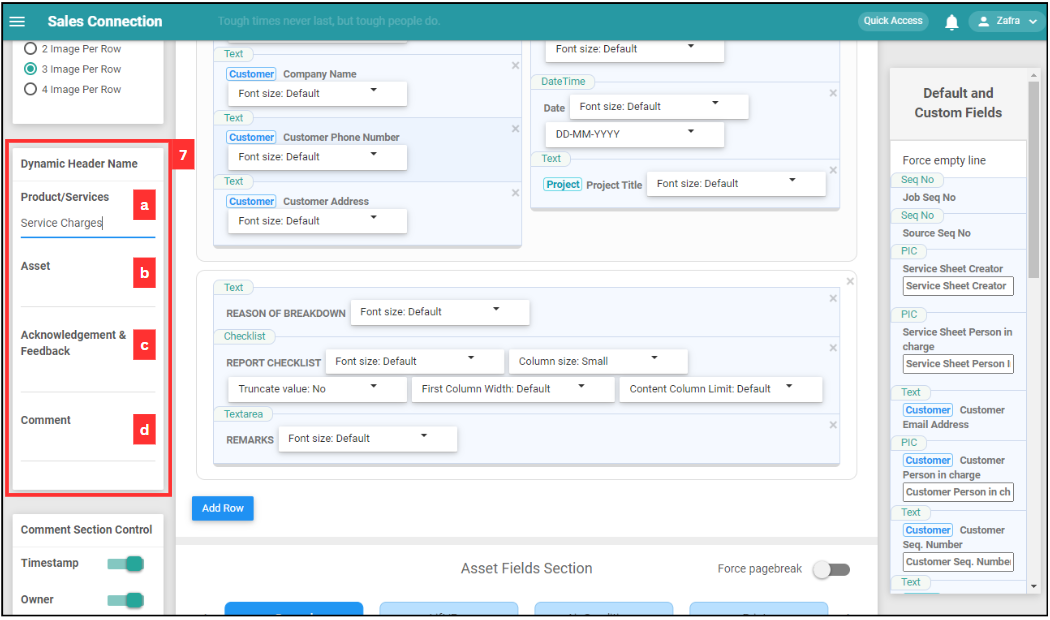
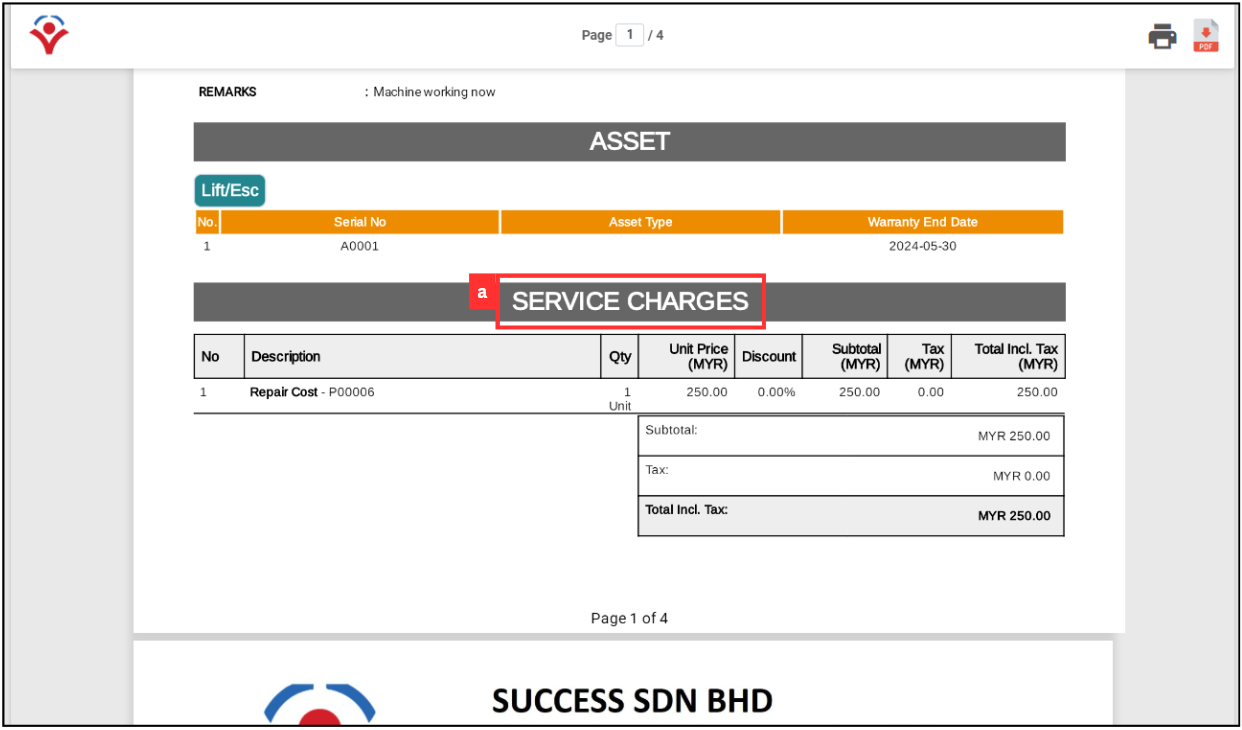
Change the dynamic header name by entering a new name for it. For example, enter “Service Charges” to replace the “Product/Services”.
The result will be shown as the image below where the header will changed to “Service Charges”.
-
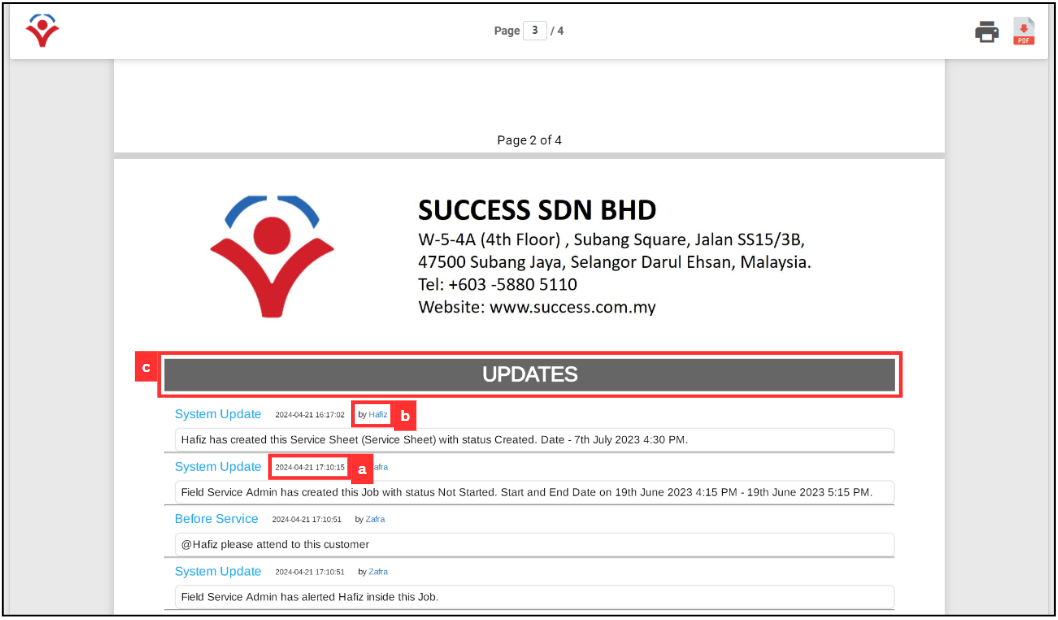
“Comment Section Control” is represented as below.
No Field Name Description a Timestamp Toggle to include a timestamp in the comment section. b Owner Toggle to include the owner information in the comment section. c Updates Force Pagebreak Toggle to force a page break after updates in the comment section. 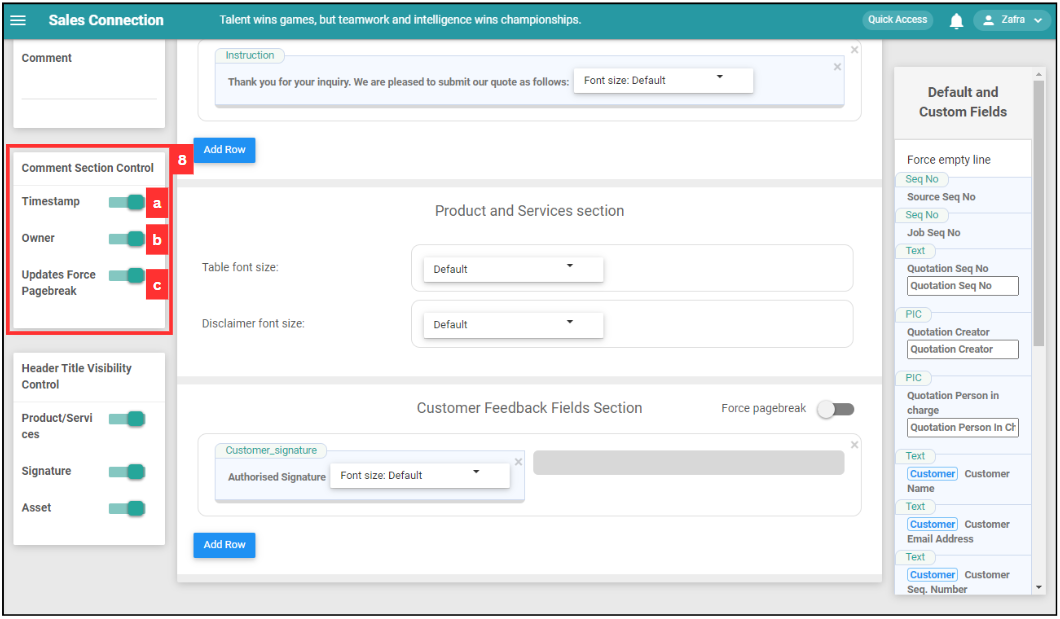
Timestamp, Owner, and Updates Force Pagebreak will be shown as the images below.
-
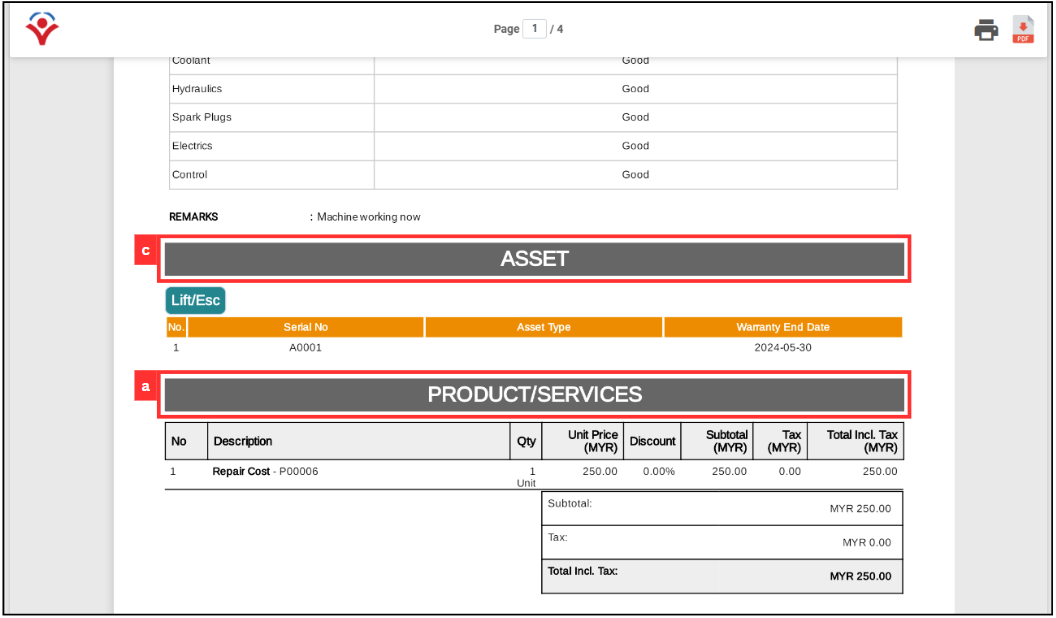
“Header Title Visibility Control” will control the visibility of the title in the PDF.
No Field Name Description a Product/Services Toggle to show or hide the product/services header. b Signature Toggle to show or hide the signature header. c Asset Toggle to show or hide the asset header. 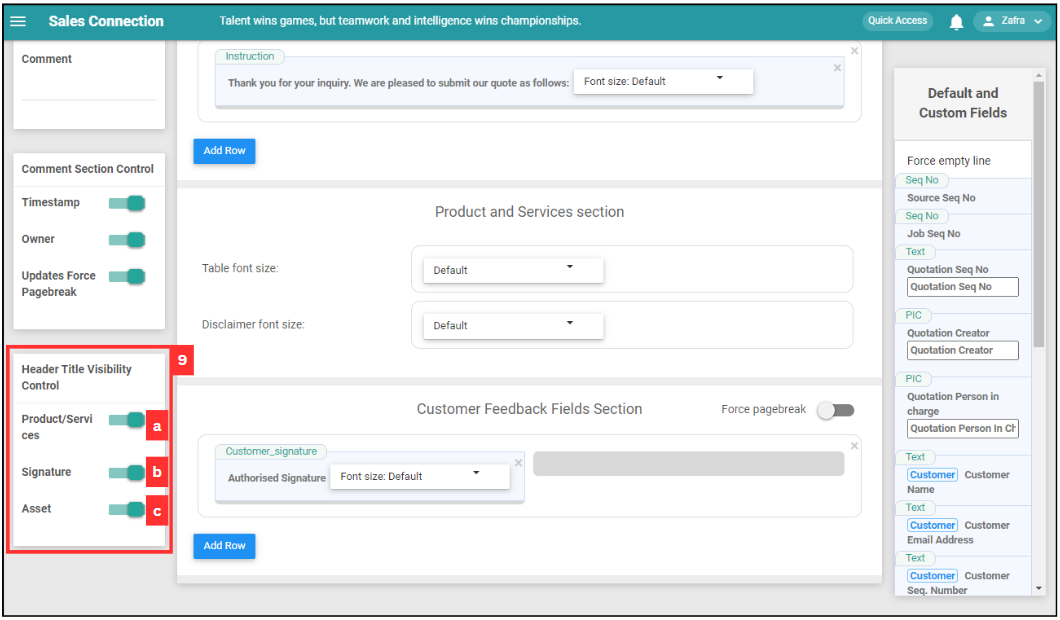
For example, the visibility of “Product/Services” and “Asset” has been toggled. The header will be shown in PDF as the image below.
-
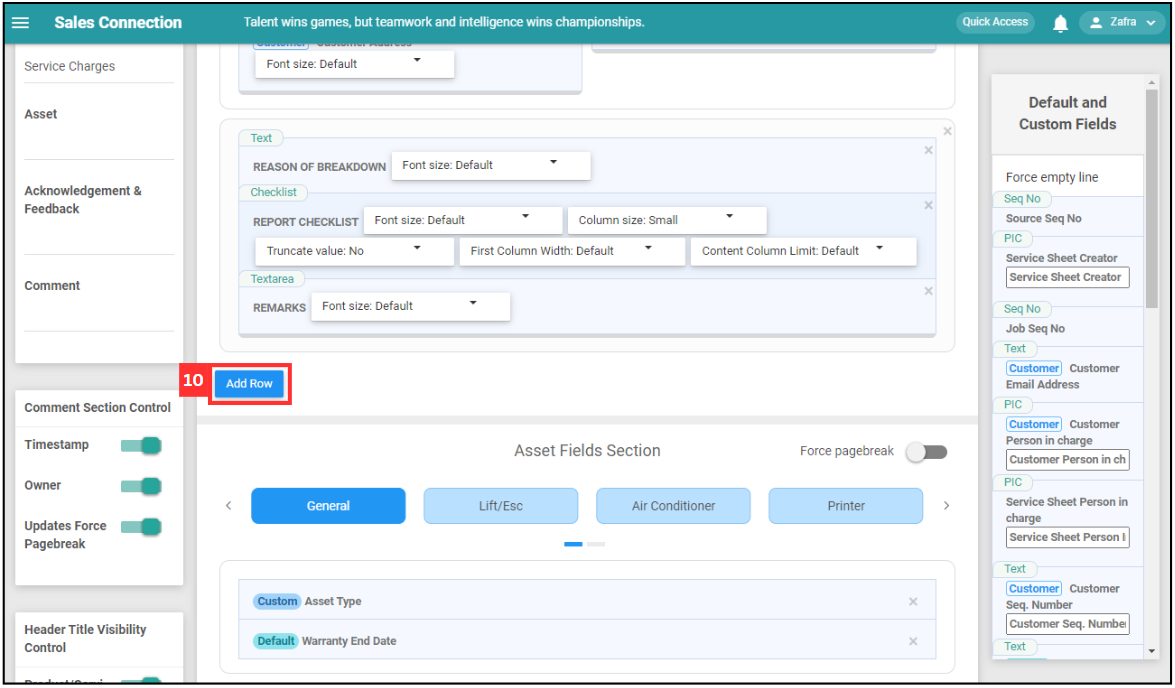
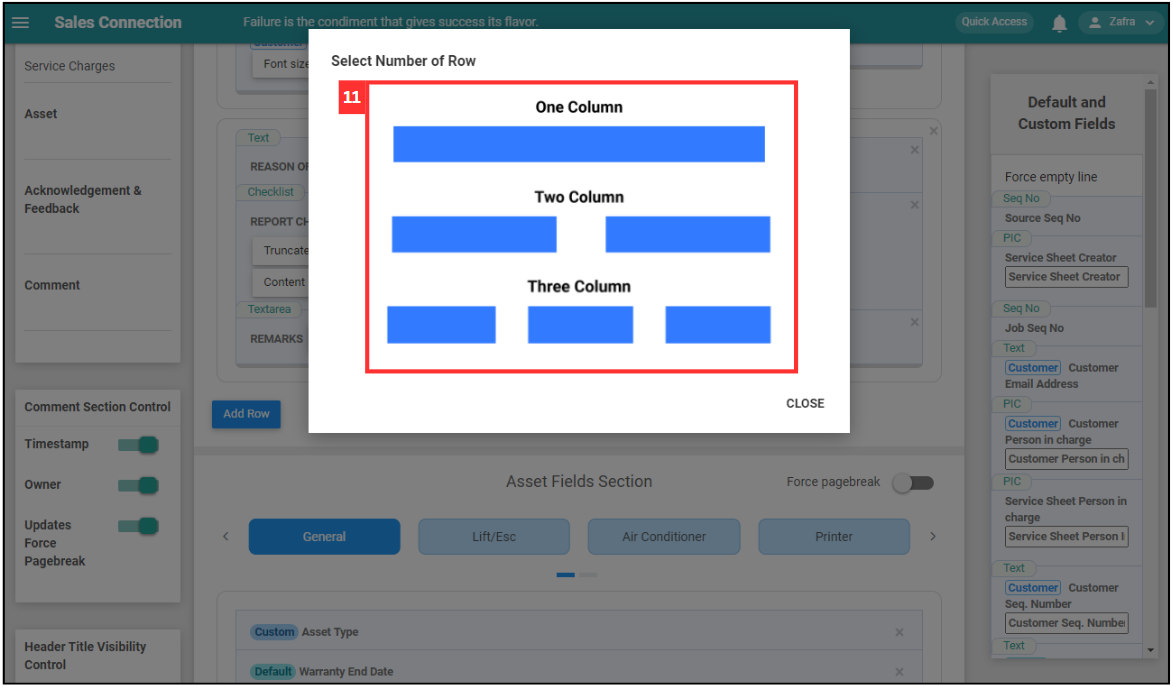
Click on the “Add Row” button to add elements.
-
Select the column number you want to show in a row.
-
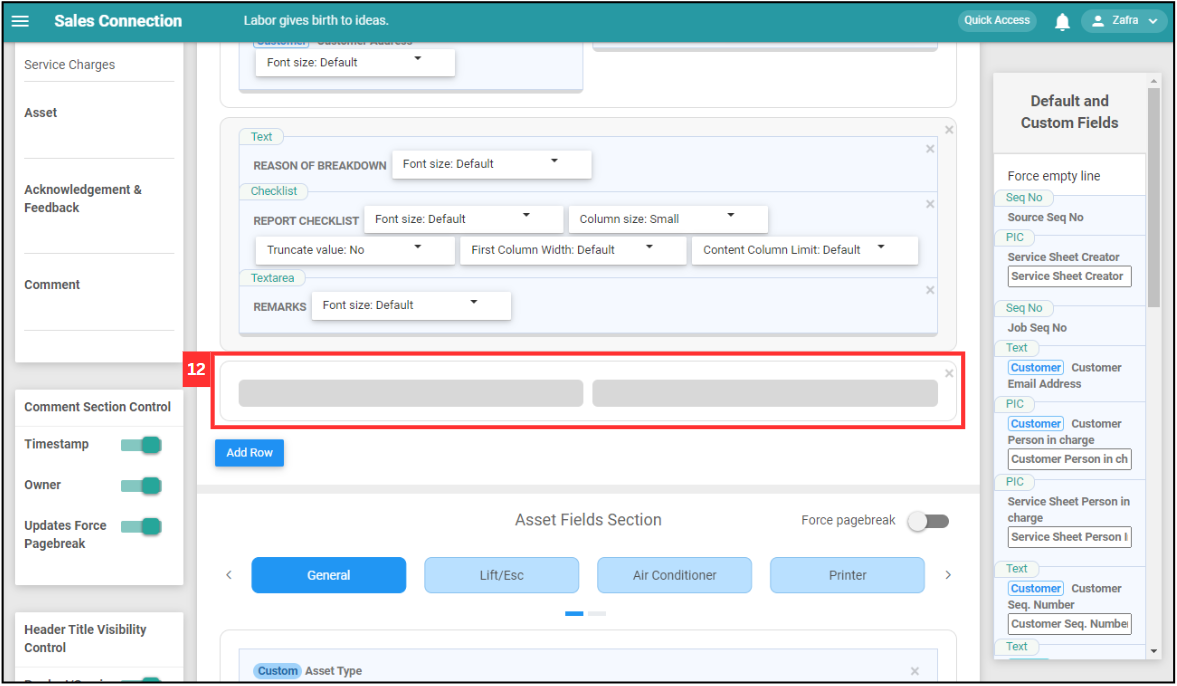
A new row with two columns is added.
-
All the digital form fields will be placed here. Drag and drop the elements to place them in the empty column to show in PDF.
*Note: “Force empty line” is used to place an empty line between two elements.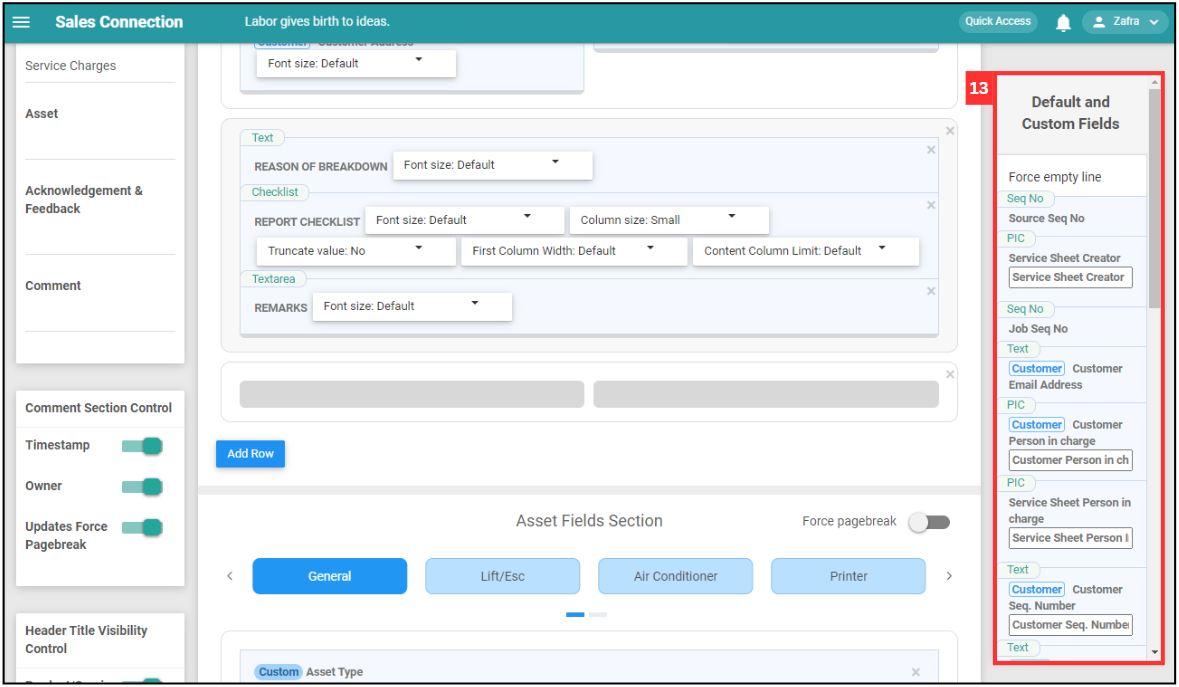
-
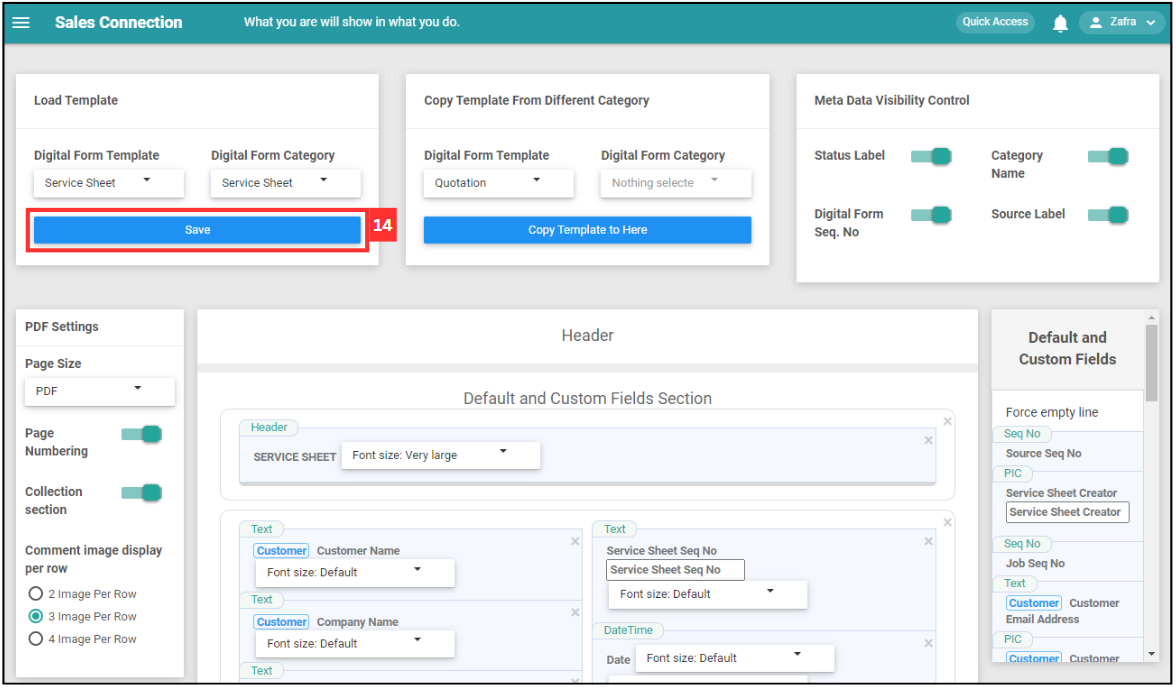
After editing the PDF template, scroll up to the “Load Template” and click on the “Save” button.
-
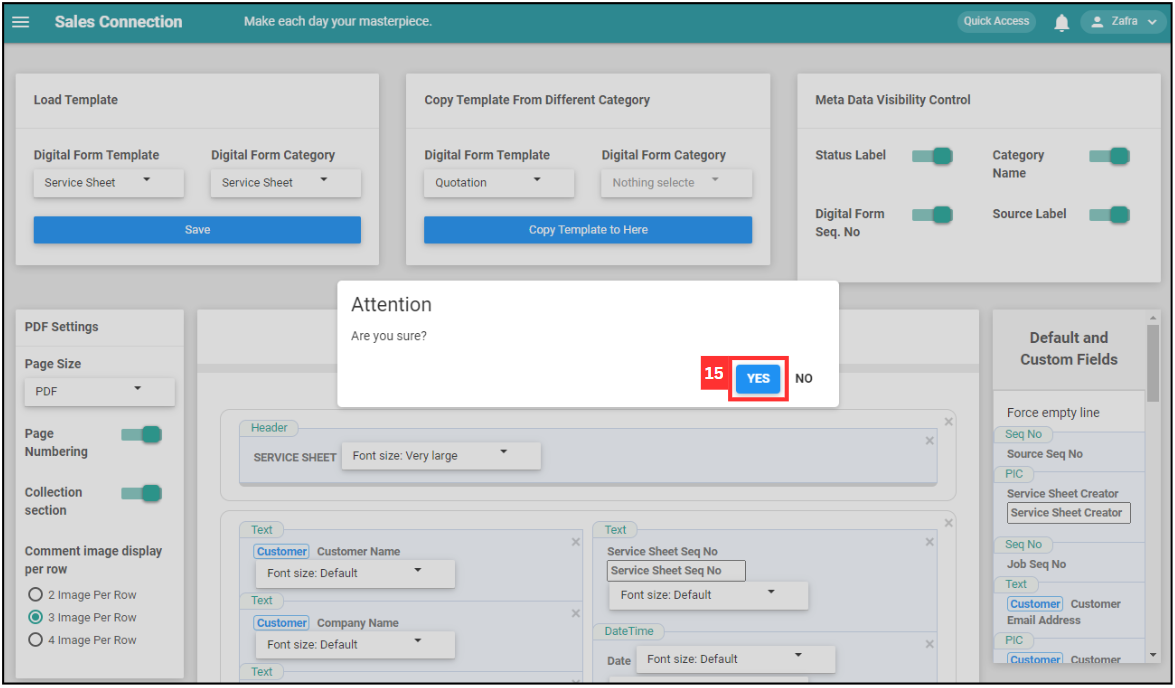
Click “YES” to confirm.
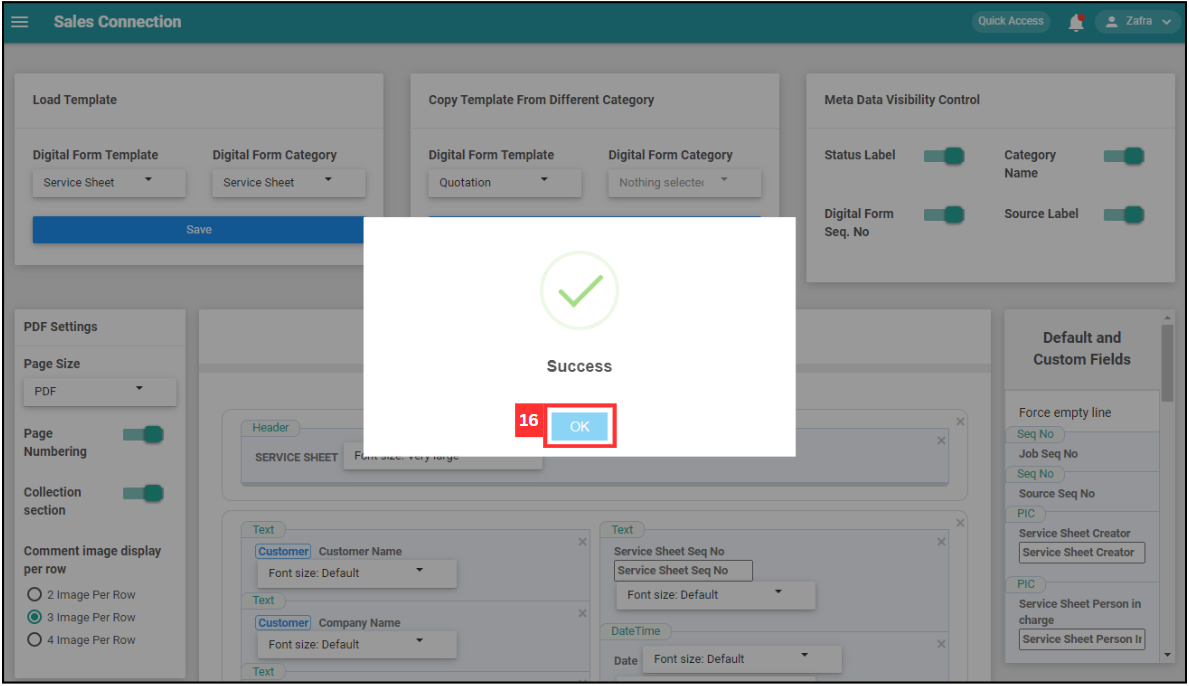
- Click “OK” and the PDF template has been saved successfully.
Generate PDF
-
To generate PDF for digital form, at the desktop site navigation bar, go to Business Reports > Digital Form Report.
Open Digital Form Report Here: https://system.caction.com/reports/digitalform?code=DR01
-
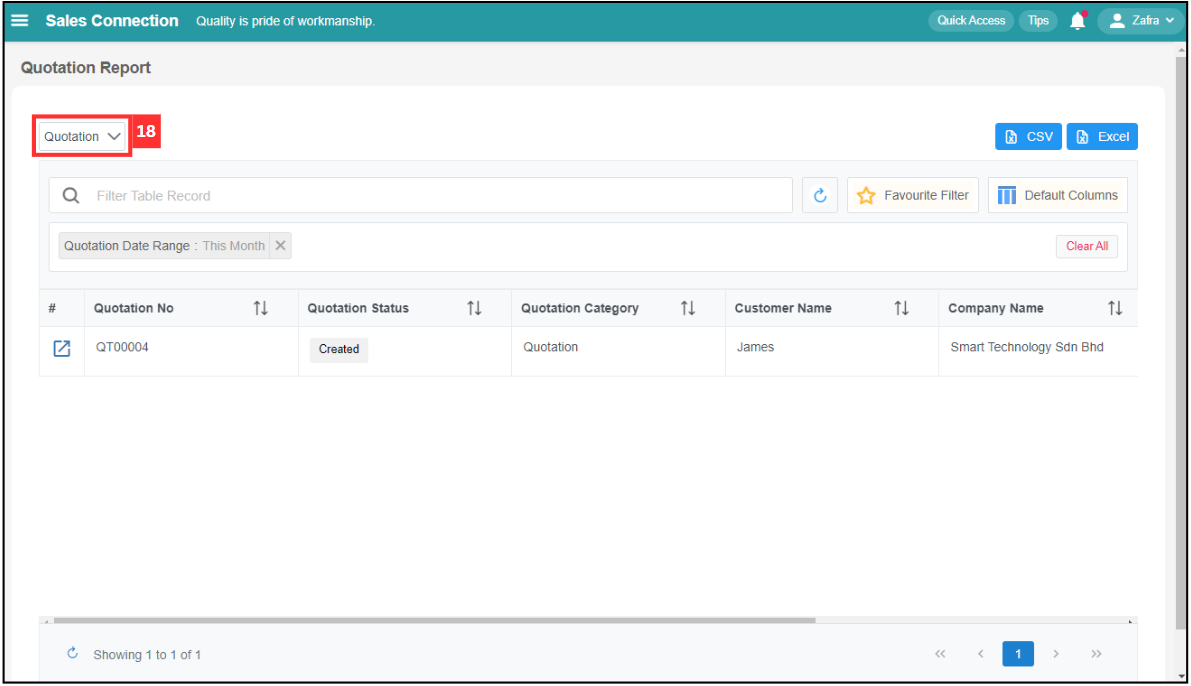
Click on the “Quotation” to select the category of the digital form.
-
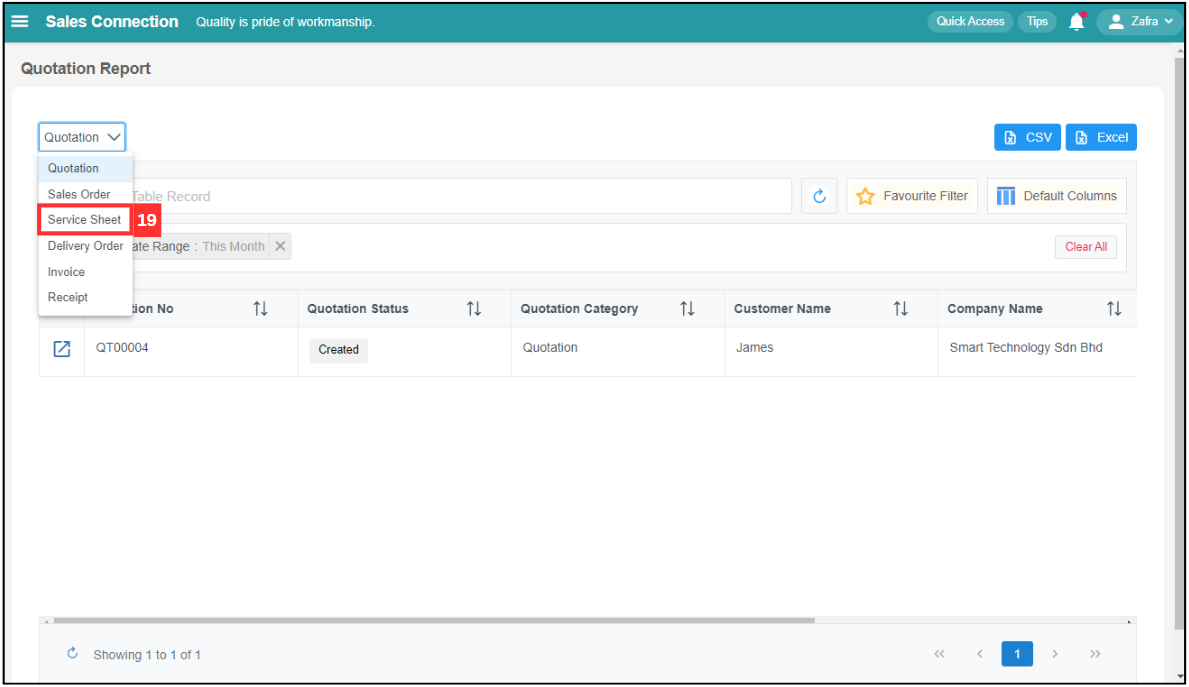
Click on the category of the digital form that needs to generate PDF.
-
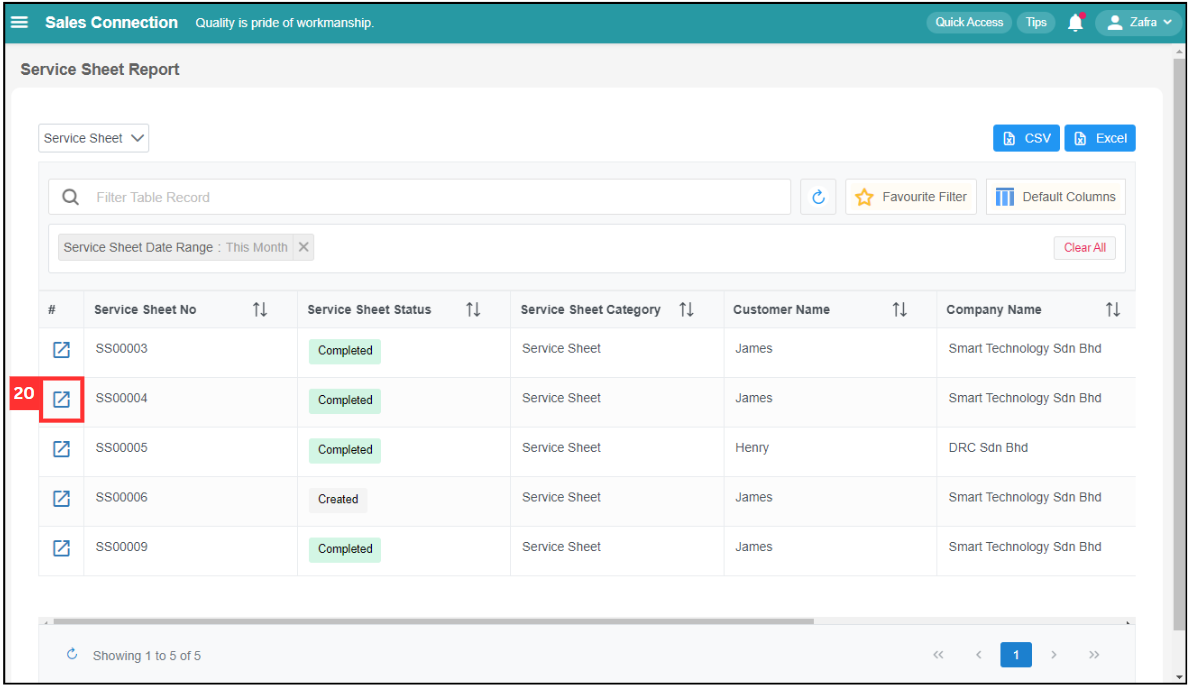
Click the expand button beside the “Service Sheet” you want to create PDF.
-
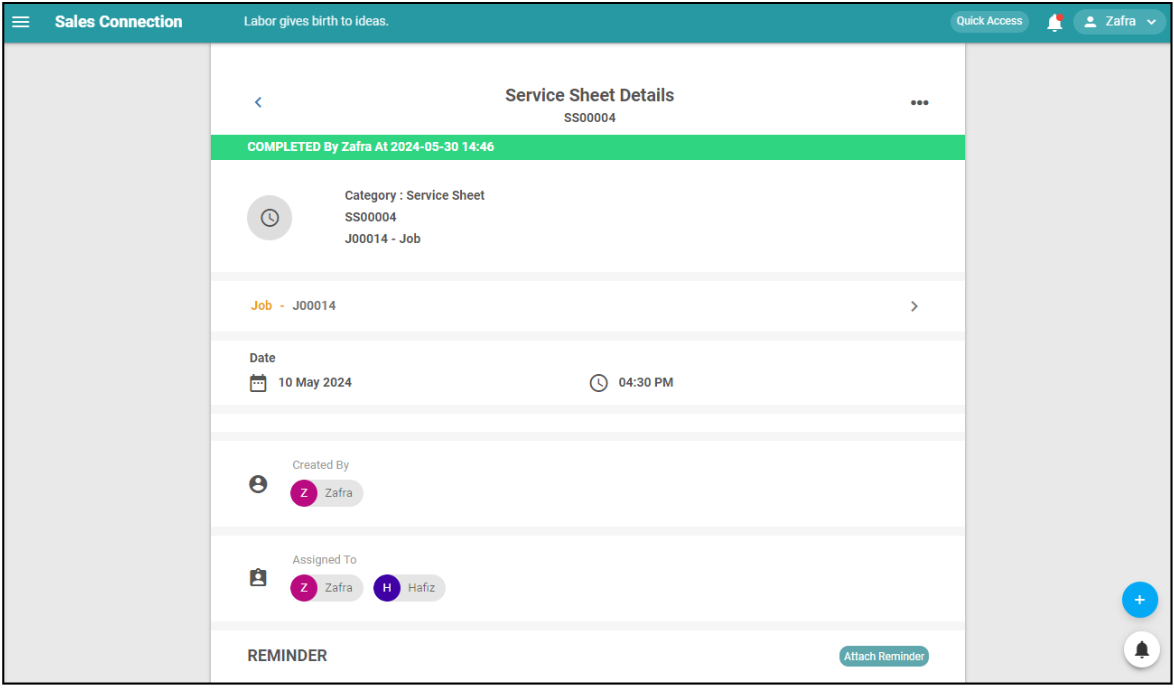
The “Service Sheet” will opened.
-
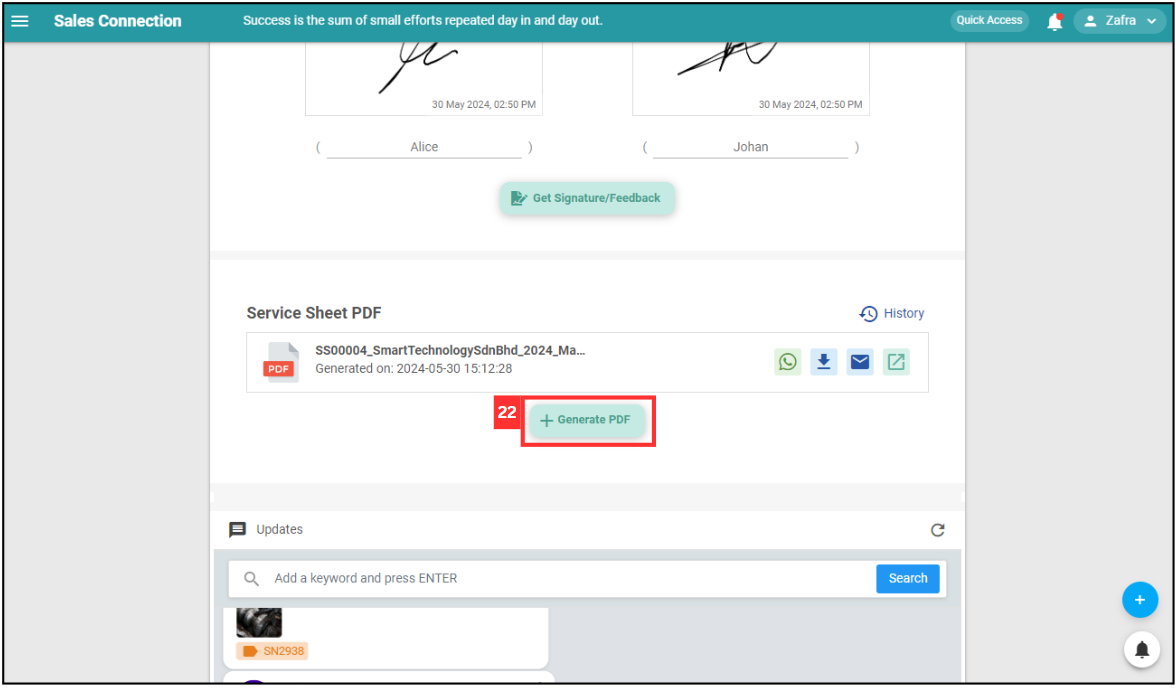
Scroll down to the PDF section and click “+ Generate PDF”.
-
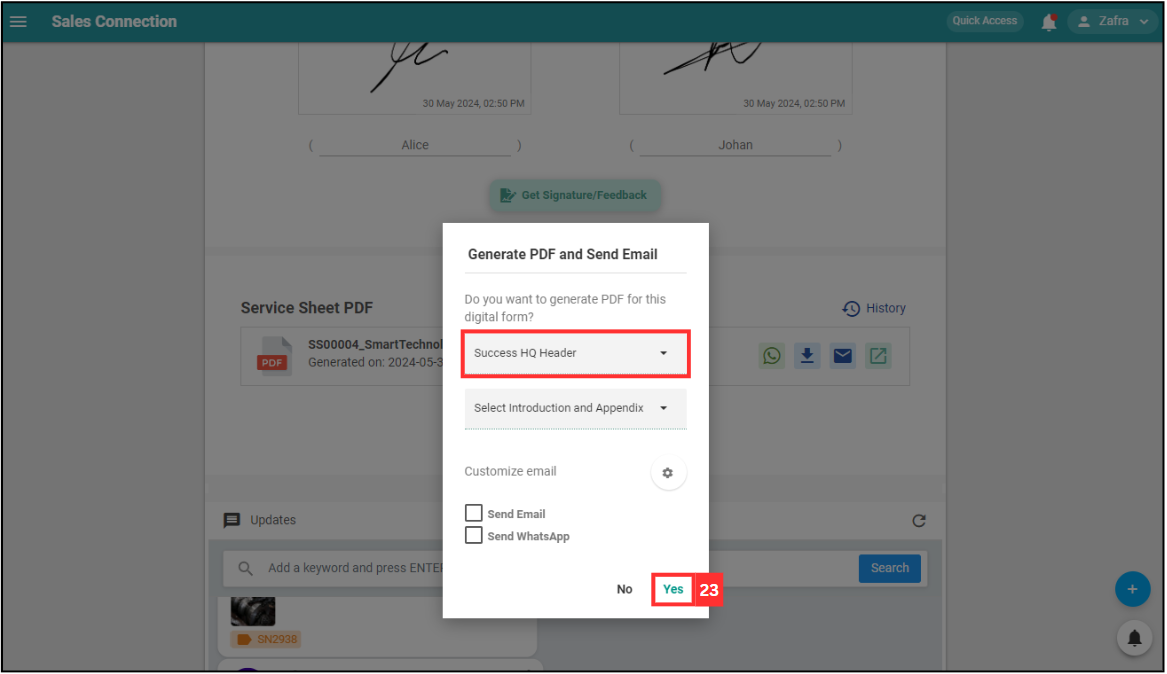
Select which header you’d like to use in the PDF. Confirm the selection and click “Yes”.
-
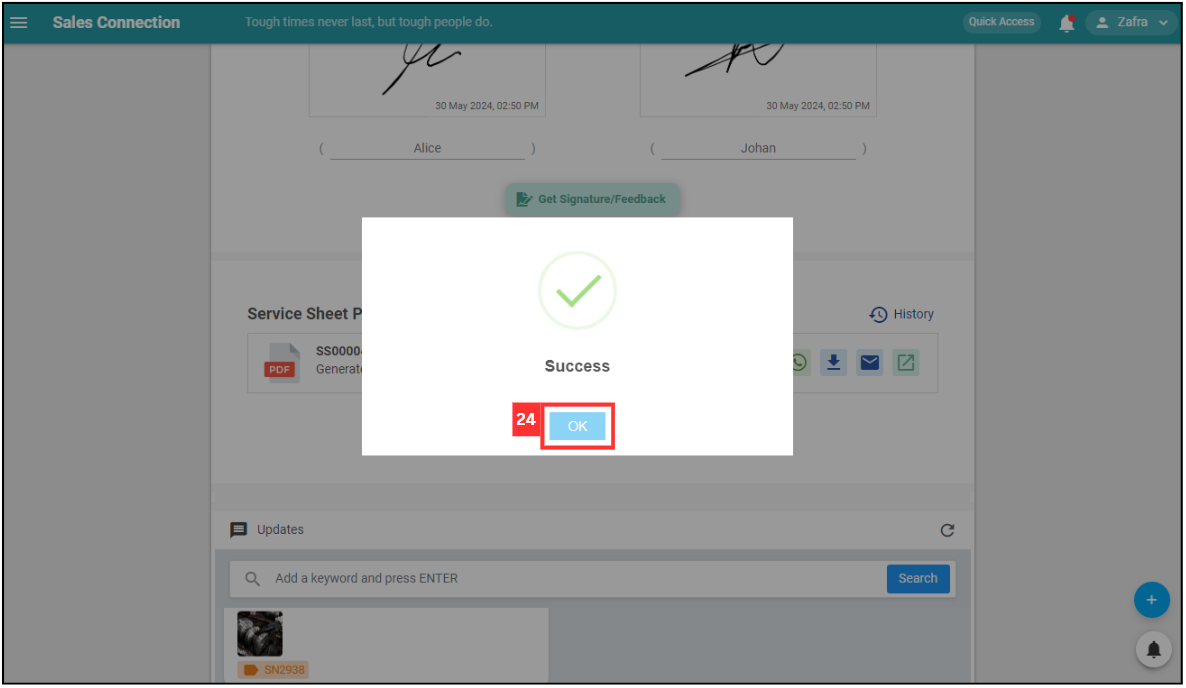
Click “OK” and the PDF has been generated successfully.
-
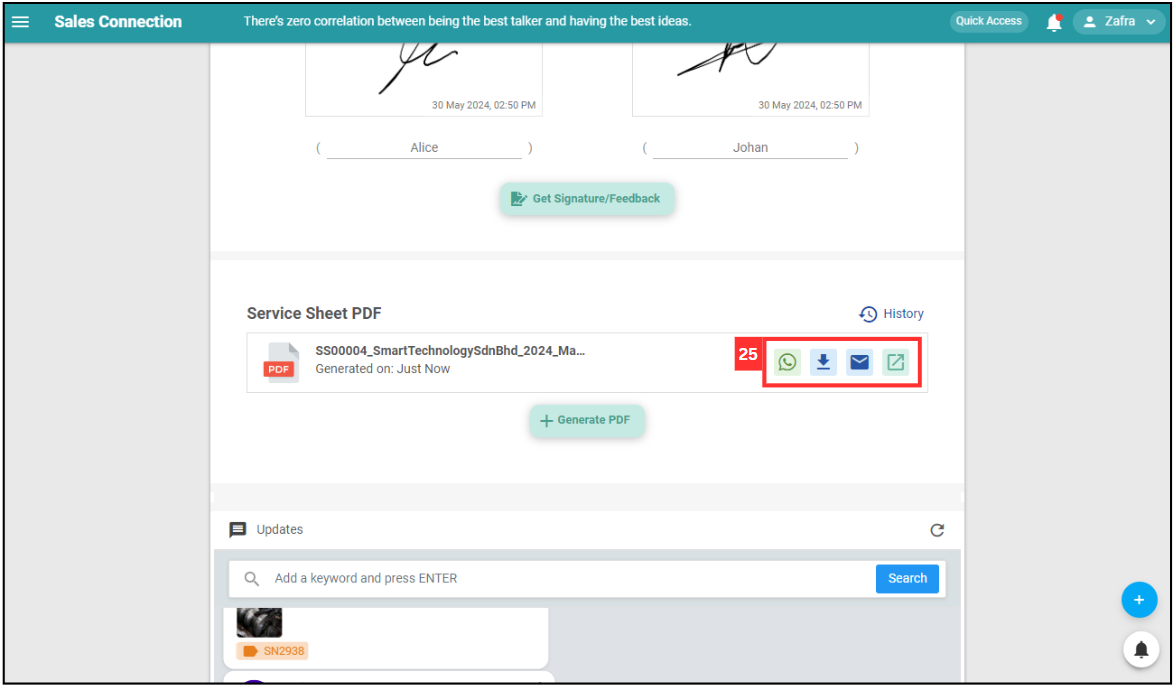
There are four options to view and send the PDF: WhatsApp, download, Email, and view on new tab. Click on any of the options to send or view the PDF.
-
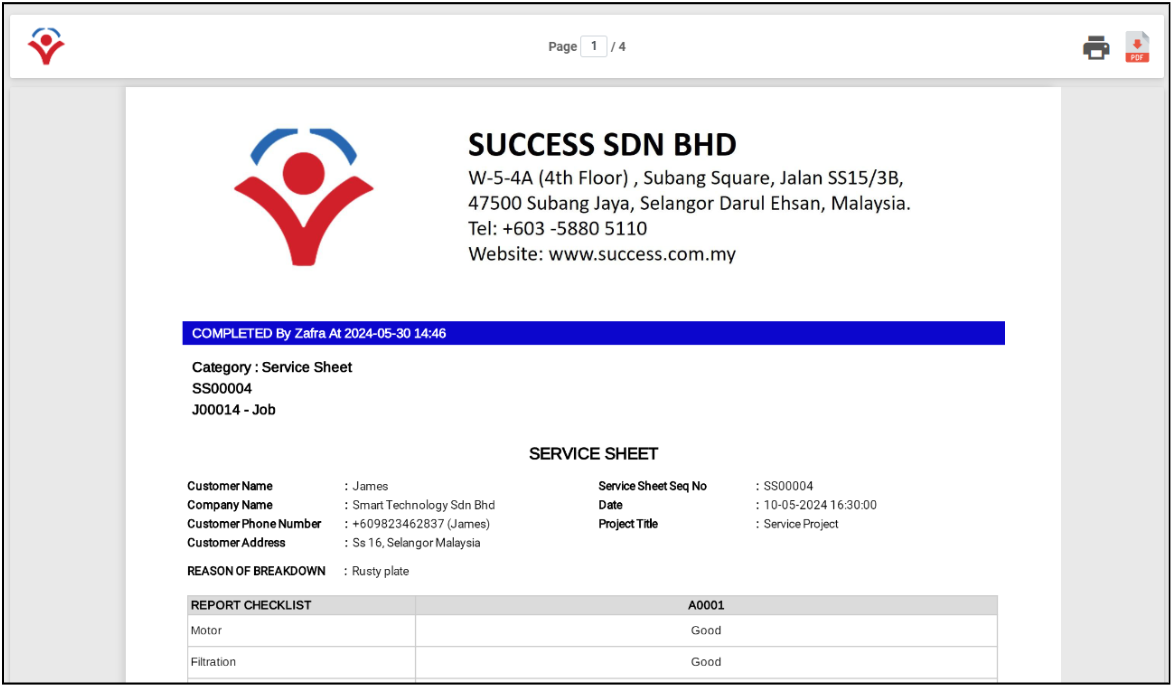
This is the PDF generated.
View & Send Options
After PDF generation, you can:
-
✅ Download PDF
-
✉️ Send PDF via Email
-
📎 Send PDF via WhatsApps
-
Related Articles
- How to Create Digital Form?
- How to Generate and Share QR Code for Public Form?
- How to Set Up a Digital Form Template?