 Help Center
The Bulk Update feature is designed to help you efficiently edit existing records in the system without having to update each entry individually. This is especially useful when making organization-wide changes such as updating statuses, assigning users, or correcting information in bulk.
*Note: This guide is for updating existing data only. To import new data, please refer to the articles listed in the Related Articles section at the bottom.
Benefits :
-
Allows efficient updates to large datasets
-
Prevents the need for manual record-by-record changes
-
Ensures up-to-date information across teams and departments
-
Supports user and department reassignments in bulk
With these benefits in mind, follow the steps below to complete your bulk update.
-
If you want to do bulk update for customer, at the desktop site’s navigation bar, go to Import > Customer Bulk Update.
Do Customer Bulk Update Here: https://system.caction.com/customerbulkimport
Do Project Bulk Update Here: https://system.caction.com/dealbulkimport
Do Product/Services Bulk Update Here: https://system.caction.com/productbulkimport
Do UOM Bulk Update Here: https://system.caction.com/uomimport/uomedit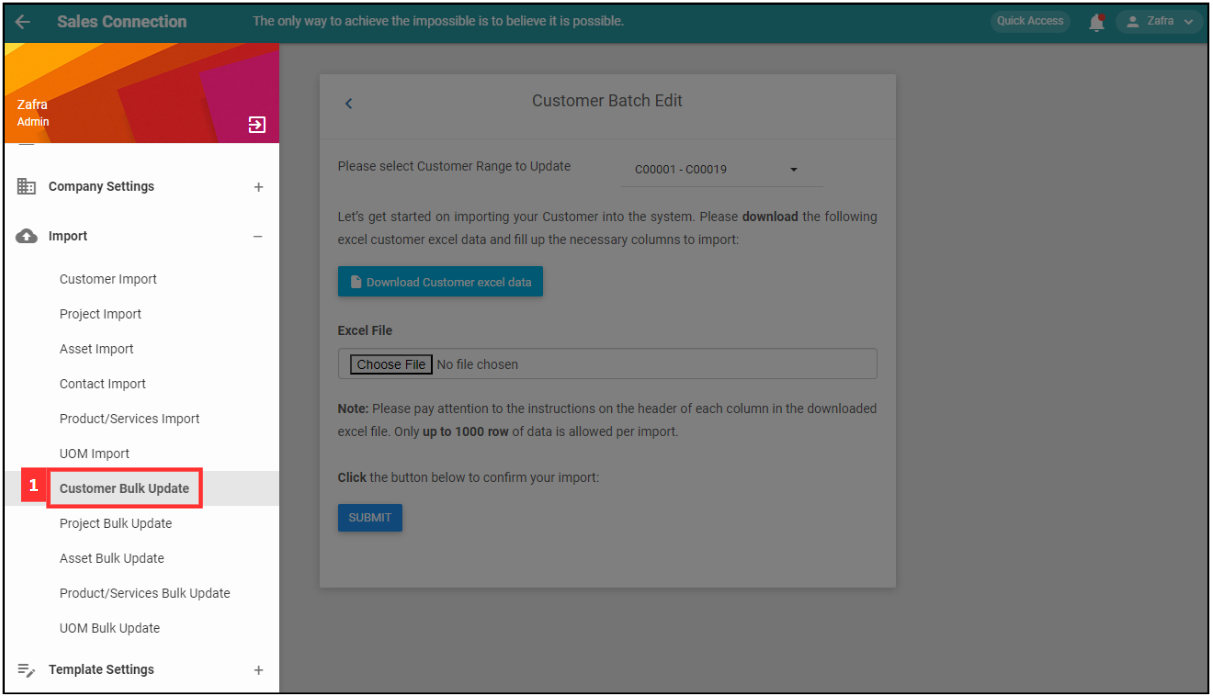
-
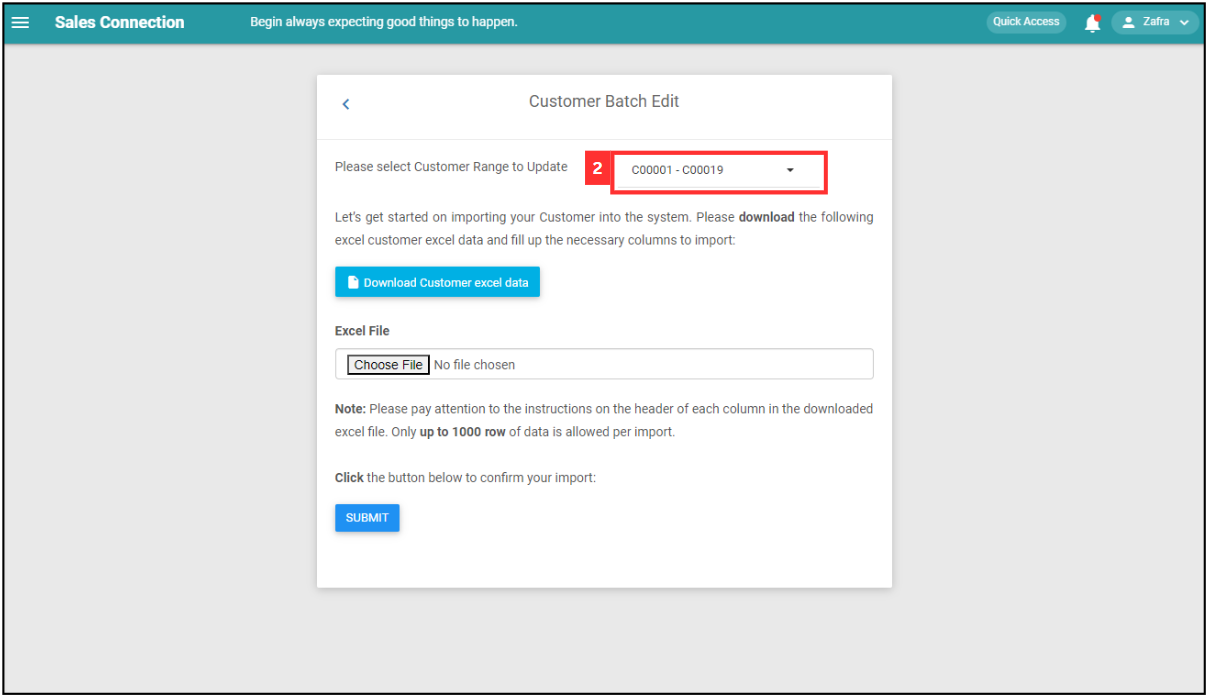
Select the customer range to update.
-
Click “Download Customer excel data”.

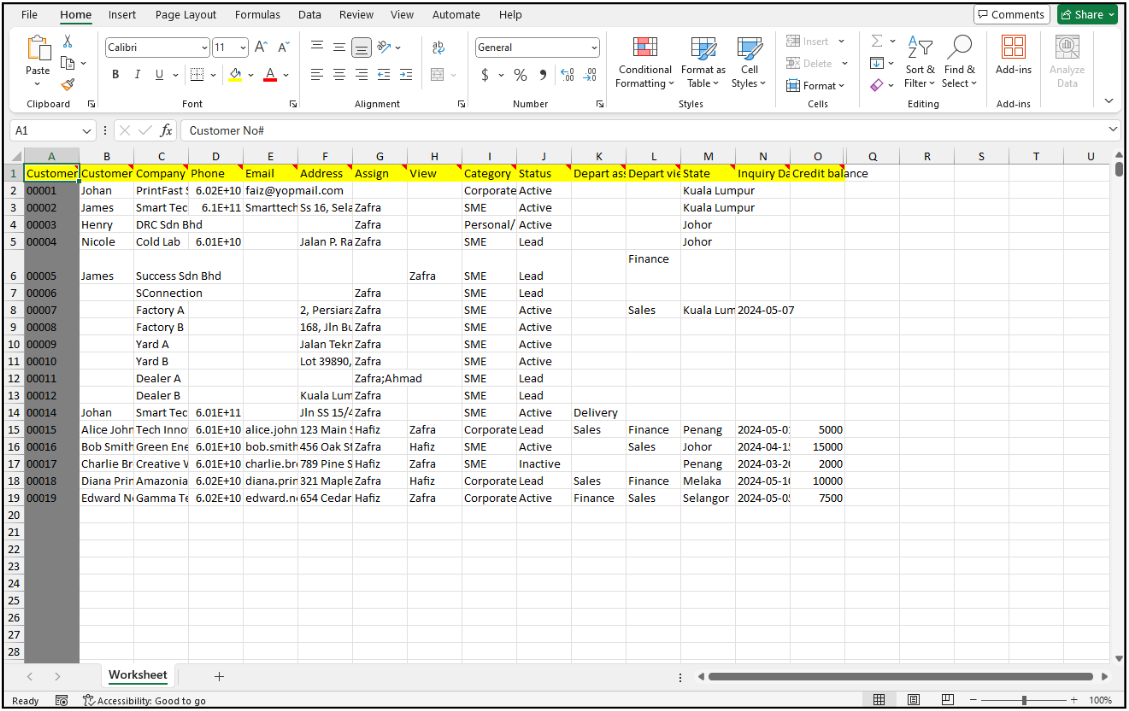
- Update the customer details.
a. The details include:
- Customer Name
- Company Name
- Phone
- Address
- Assign - Which user is assigned to this [Customer]
- View - Which user can view this [Customer]
- Category - If blank, default category (First in the list will be selected)
- Status - If blank, default status (First in the list will be selected)
- Depart assign - Which Department is assigned to this [Customer]
- Depart view - Which Department can view this [Customer]

-
Make sure all the updated information of the customers is correct and save the file.
-
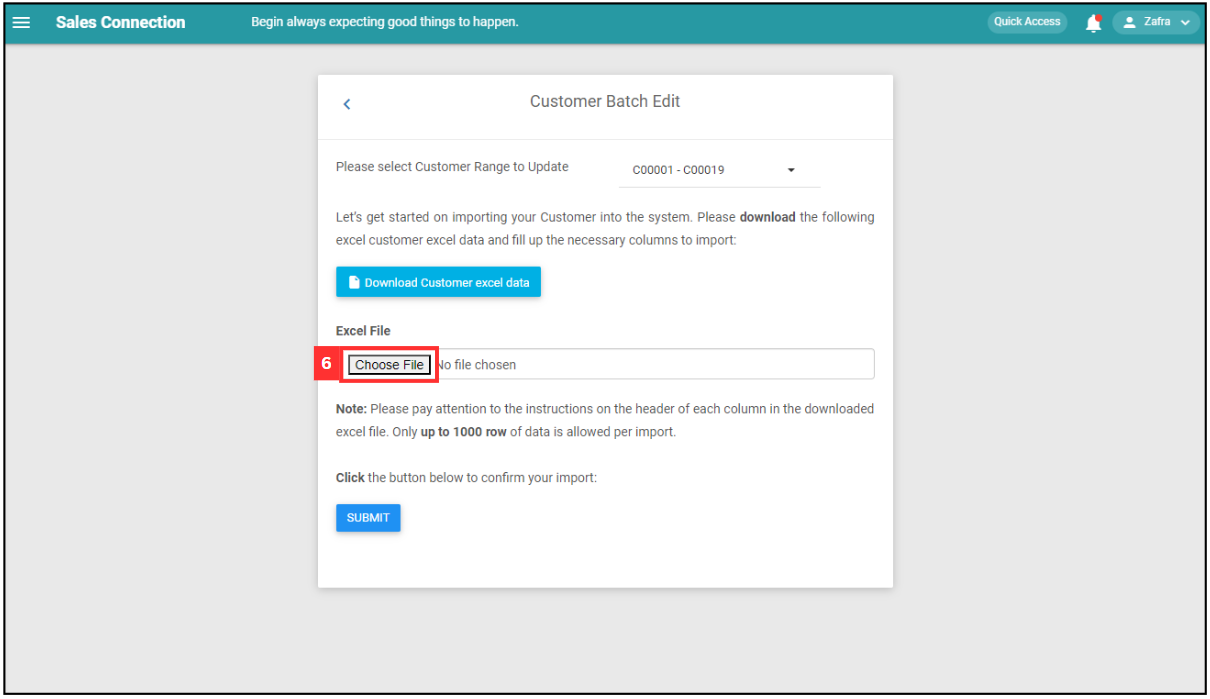
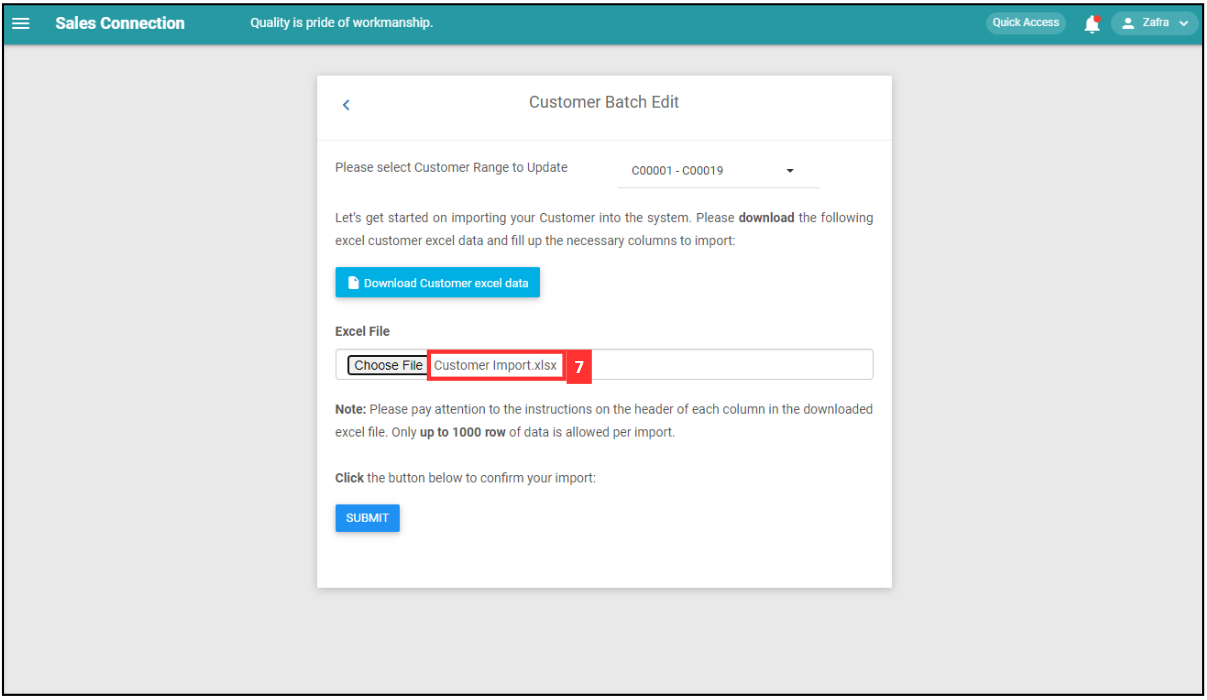
Go back to the customer bulk update page and choose the correct file by clicking “Choose File” to import.
-
Make sure the file uploaded is correct.
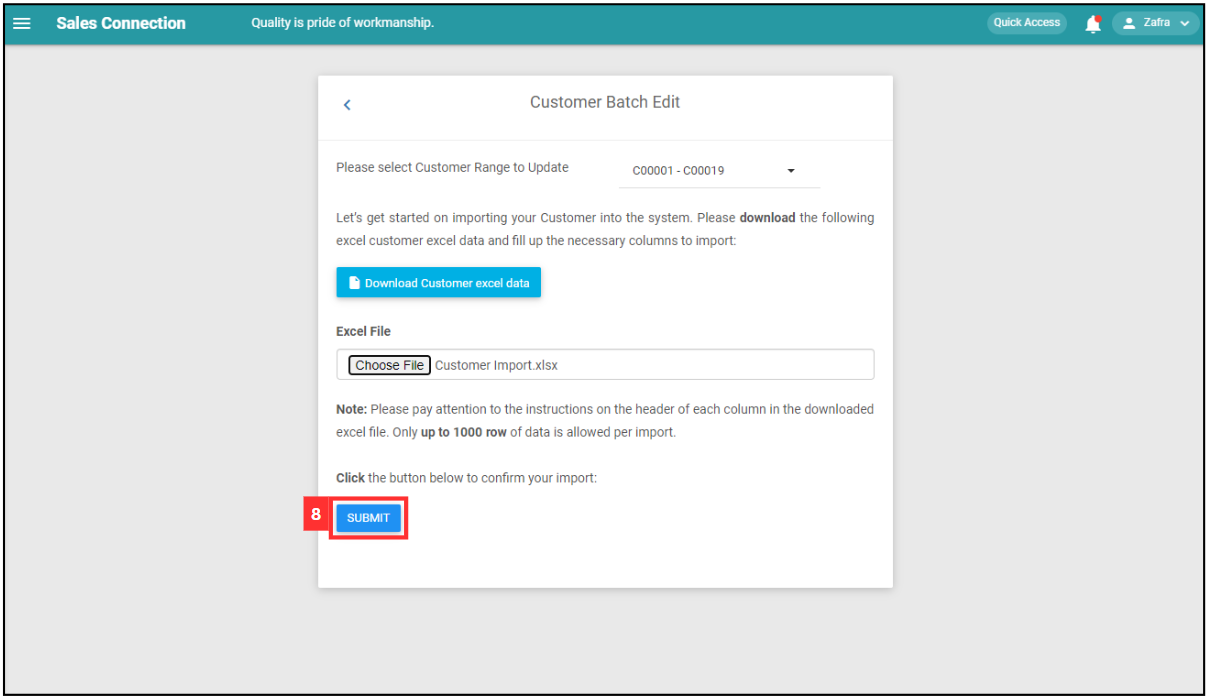
-
Click on the “SUBMIT” button.
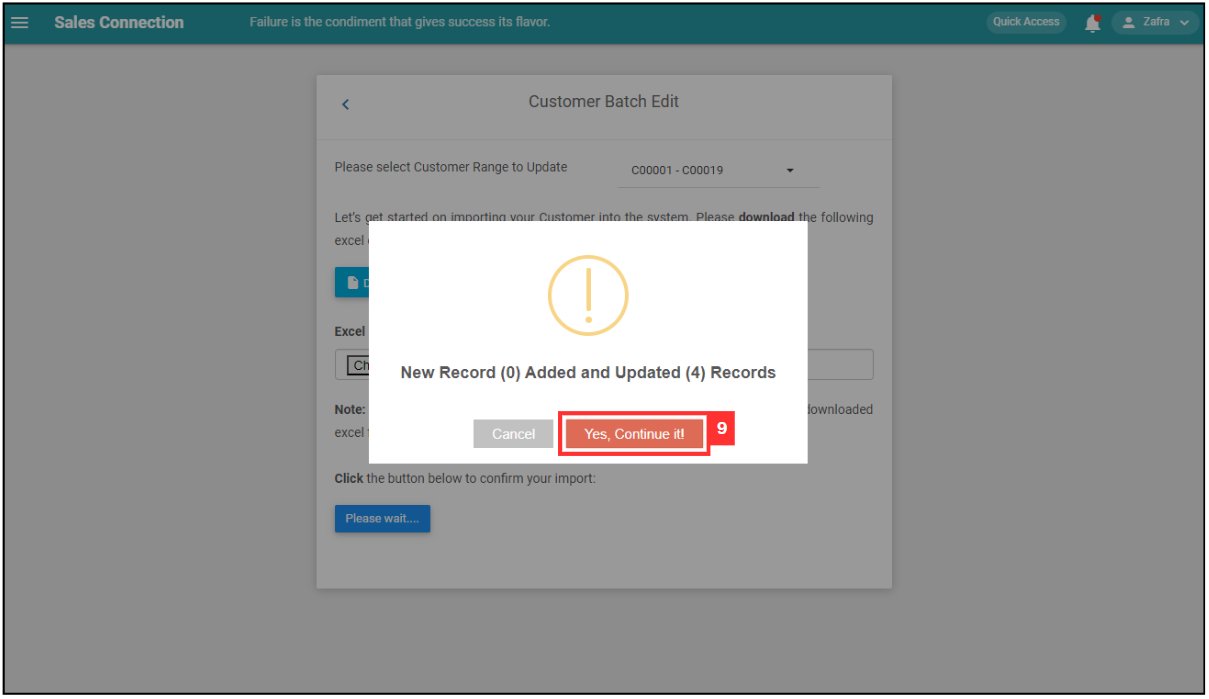
-
Click “Yes” to confirm the action.
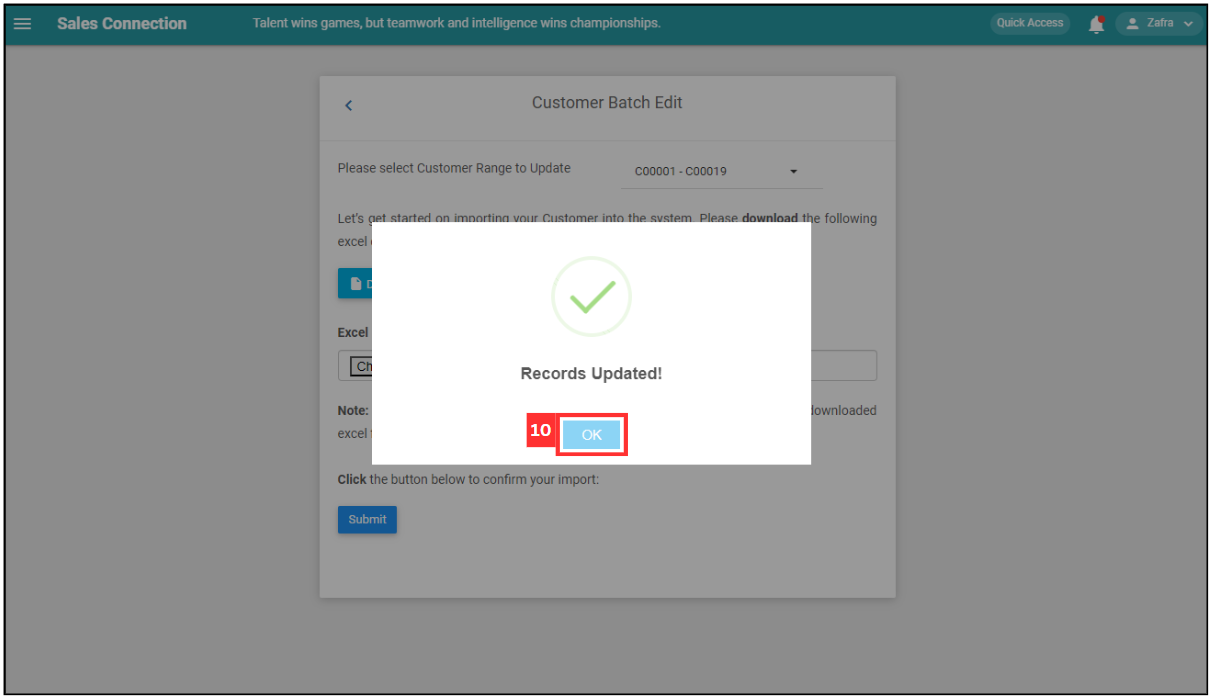
-
Click “OK” and the customer details have been updated successfully.
Related Articles