 Help Center
🧠 Why Use Customer Import?
Ensure data consistency across all imported records.Prepare data offline in Excel before uploading. Batch process large customer lists during migrations or launches
Caction’s Customer Import feature is designed to help your team manage large volumes of customer data efficiently. Instead of entering each customer one by one, you can prepare your customer details offline in a spreadsheet and upload them all at once. This is especially useful during company expansion, customer migrations, or onboarding from external sources.
Benefits :
- Upload customer details in batches instead of manually adding each one.
- Ensure customer data consistency across all imported records.
- Redirect staff time from data entry to more valuable tasks.
This guide will walk you through how to prepare, upload, and confirm customer data via the import tool.
Note: You must have access to the Import menu to perform this action. Please request permission from your system admin if necessary.
-
At the desktop site’s navigation bar, go to Import > Customer Import.
Import Customer(s) Here: https://system.caction.com/customerimport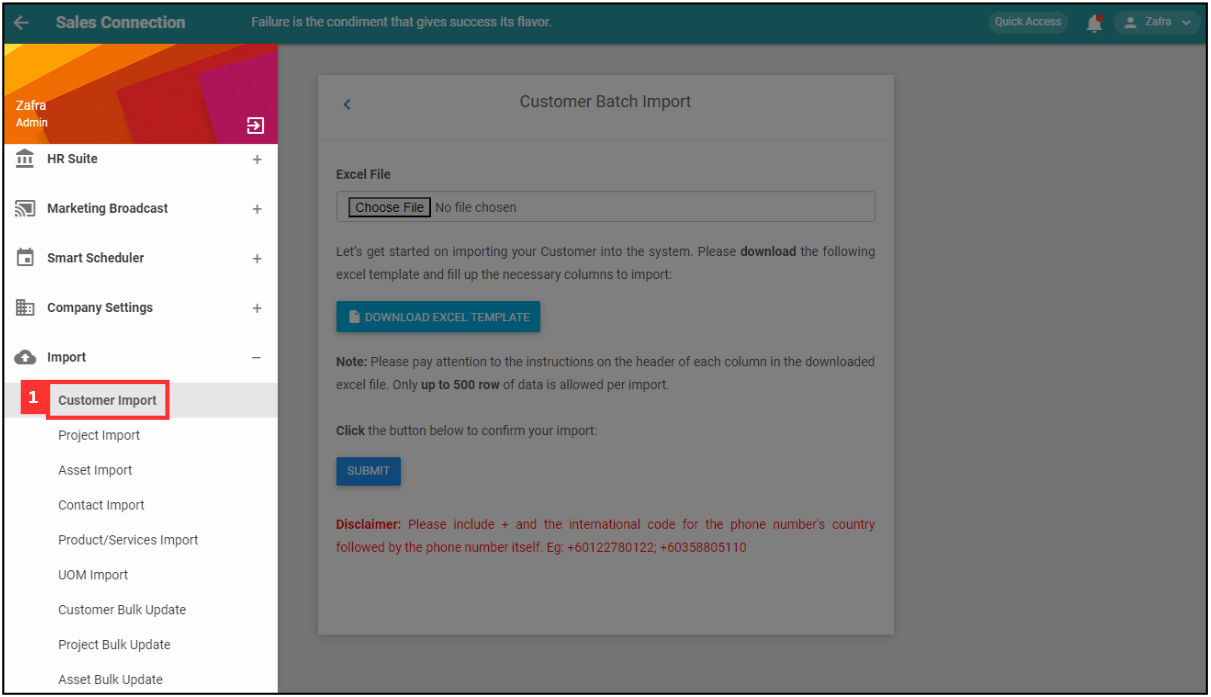
*Note: You must have access to Import menu to perform this action. Please request permission or help from your admin if you do not have access to the menu.
-
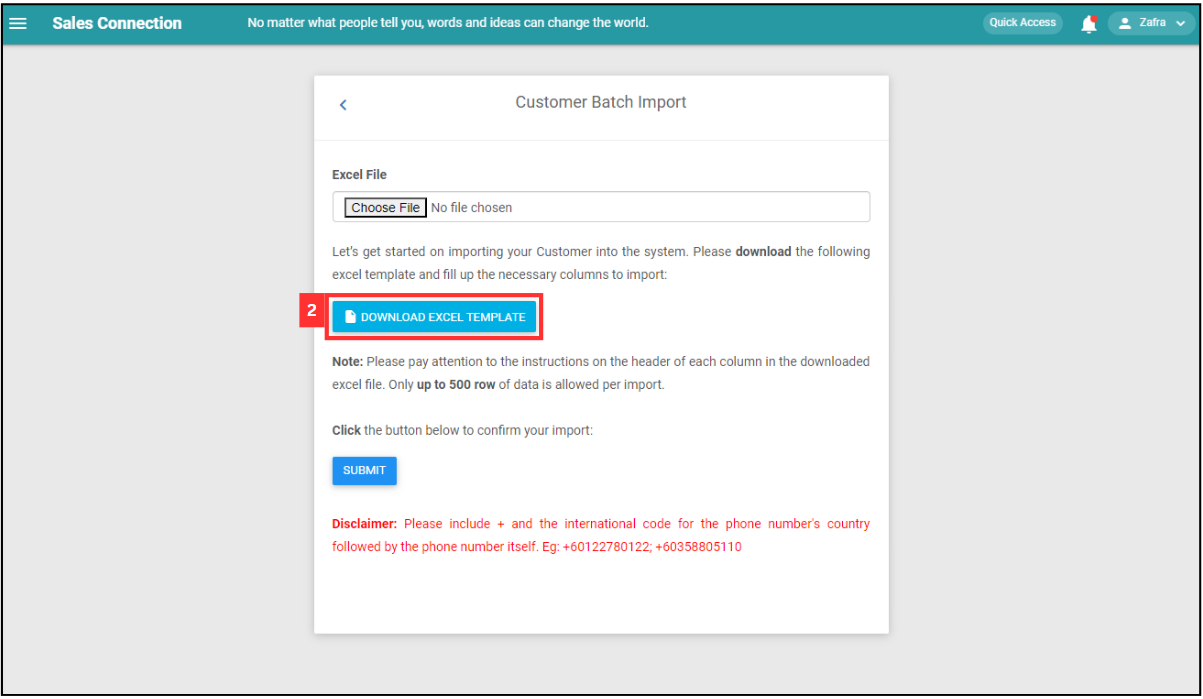
Click “DOWNLOAD EXCEL TEMPLATE”.
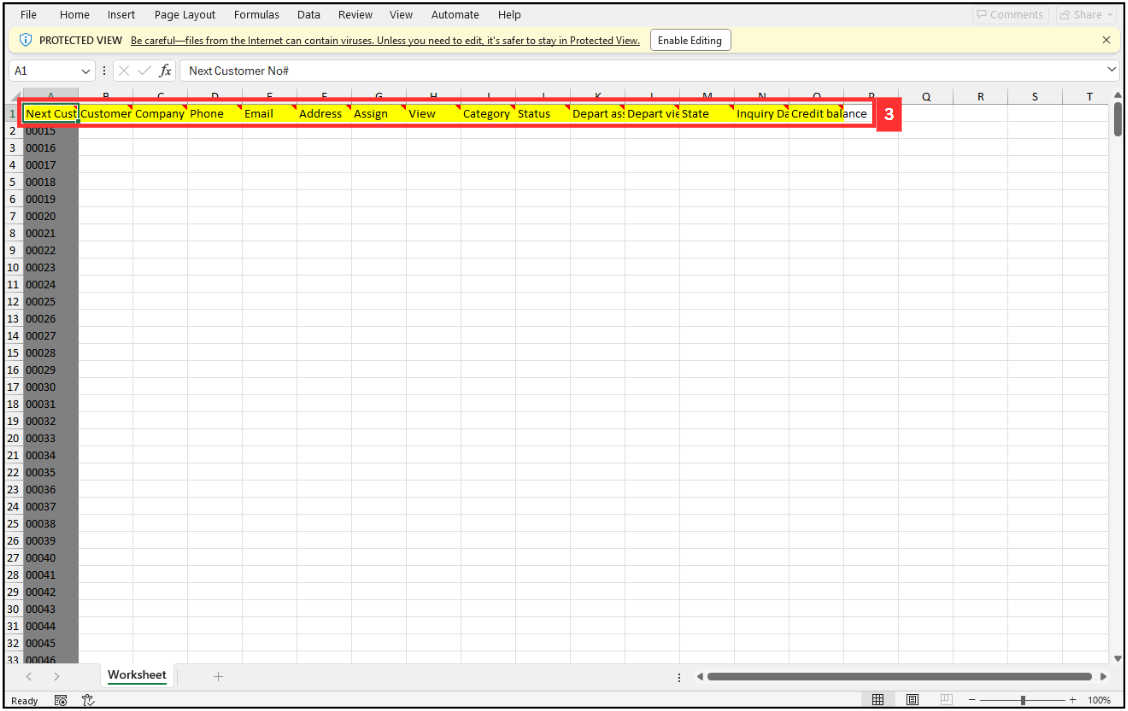
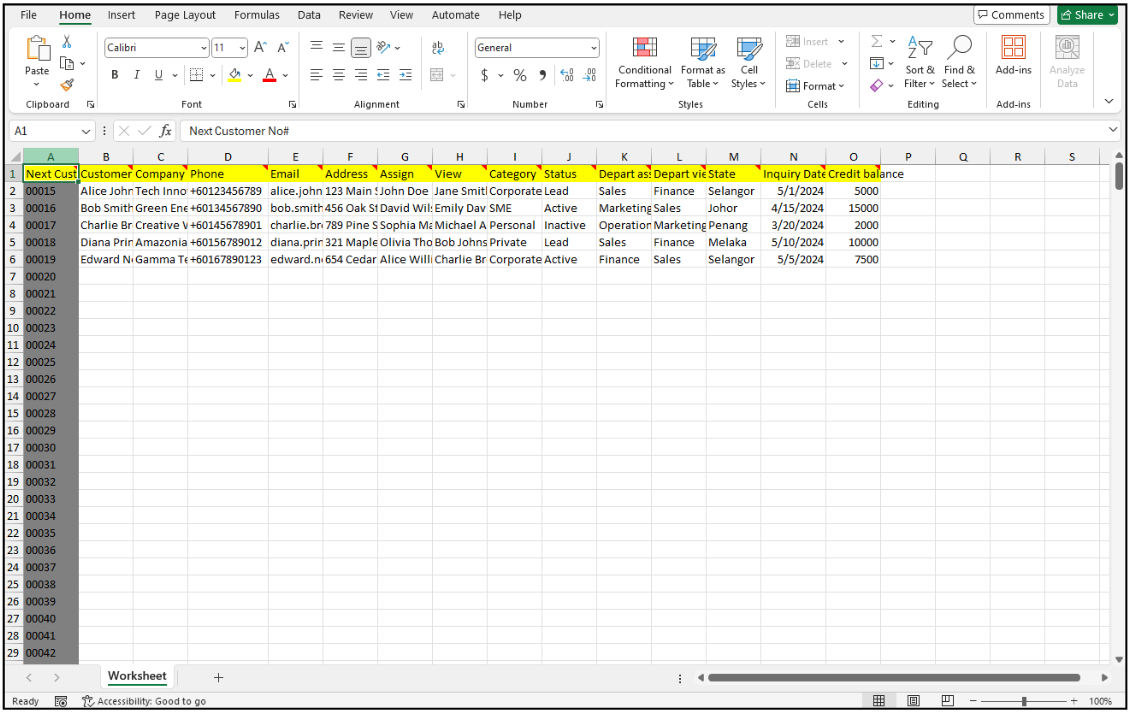
- Fill out the details of the new customers. Available column fields may differ depending on your company’s system setup.
a. The details include:
- Customer Name
- Company Name
- Phone
- Address
- Assign
- View
- Category
- Status
- Depart assign
- Depart view
- State
- Inquiry Date
- Credit Balance
*Note: Please include + and the international code for the phone number’s country followed by the phone number itself. Eg: +60122780122; +60358805110.
-
Make sure all the information of the customers is correct and save the file.
-
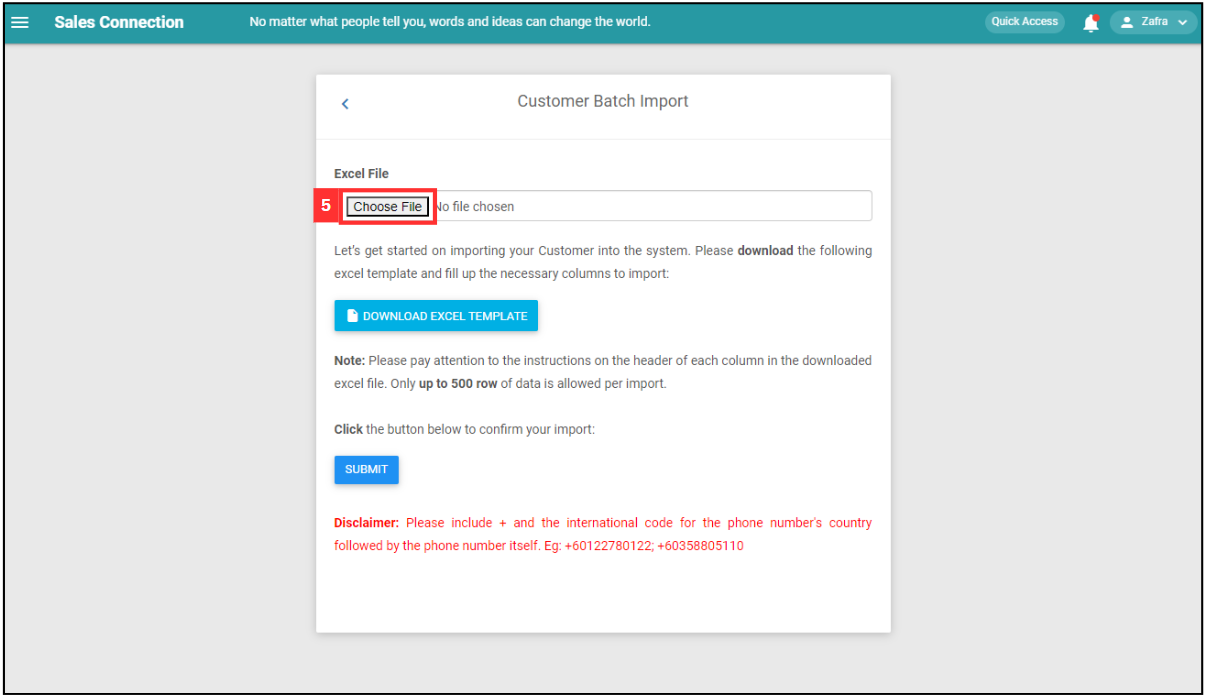
Go back to the customer import page and choose the correct file by clicking “Choose File” to import.
-
Make sure the file uploaded is correct.
-
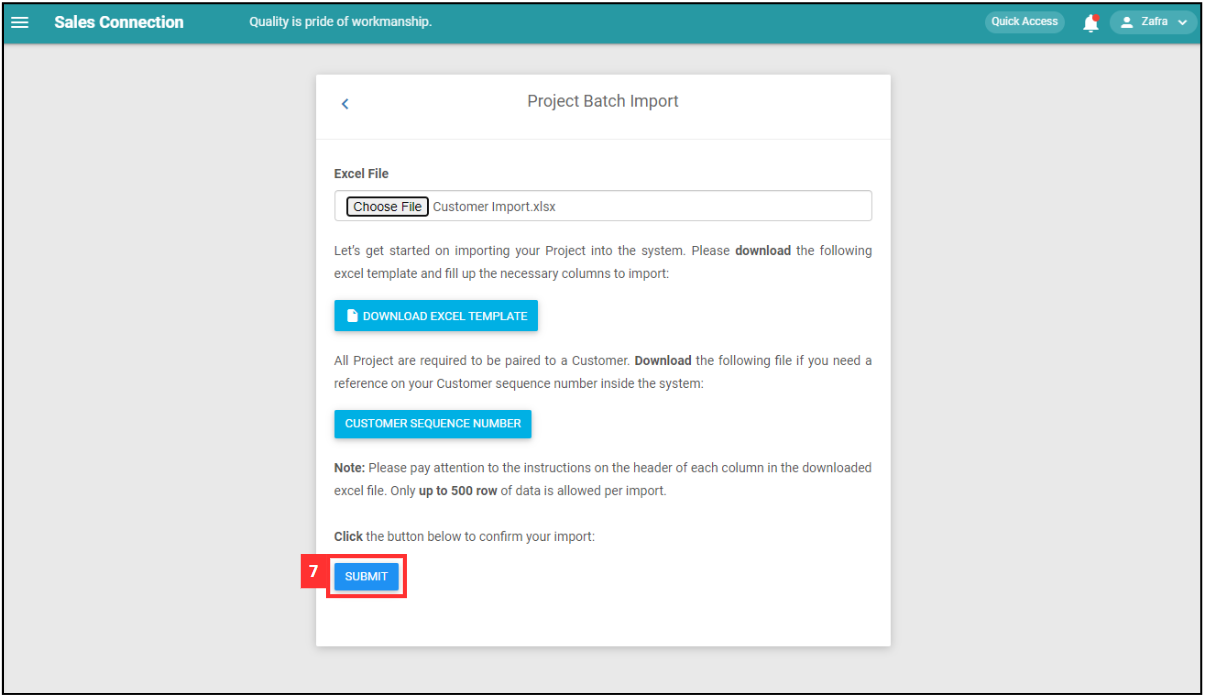
Click on the “SUBMIT” button.
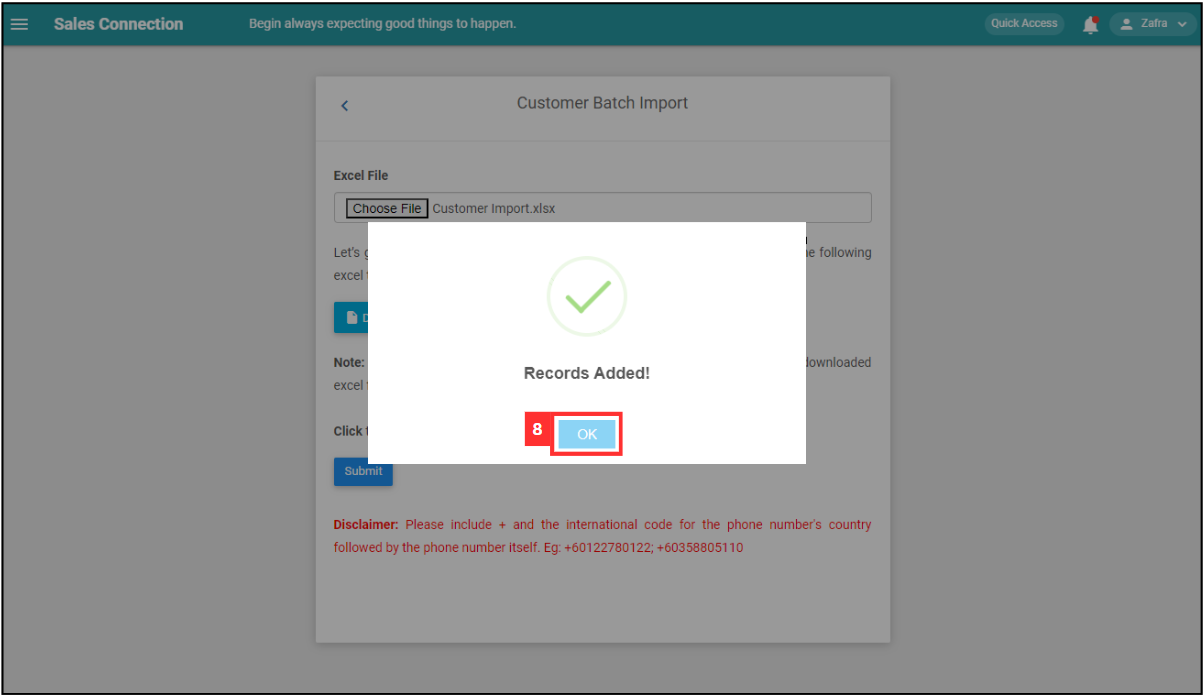
- Your items are successfully added when the “Records Added” prompt appears.
💡 Tips for Better Setup
🗂️ Stick to the template format – Changing column names or order may result in errors.
📞 Use proper phone number format – Always include country codes to prevent import issues.
🧪 Test with a small batch first – Run a few entries to ensure format and field mapping are correct.
📋 Validate required fields – Ensure all mandatory fields are filled to avoid import failures.
📁 Keep a copy of the uploaded file – Useful for audit trails or re-importing if something goes wrong.
Related Articles
- How to Add New Customer?
- How do I Import New Projects?
- How to Import New Product/Services?
- How do I Import New Assets?
- How to Import New UOMs?
- How to Import New Contacts?