 Help Center
This feature allows users to bulk import contact data into the system using a structured Excel template, ensuring data consistency and efficient onboarding.
Benefits
-
Streamlines the process of adding multiple contacts
-
Reduces manual entry errors
-
Ensures consistent and complete contact information
-
Auto-populates linked customer data based on company name
Importing new contacts in bulk helps streamline your workflow and ensures data consistency across the system. By using the provided Excel template, you can quickly and accurately upload multiple contacts at once. Below are the step-by-step guide to help you complete the import process efficiently.
-
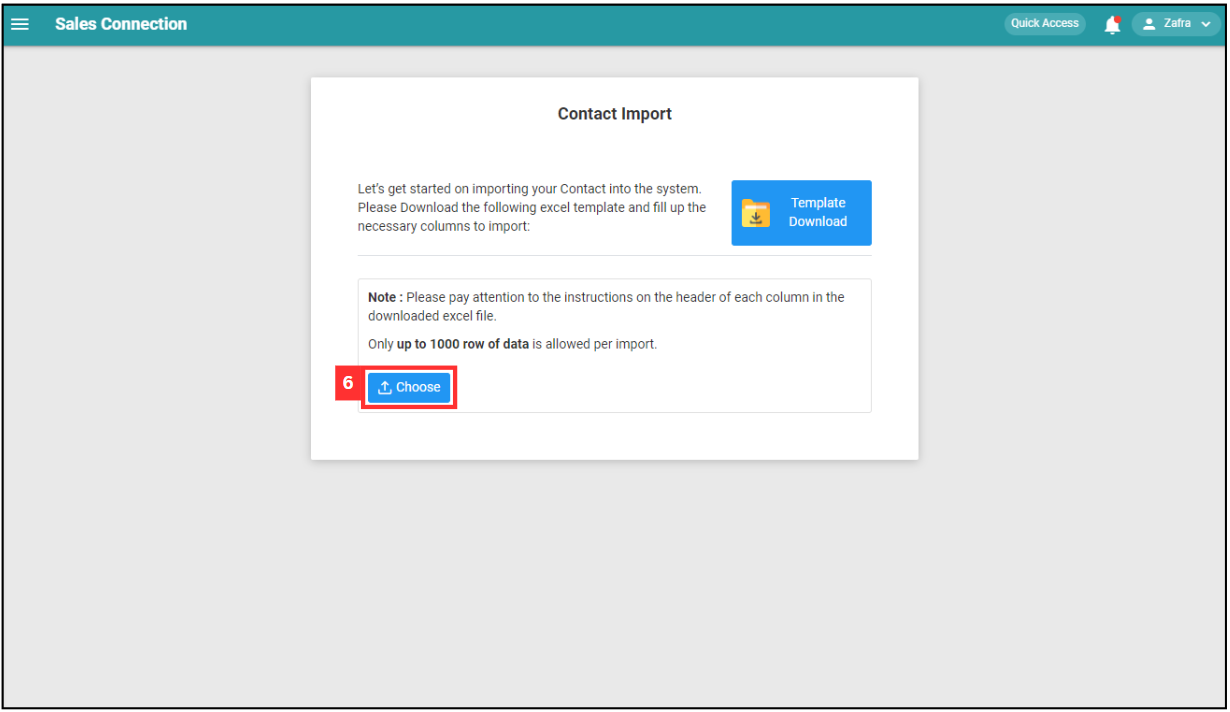
At the desktop site’s navigation bar, go to Import > Contact Import.
Import Contact(s) Here: https://system.caction.com/contact/import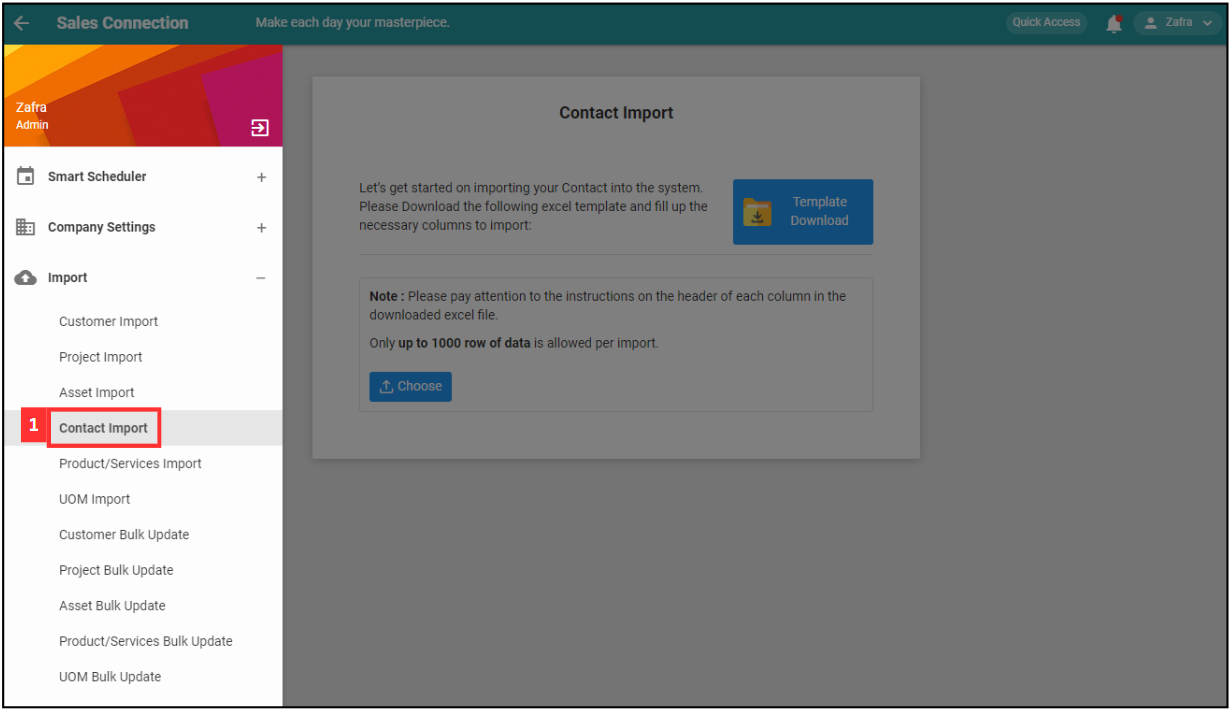
-
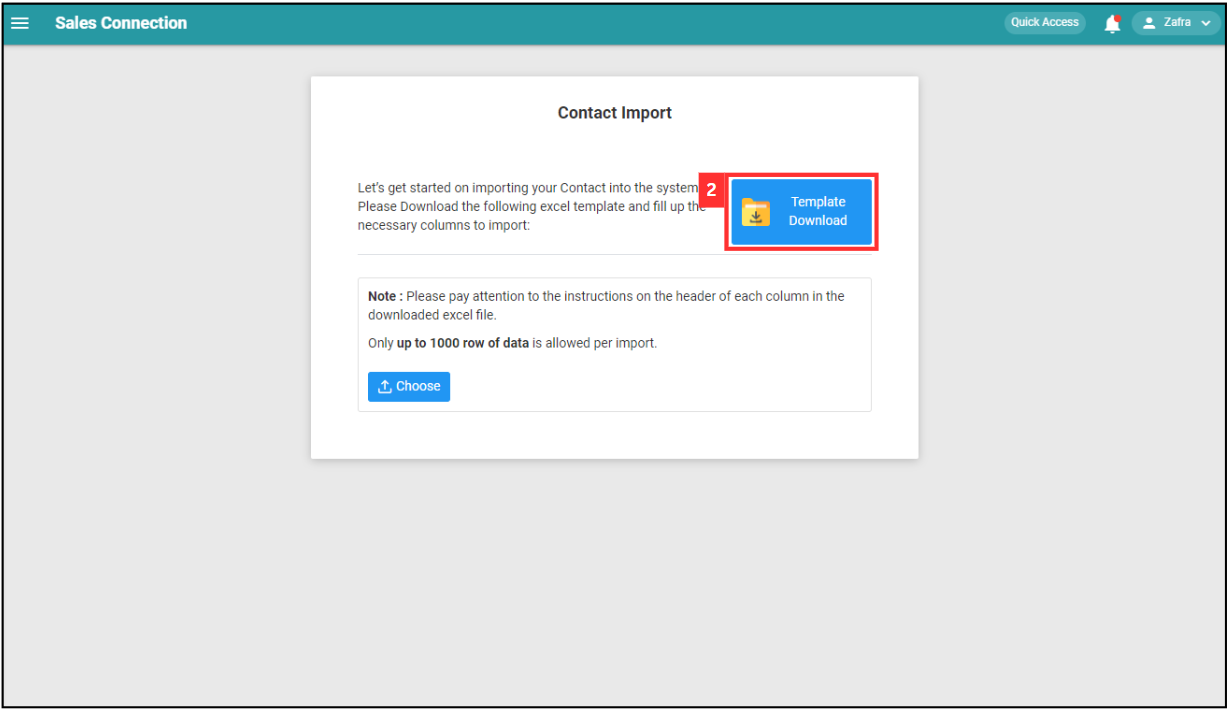
Click “Template Download”.
-
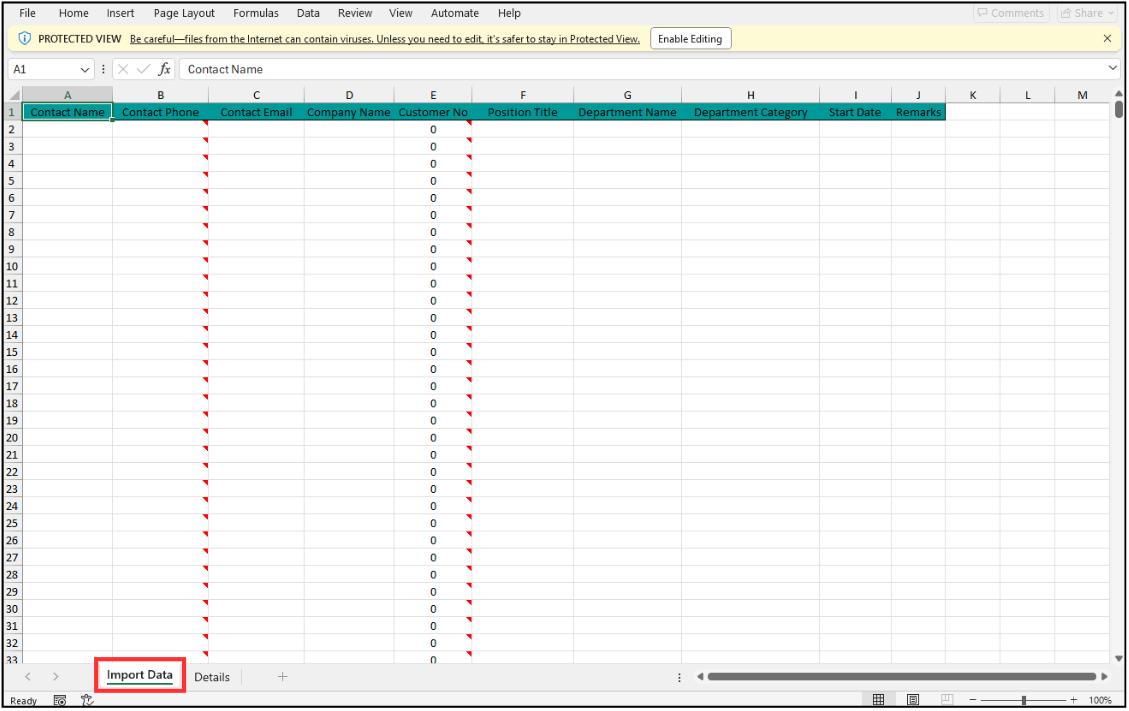
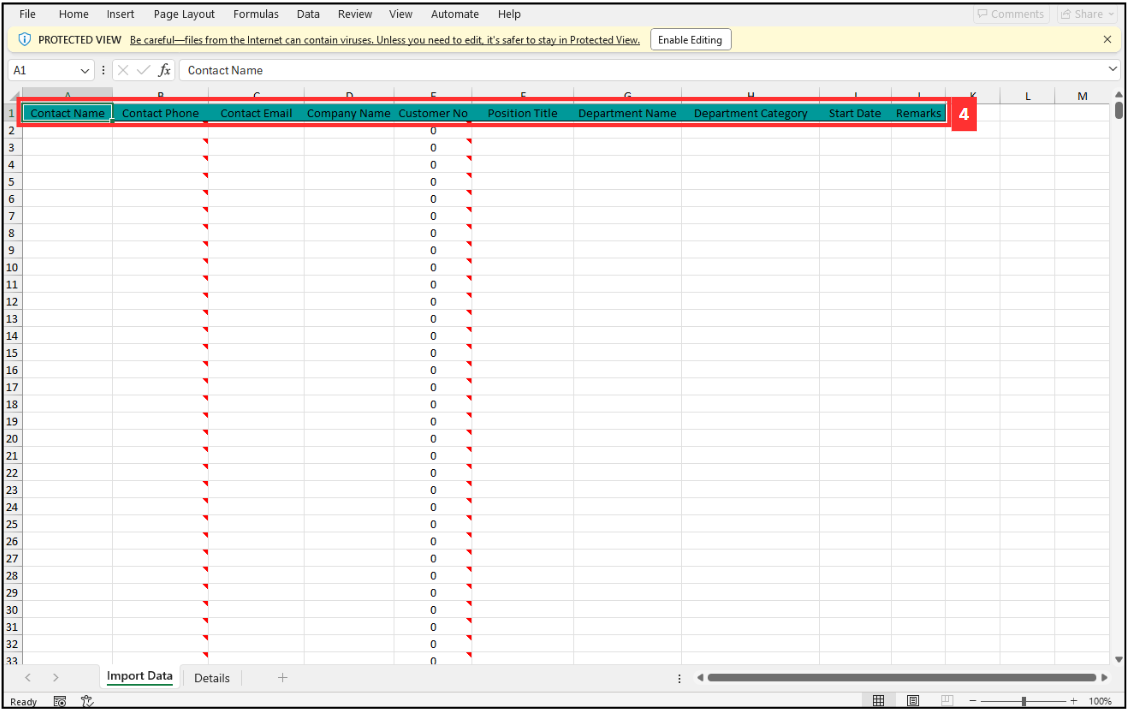
The “Excel Template” file has 2 sheets: “Import Data” and “Details”.
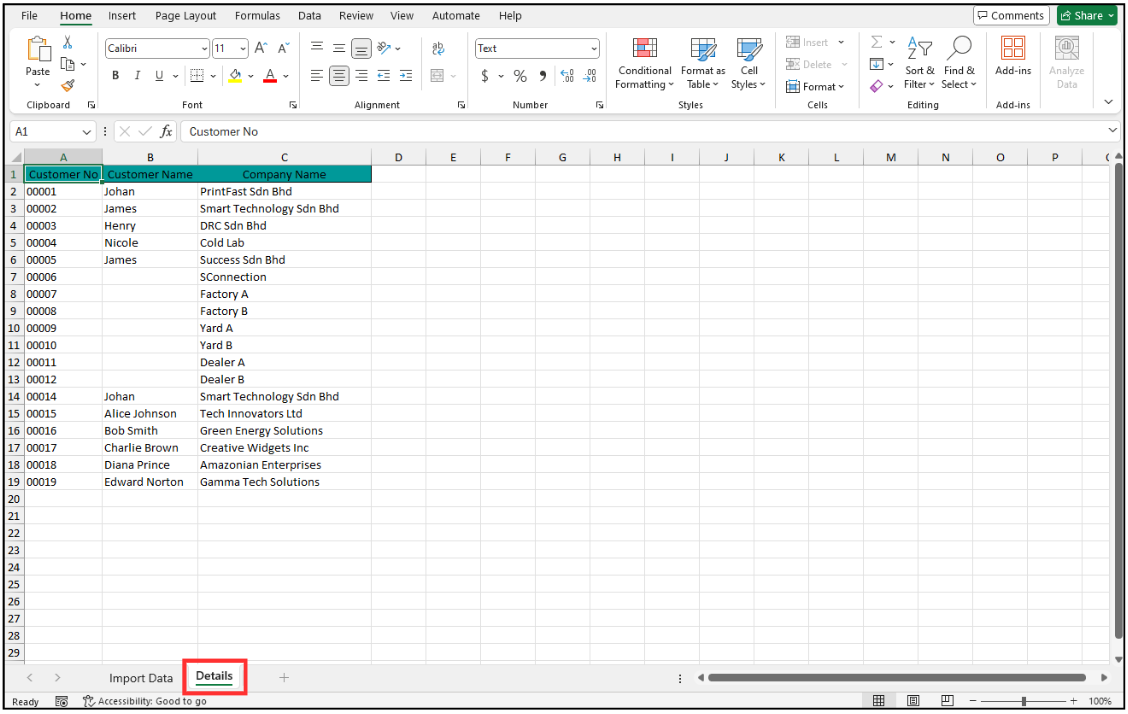
Sheet Usage Import Data Enter the contact details in this page. Details Reference for customer and company details. Import Data:
Details:
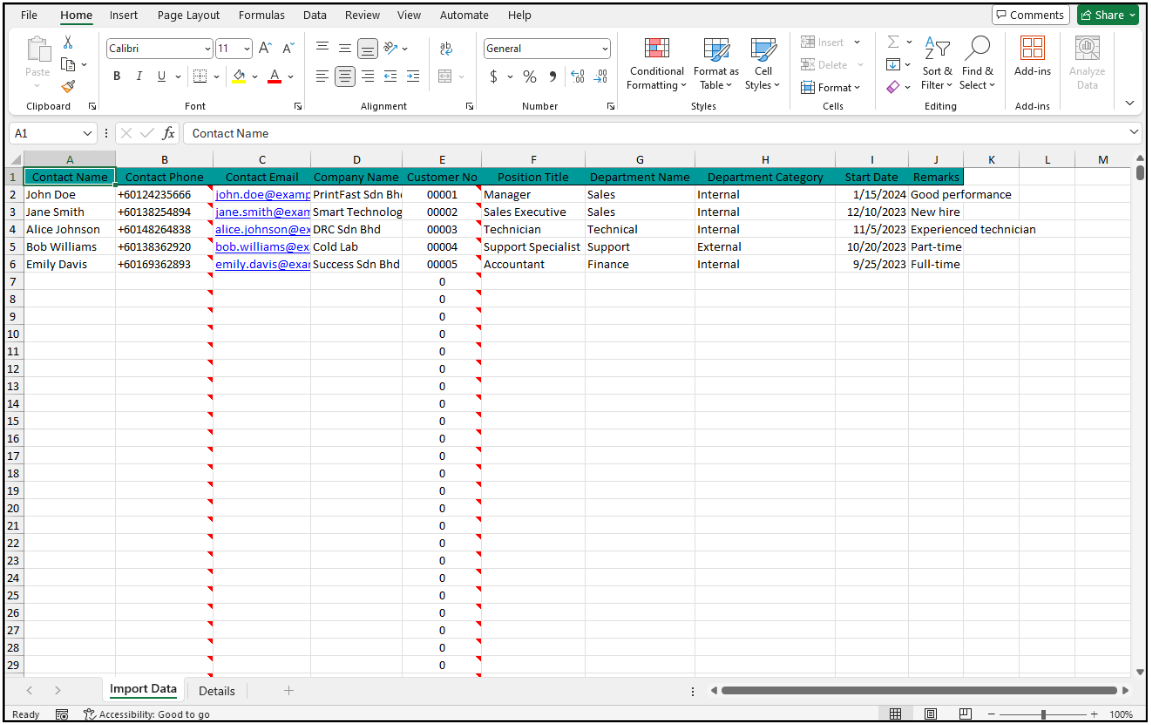
- Fill out the details of the new contacts.
a. The details include:
- Contact Name
- Contact Phone
- Contact Email
- Company Name
- Customer No (will be auto-populated after the company name is entered)
- Position Title
- Department Name
- Department Category
- Start Date
- Remarks
*Note: Only up to 1000 rows of data are allowed per import.
-
Make sure all the information of the contacts is correct and save the file.
-
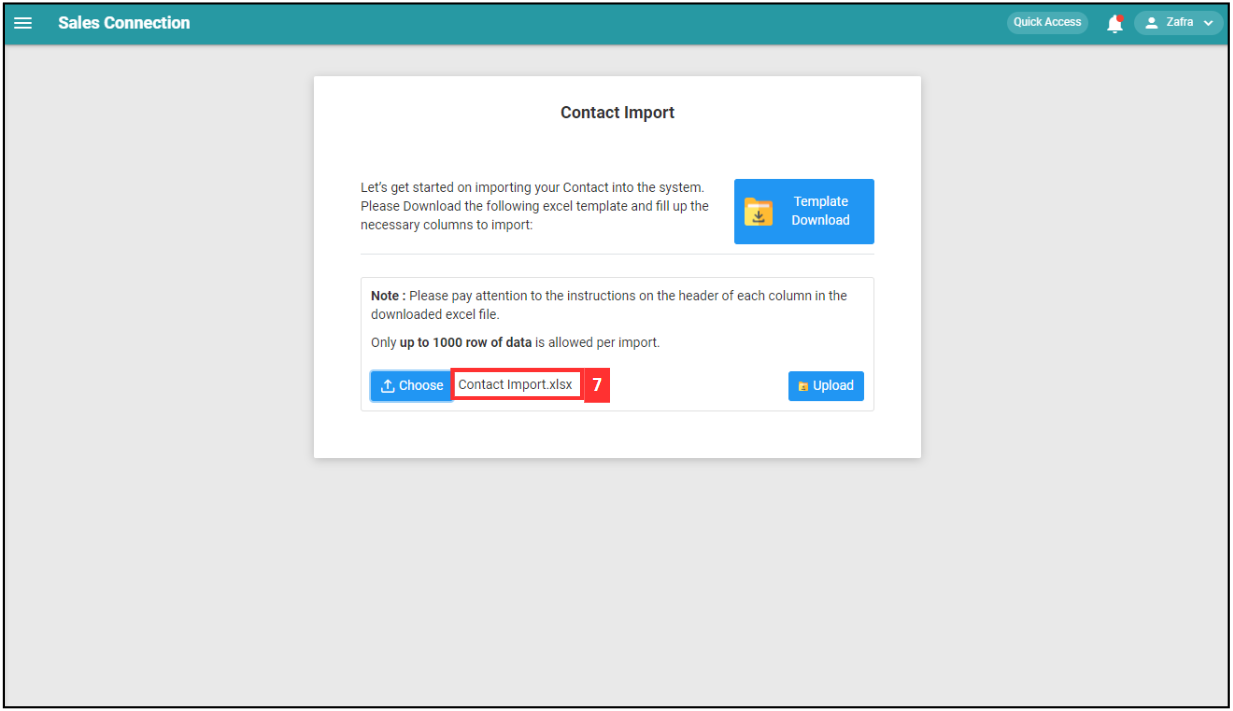
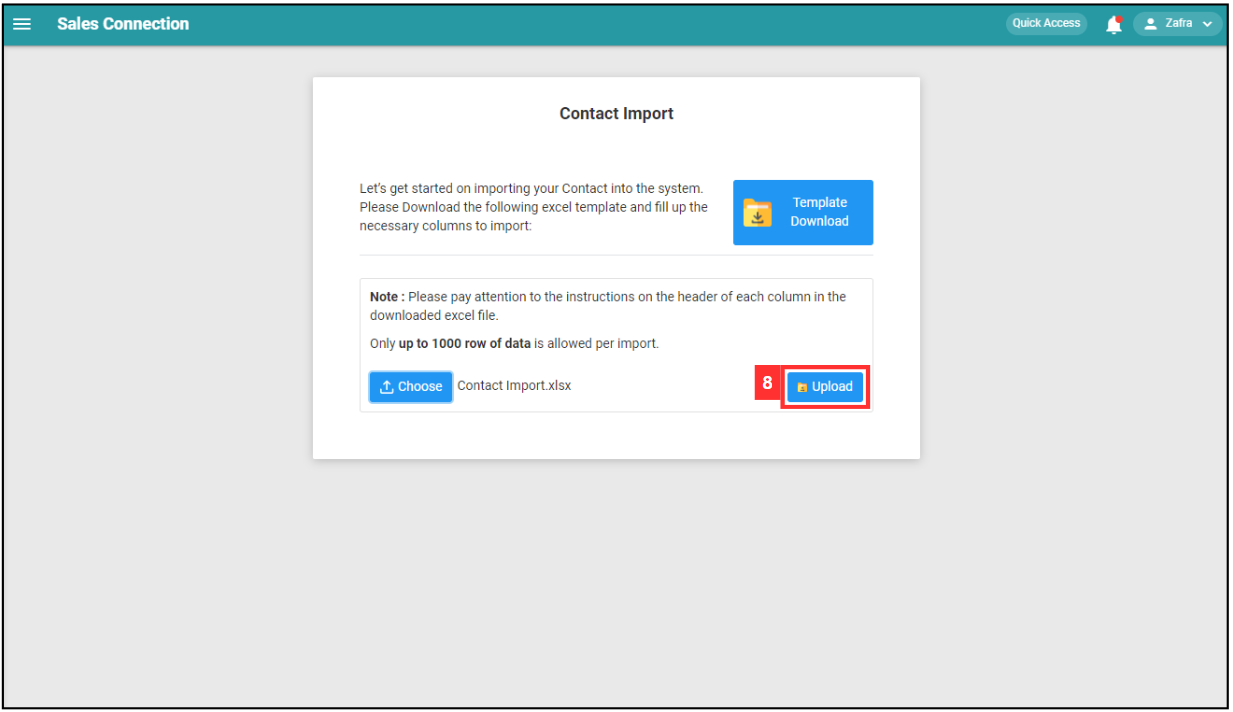
Go back to the contact import page and choose the correct file by clicking “Choose” to import.
-
Make sure the file uploaded is correct.
-
Click on the “SUBMIT” button.
-
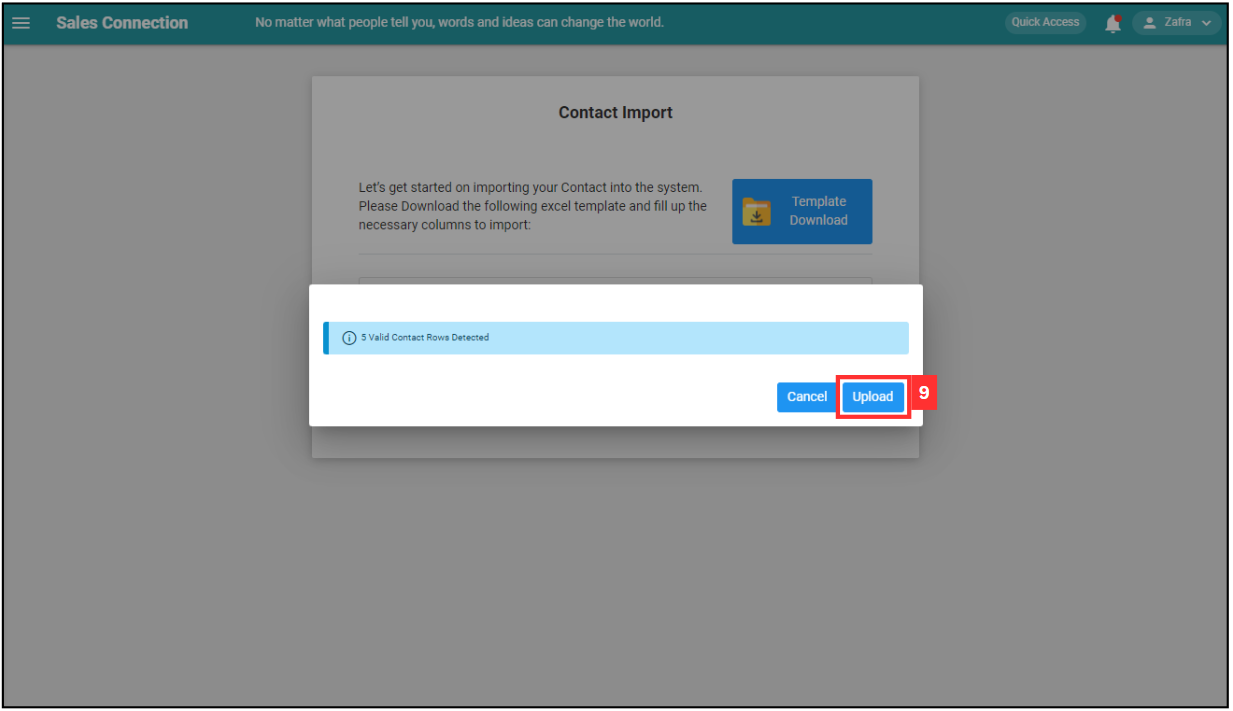
Click “Upload”.
-
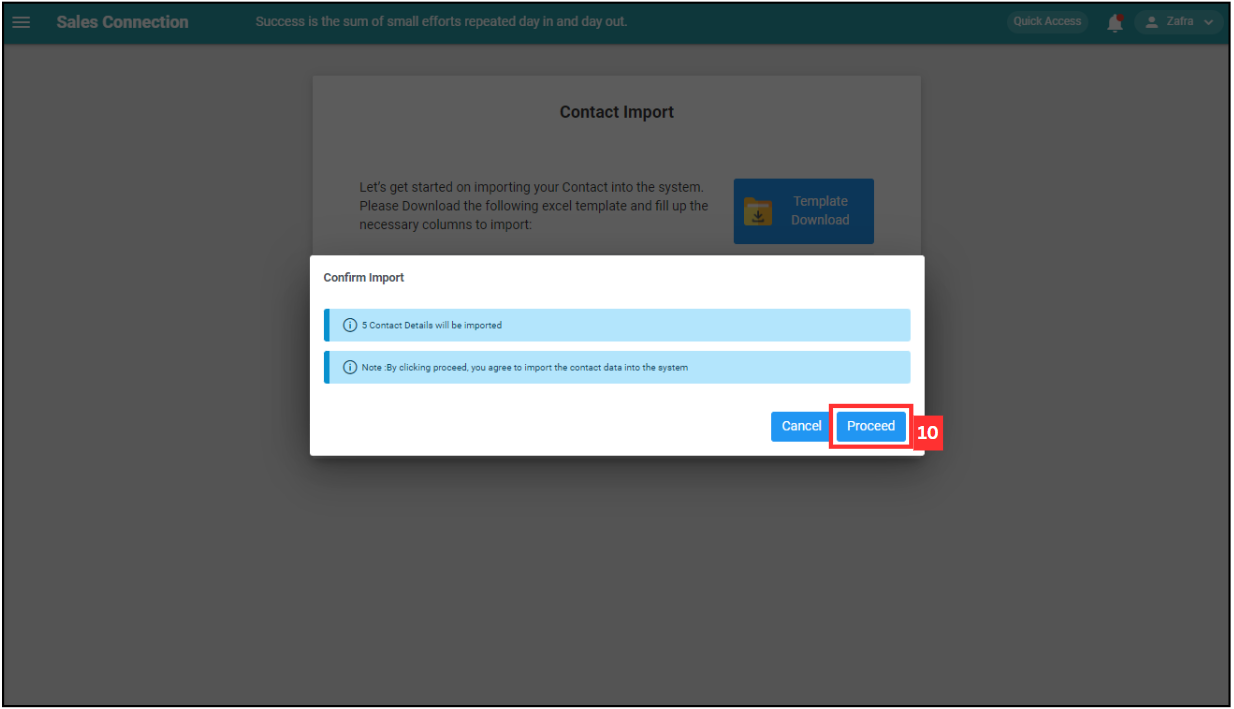
Click on the “Proceed” button to confirm the upload.
-
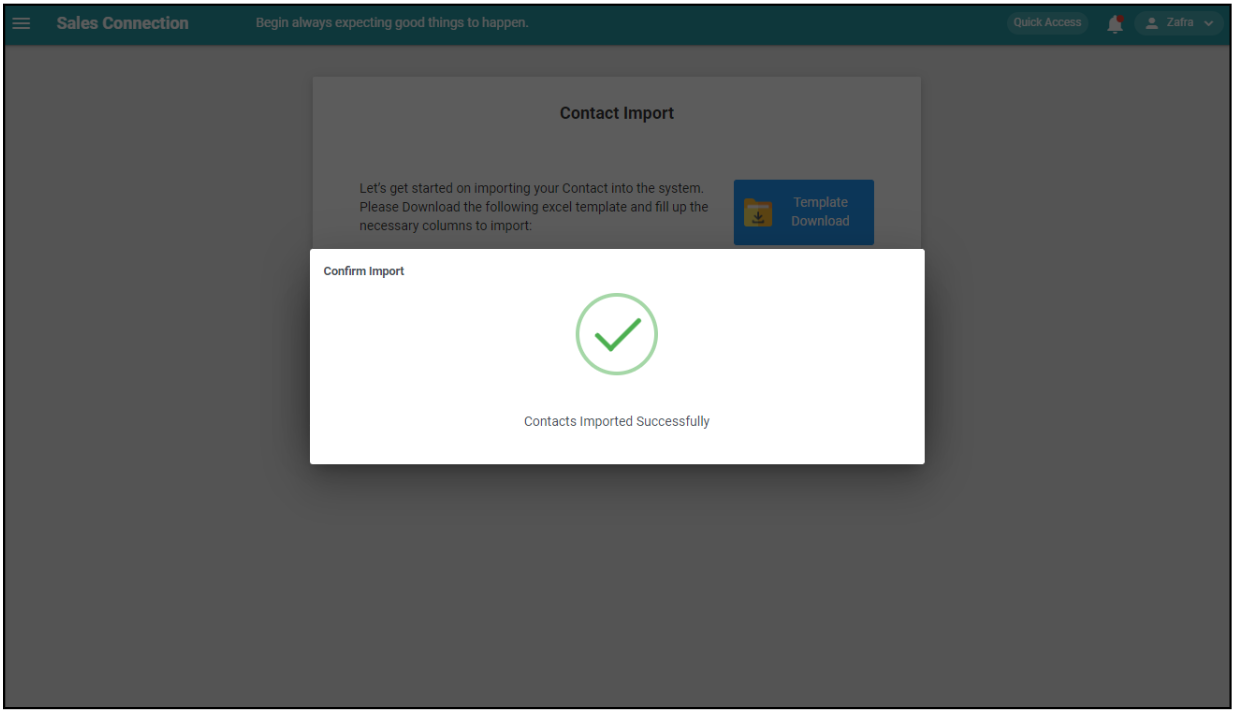
When this prompt shows, it means the contacts have been imported successfully.
Related Articles