 Help Center
This guide walks users through the process of adding a new Category in Caction, applicable across key data areas including Customers, Projects, Jobs, and Digital Forms. Organizing your data with clear, consistent categories helps standardize information entry and enhances visibility across the platform. While the example shown focuses on Projects, the same steps apply to other modules.
Benefit:
- Maintain consistent structure across all data types.
- Easily locate and segment records using category-based filters.
- Categorized data enables more targeted and meaningful reports.
- Align categories with business processes for better data understanding.
Note: This walkthrough uses Projects as the example, but the process is identical for adding categories to Customers, Jobs, and Digital Forms.
-
For example, if you wish to add new category in Project. At the desktop site’s navigation bar, go to Wizard.
Open Wizard Page Here: https://system.caction.com/wizard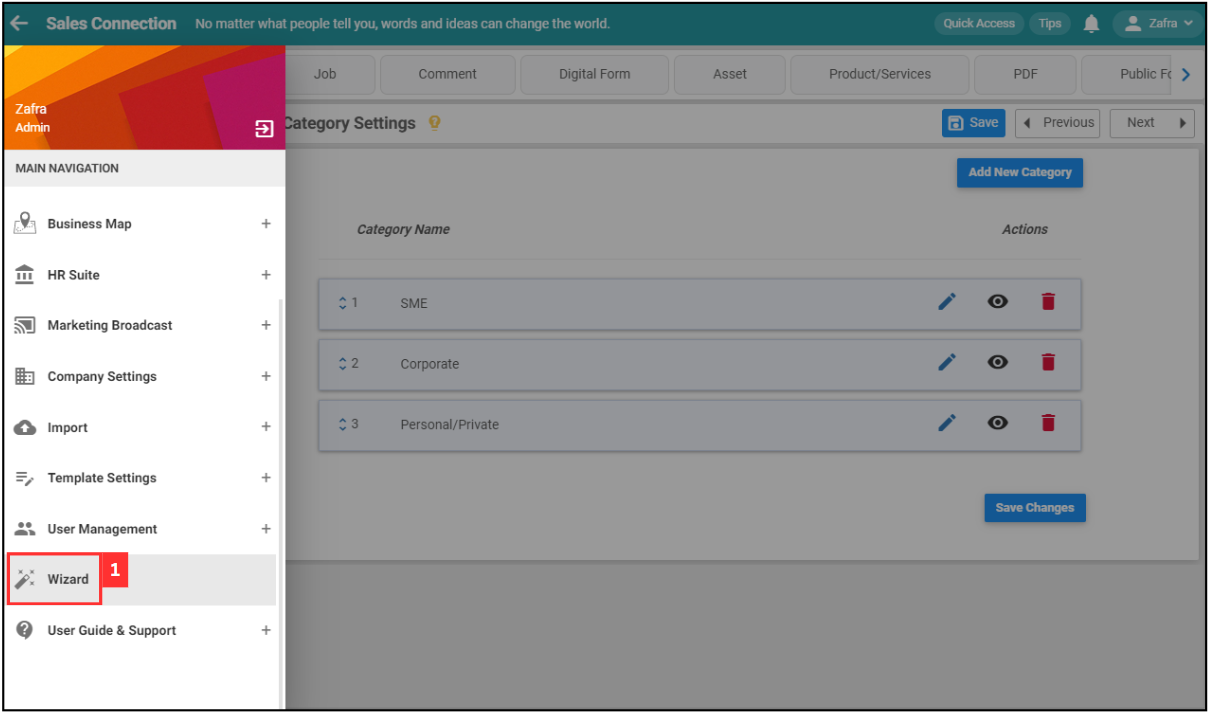
-
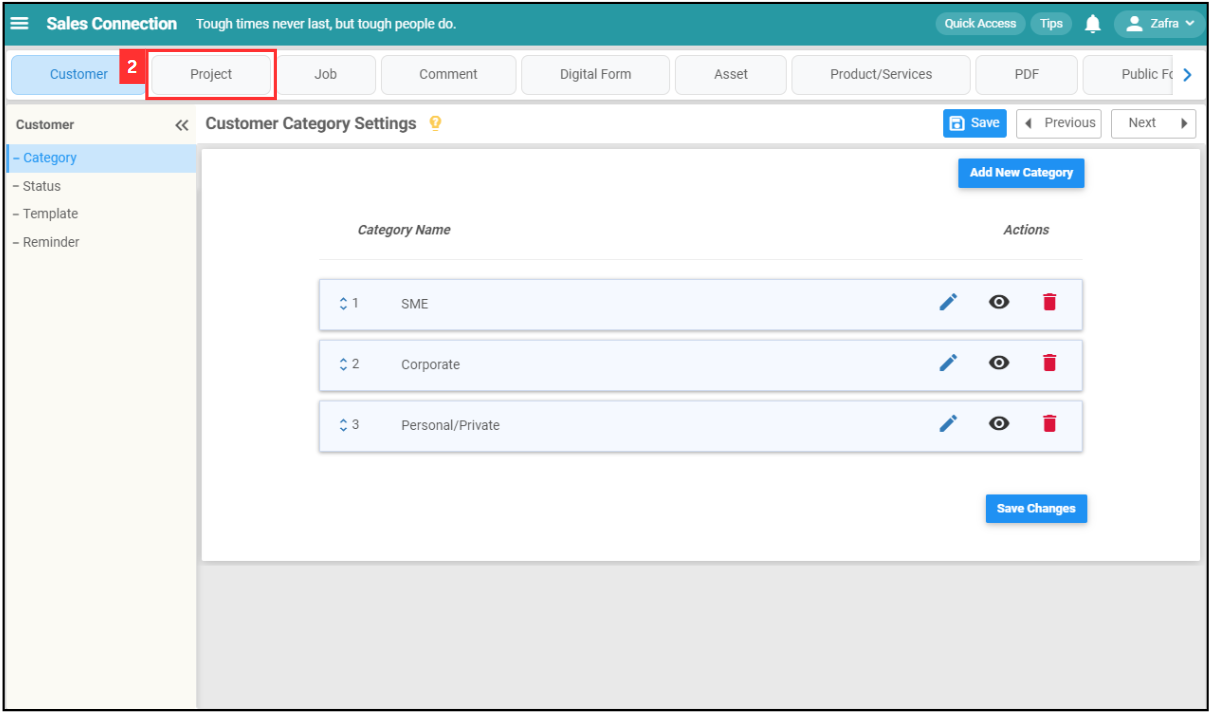
Click “Project”.
-
Click “Category”.

-
Click on the “Add New Category” button.
Add New Project Category Here: https://system.caction.com/settings/CategoryList?type=dssecond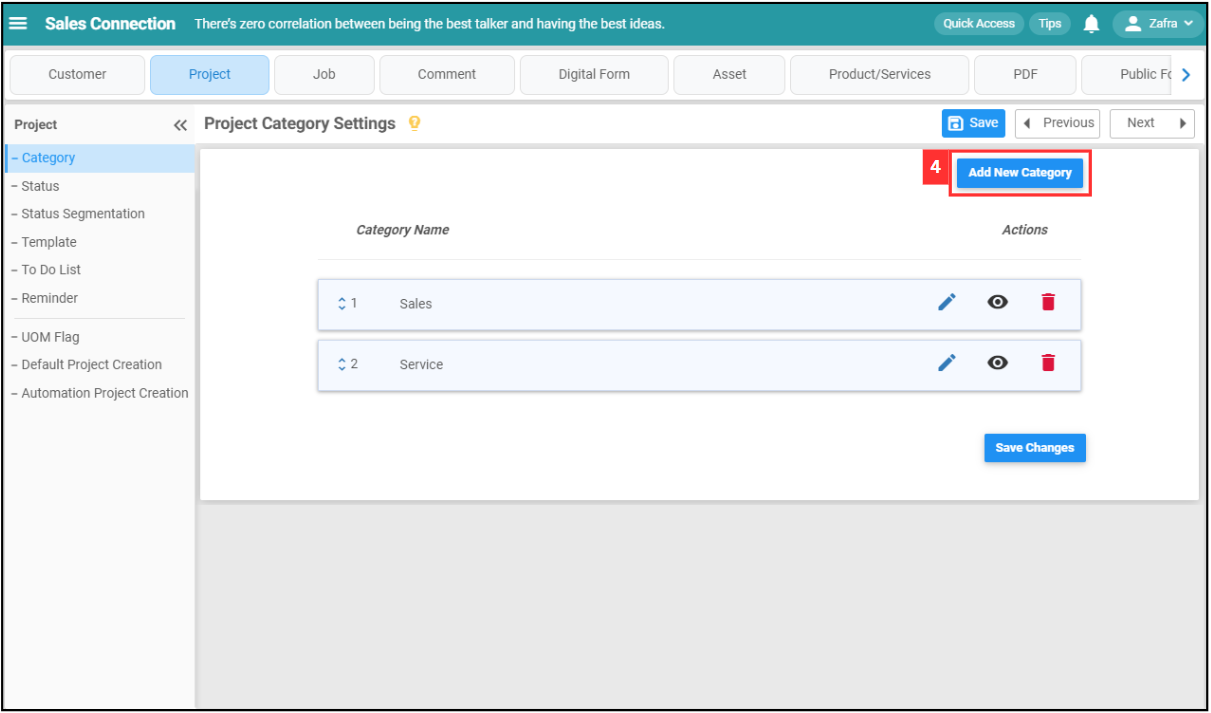
-
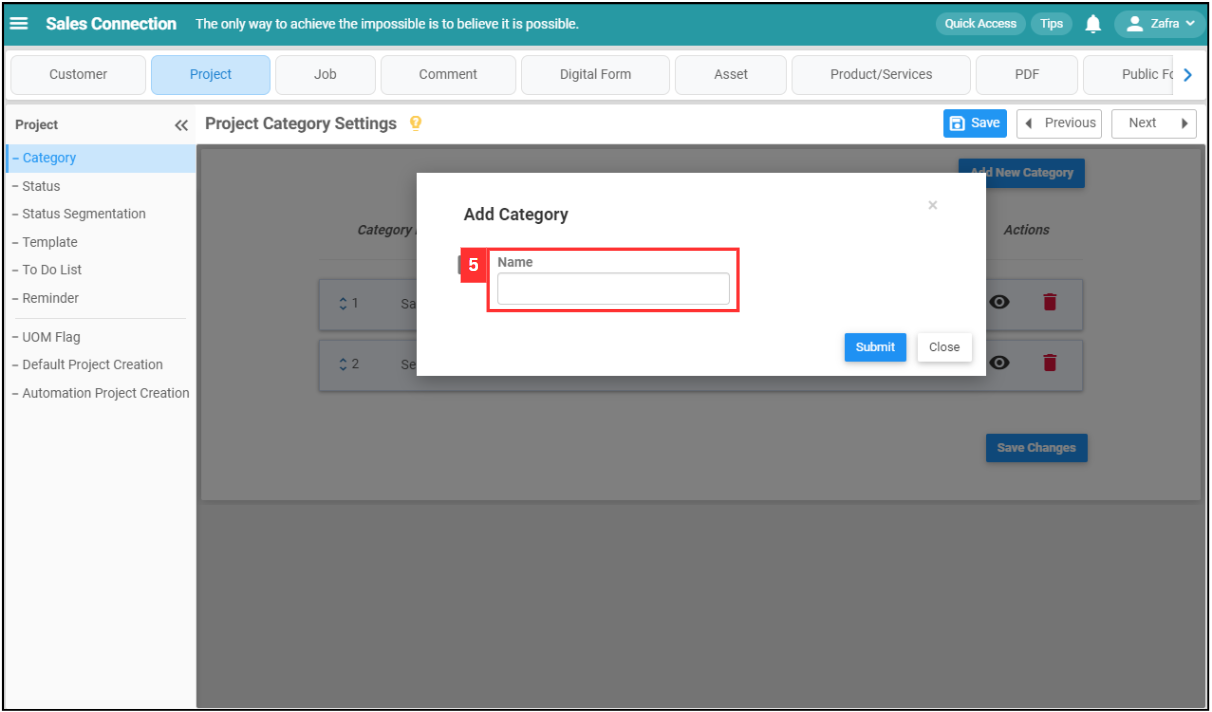
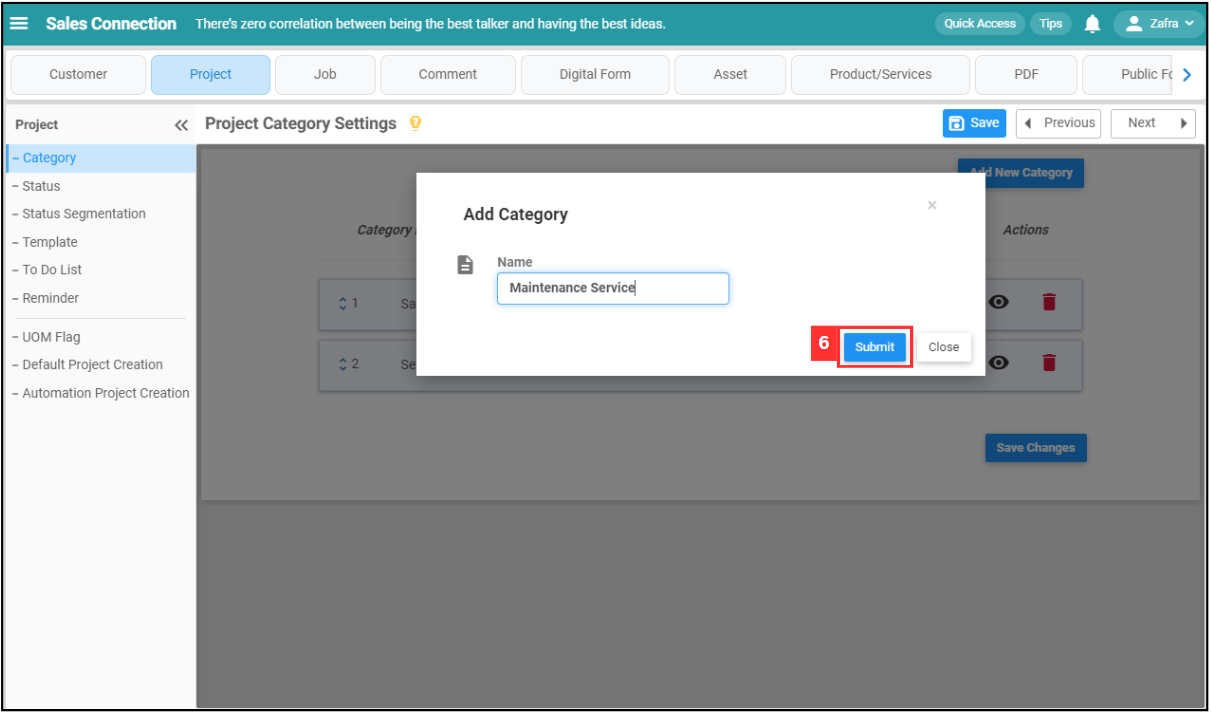
Enter the name of the new category.
-
Click the “Submit” button.
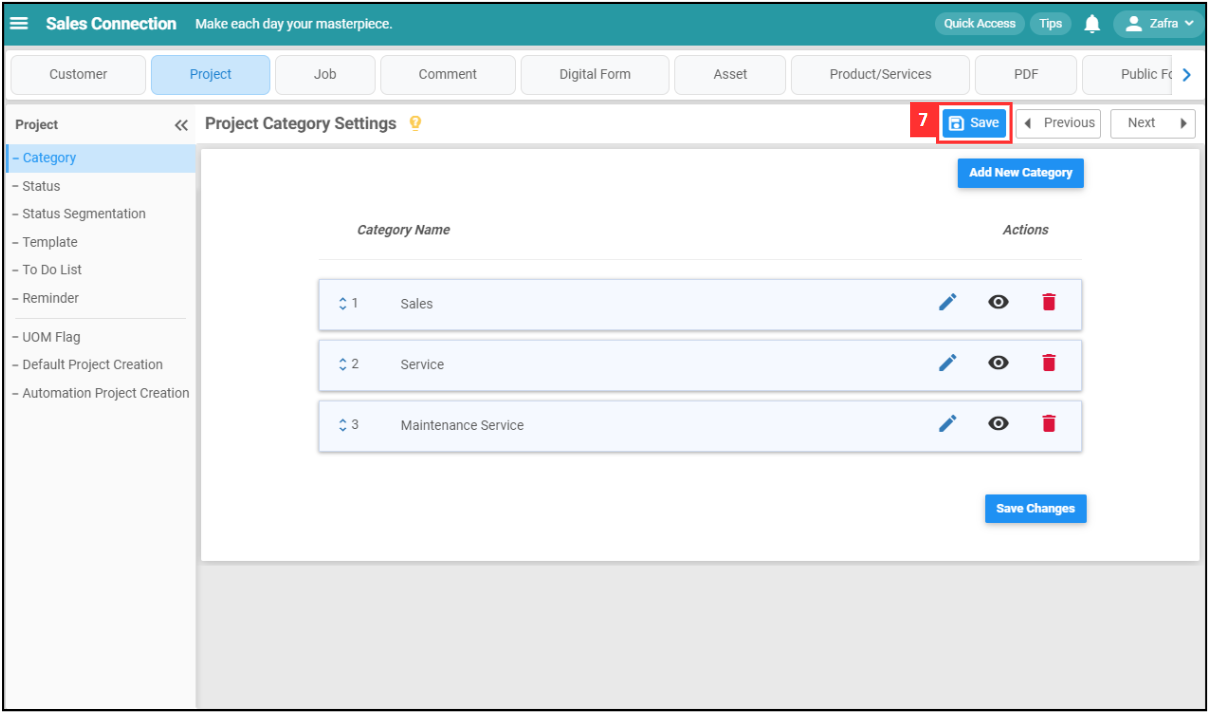
-
Remember to click the “Save” button to save the new category.
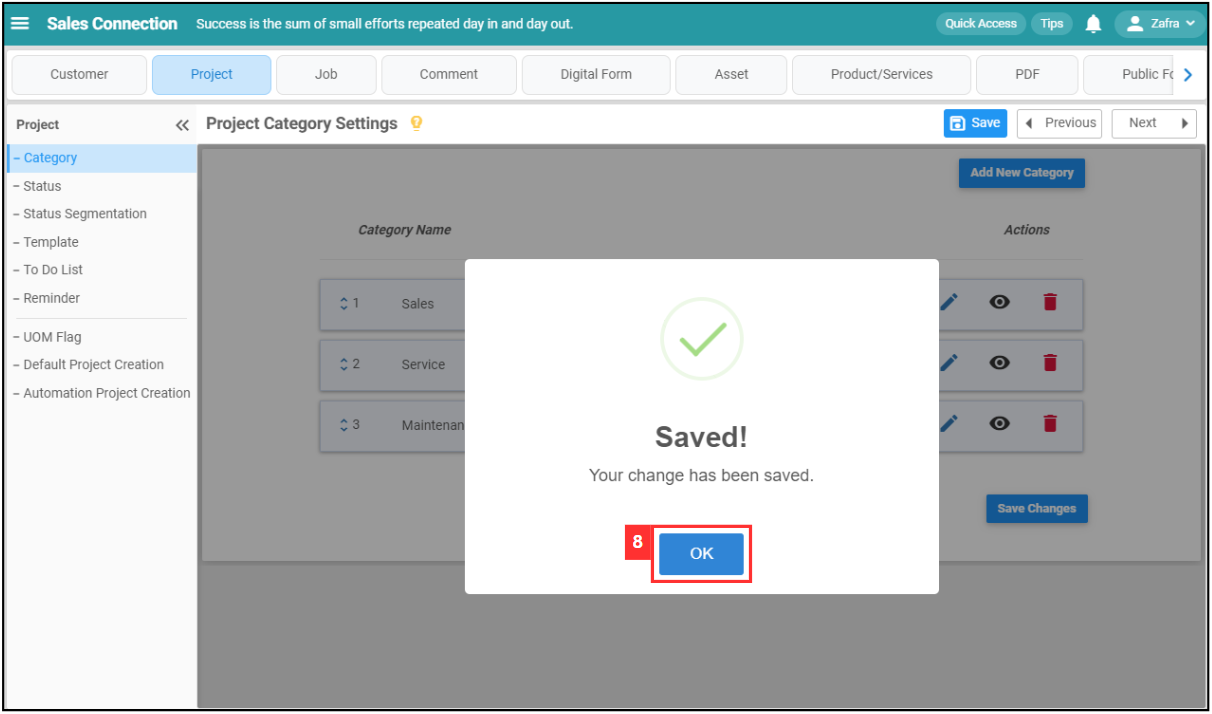
-
Click “OK” and the new project category has been saved successfully.
Example of Add New Category in Digital Form
-
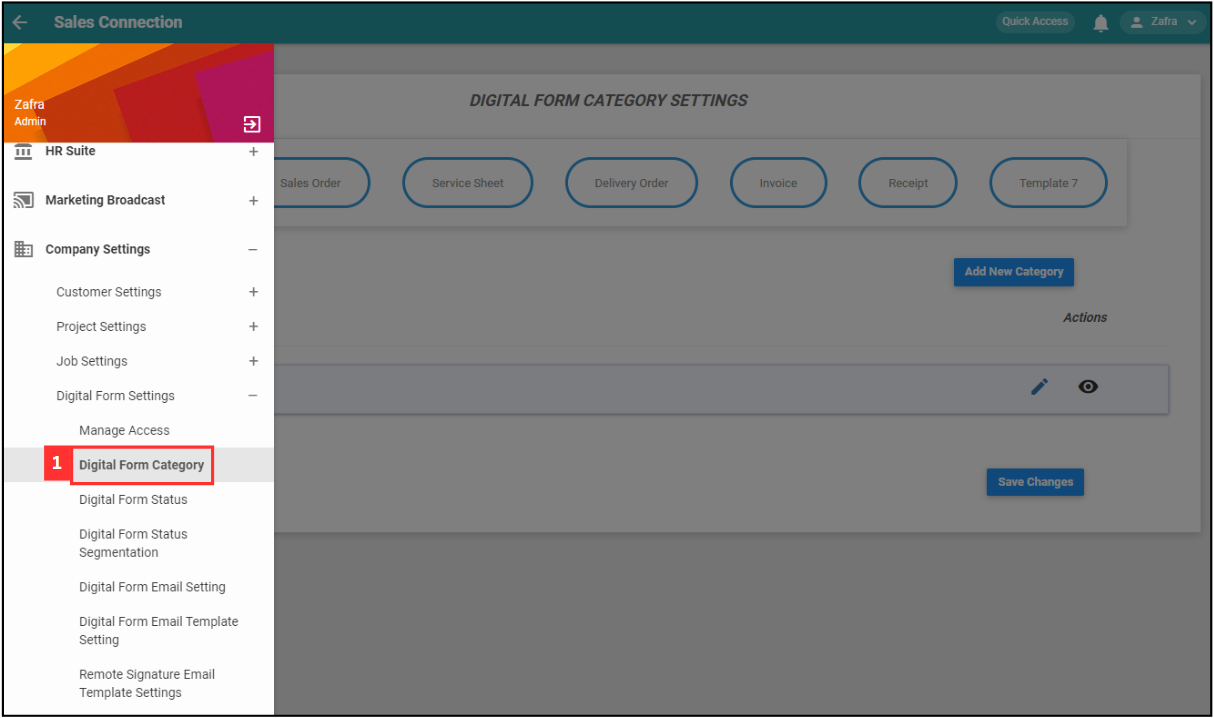
For example, if you wish to add new category in Delivery Order. At the desktop site’s navigation bar, go to Company Settings > Digital Form Settings > Digital Form Category.
-
Click on “Delivery Order”.
Add New Digital Form Category Here: https://system.caction.com/ServiceReport/DigitalFormCategory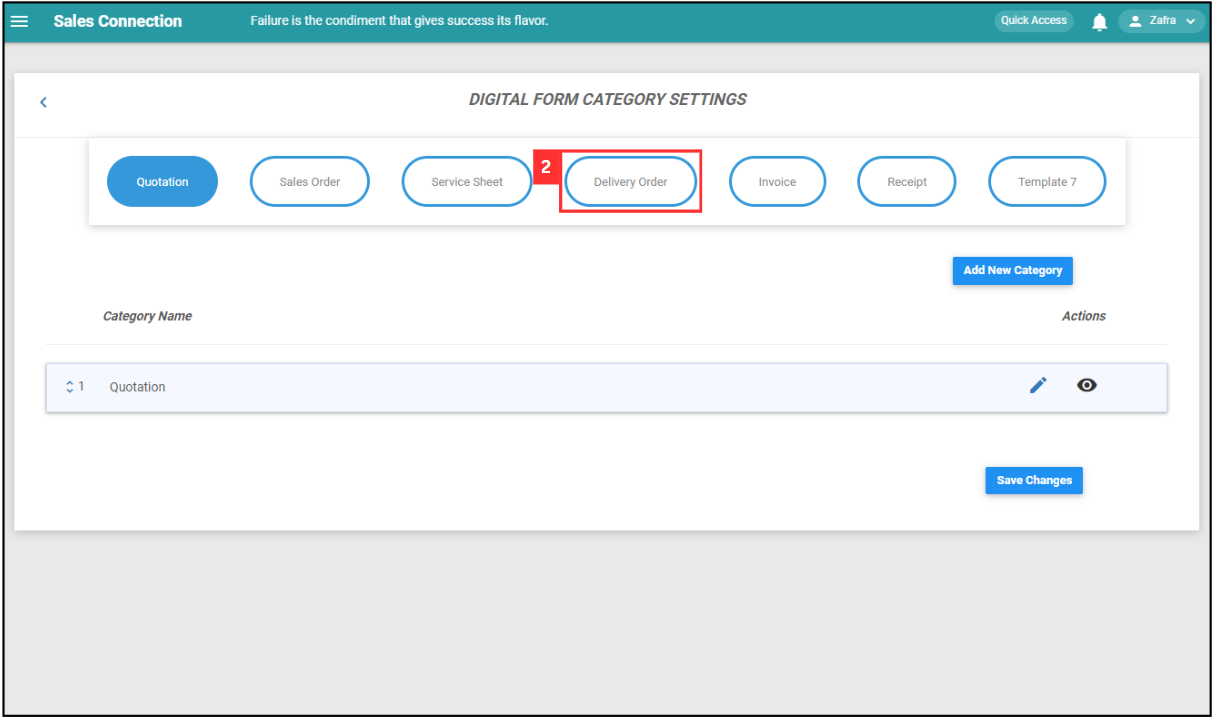
-
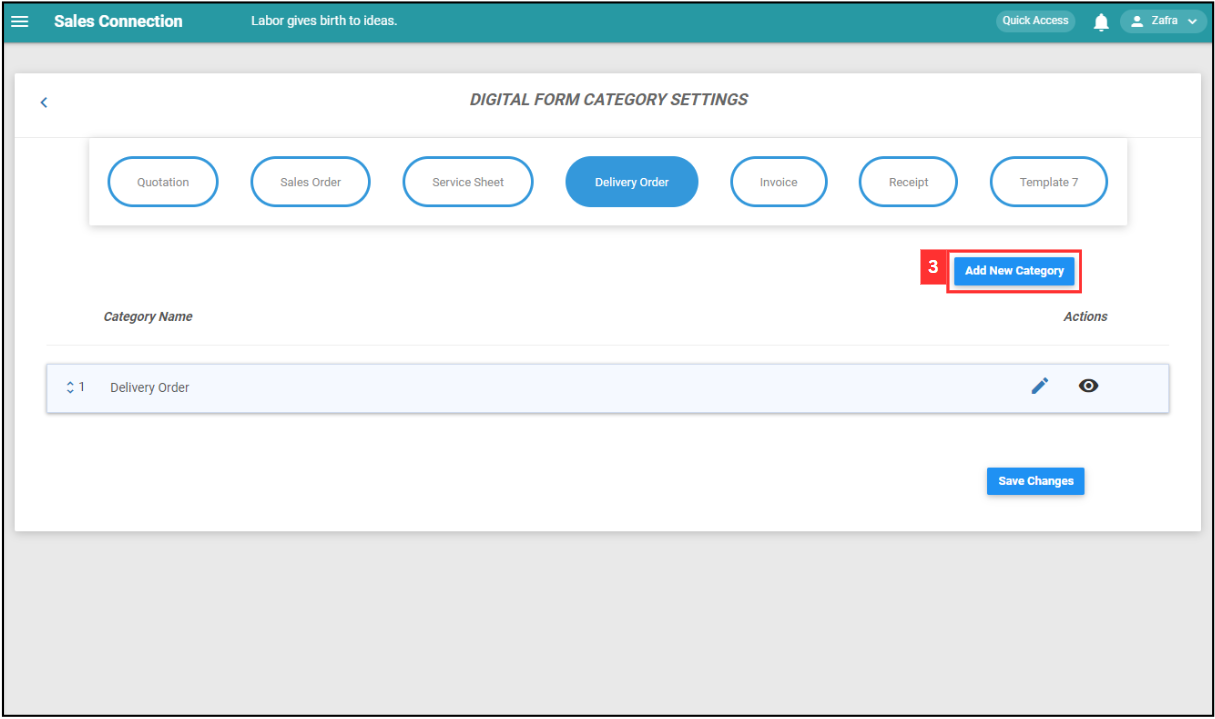
Click on the “Add New Category” button.
-
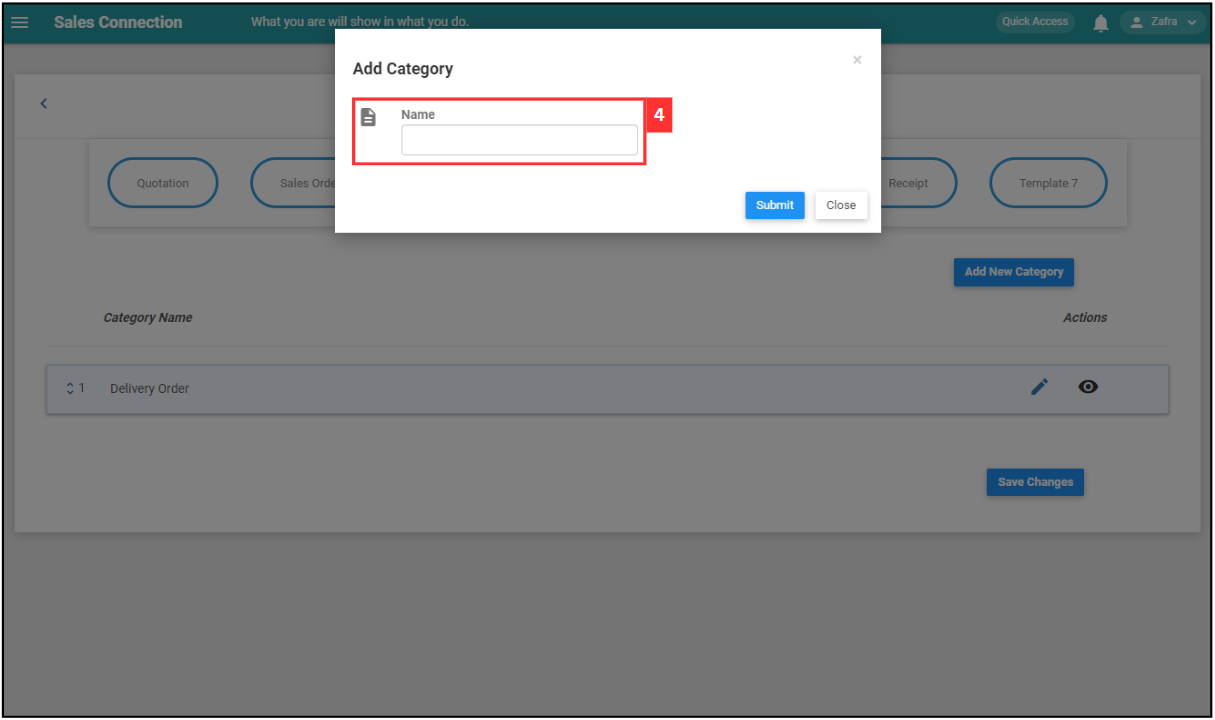
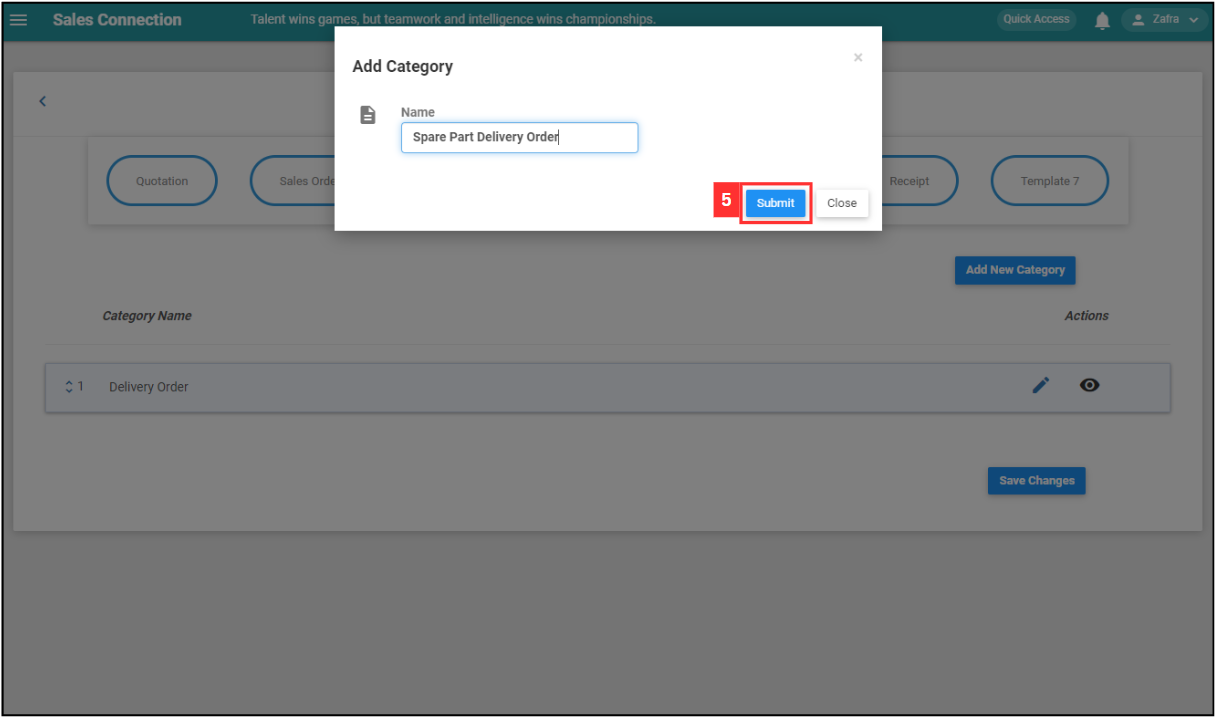
Enter the name of the new “Delivery Order” category.
-
Click the “Submit” button.
-
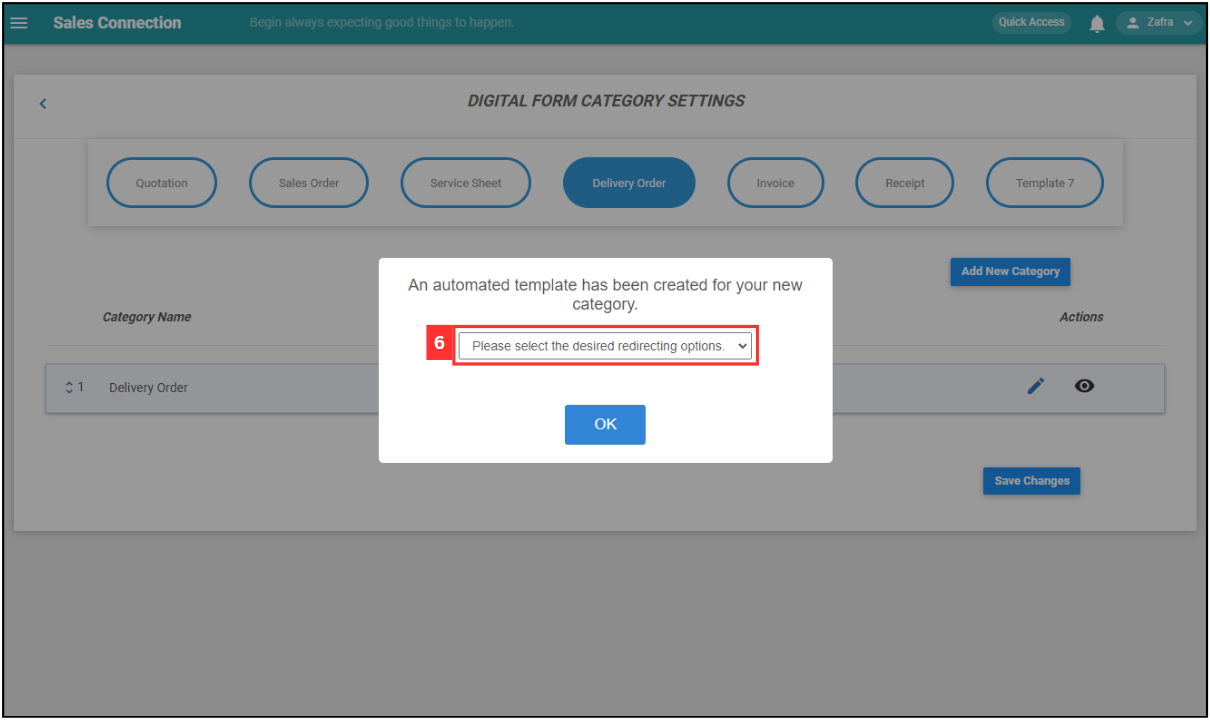
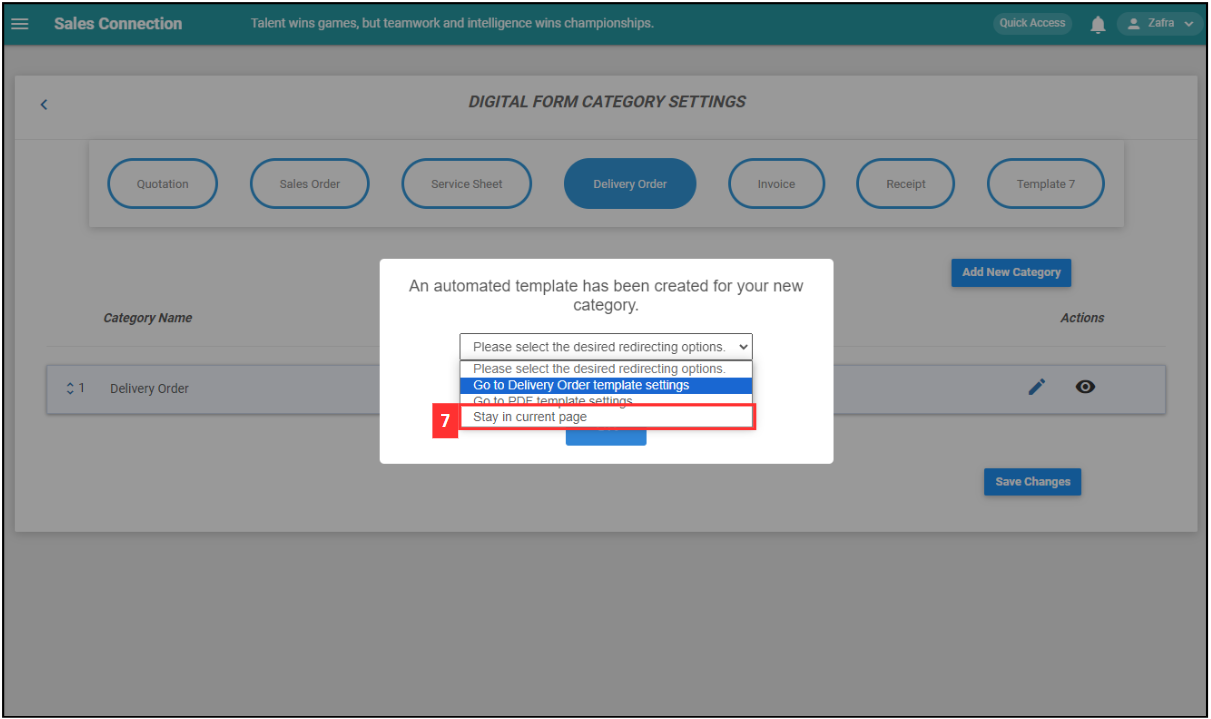
Click on the column.
-
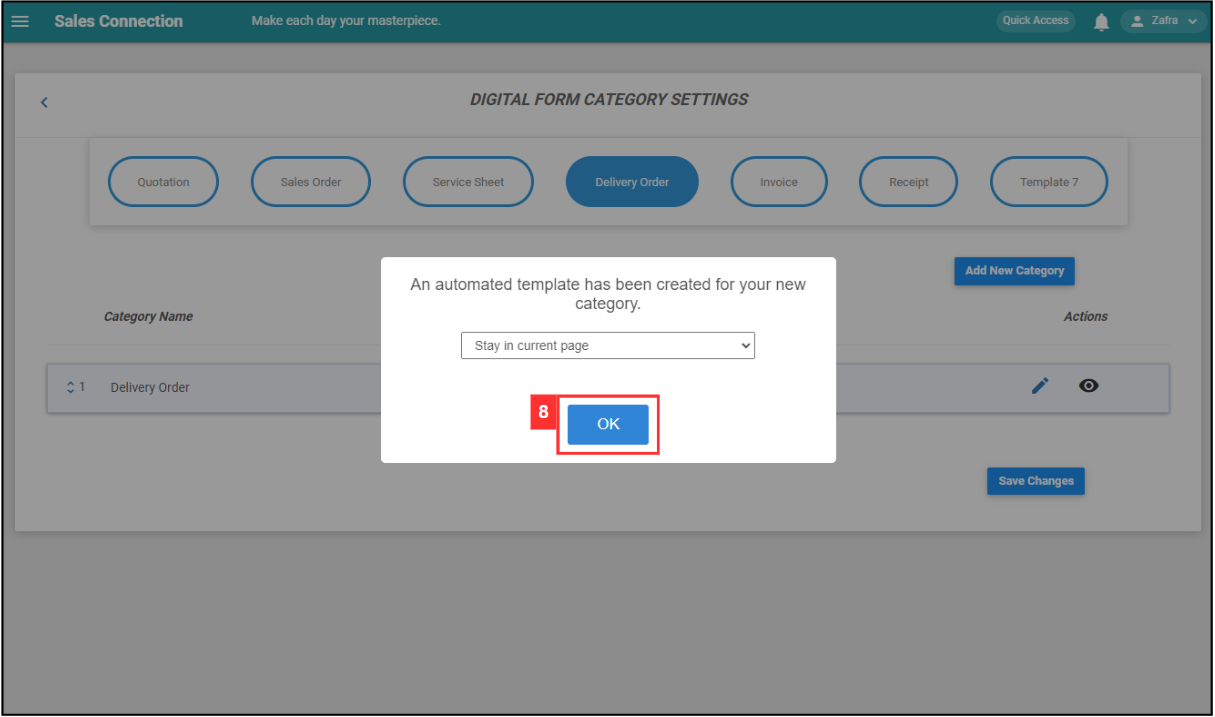
Choose “Stay in Current Page”.
-
Click “OK”.
-
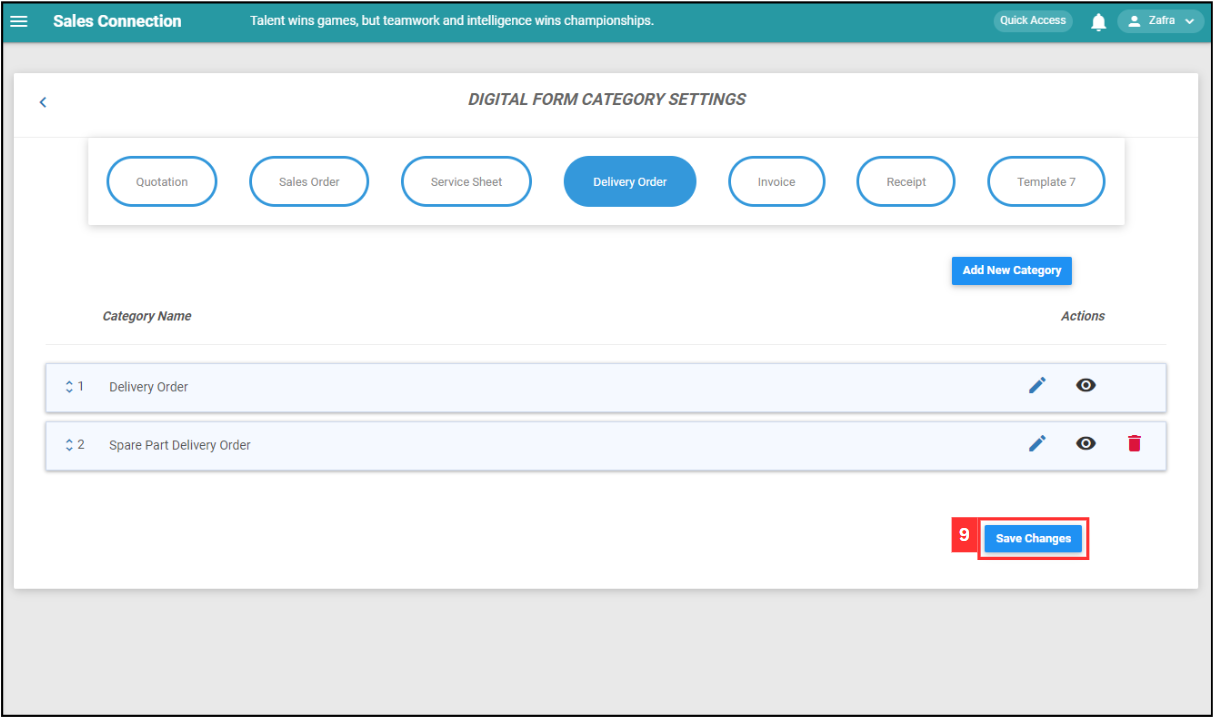
Remember to click the “Save Changes” button to save the new category.
-
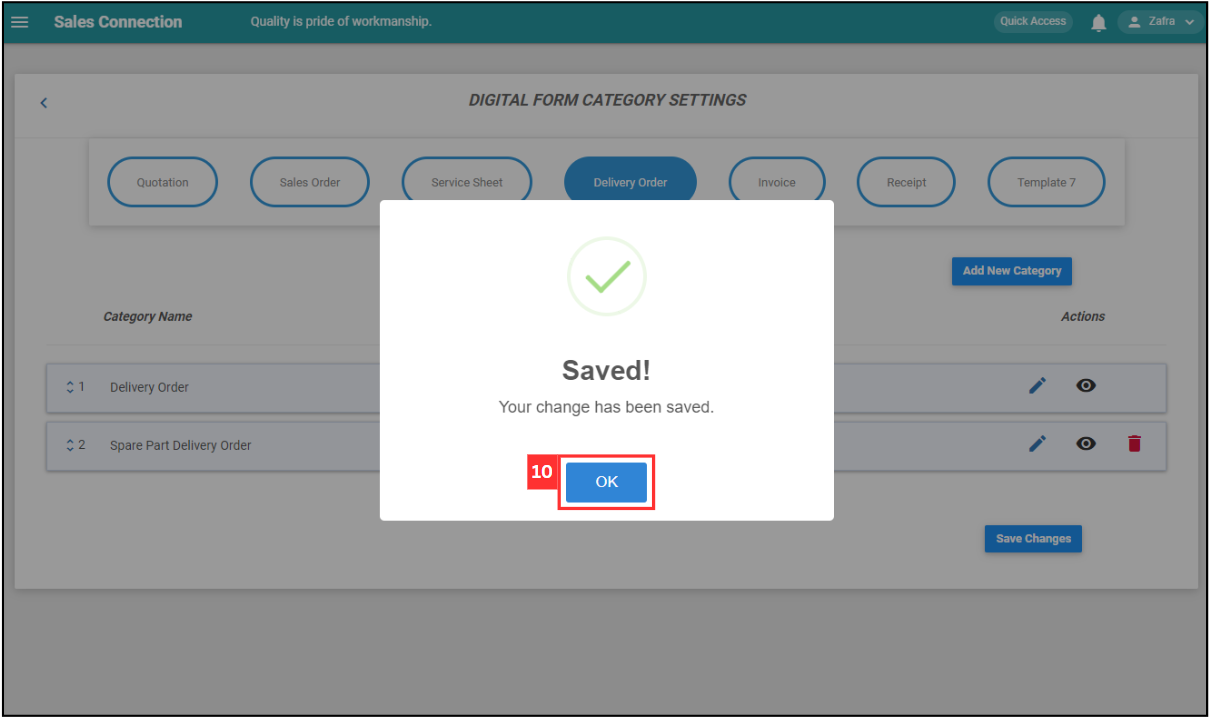
Click “OK” and the new “Delivery Order” category has been saved successfully.
Related Articles