 Help Center
🧠 Why Segment Comment Categories?
This feature helps you keep comment options clean and relevant, speed up user input by reducing distractions, prevent misuse of specialized comment types, and ensure teams stay aligned on what needs to be documented.
This guide explains how to configure Comment Category Segmentation in the Caction system, allowing user to customize specific comment options based on the data level (e.g., Job, Project, Digital Form) . This category segmentation helps ensure that users only see the relevant comment types for their tasks, improving focus and documentation consistency.
For an example, in the system, there are several existing comment categories available, such as Sales Notes , Meeting Minutes and Sales Rejection. Without segmentation, all of these options would appear for all Jobs. Users want to limit the available comment categories based on the specific Job Category.
For instance, if the Job Category is Sales Enquiry, users should only see comment :
- Sales Notes
- Meeting Minutes
This is where Comment Category Segmentation becomes essential. It allows you to control which comment categories are shown based on the specific Job .The tutorial below is based on Job Page but all of these can be applied to other data level such as Customer, Project, and Digital Form.
Benefits:
-
Speeds up user input by reducing clutter and unnecessary comment choices.
-
Helps users stay aligned on what information should be captured
What’s Next?
Now that you understand the purpose and benefits, the next section will walk you through the setup process. In just a few simple steps, you’ll be able to assign the appropriate comment categories to specific data levels and categories—ensuring users only see what’s relevant to them, exactly when they need it.
-
At the desktop site navigation bar, go to Wizard.
Open Wizard Page Here: https://system.caction.com/wizard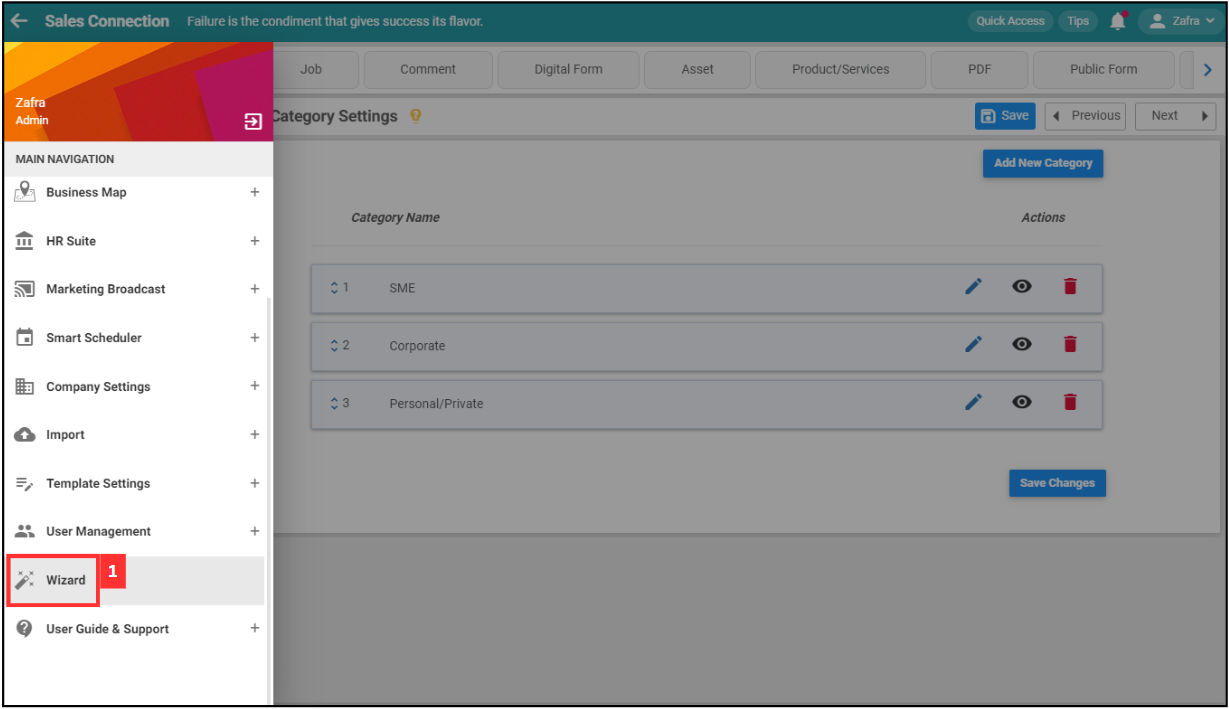
-
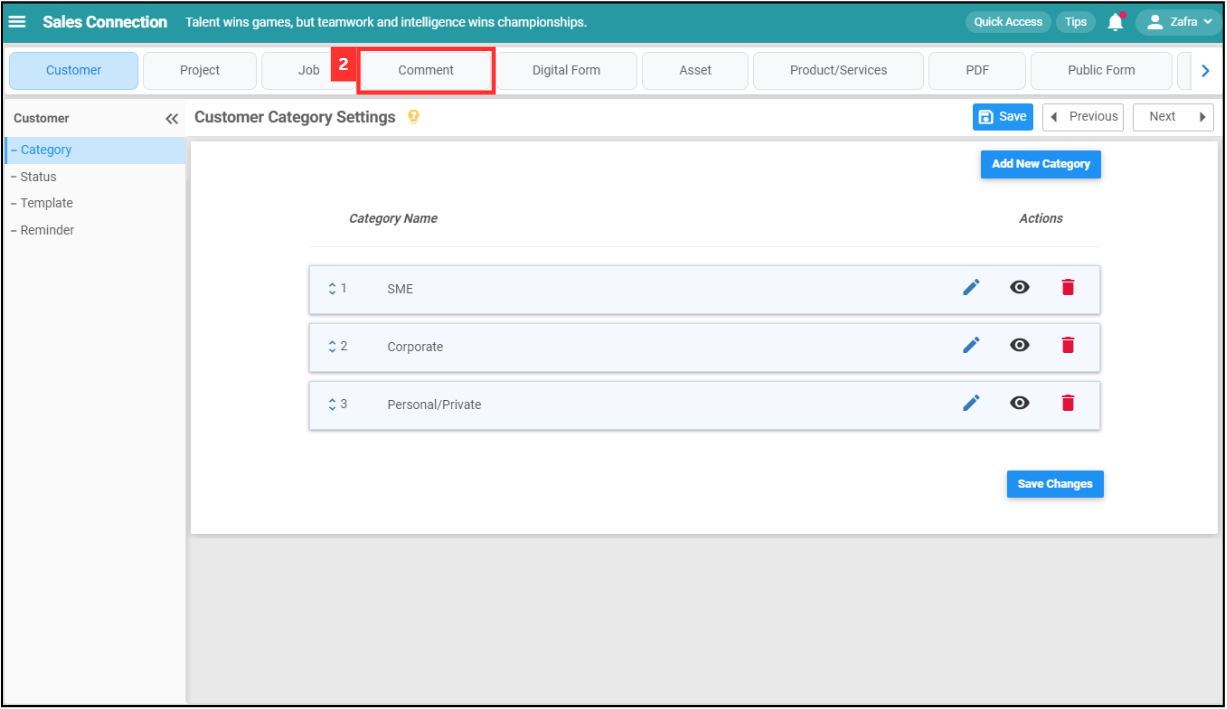
Click “Comment”.
-
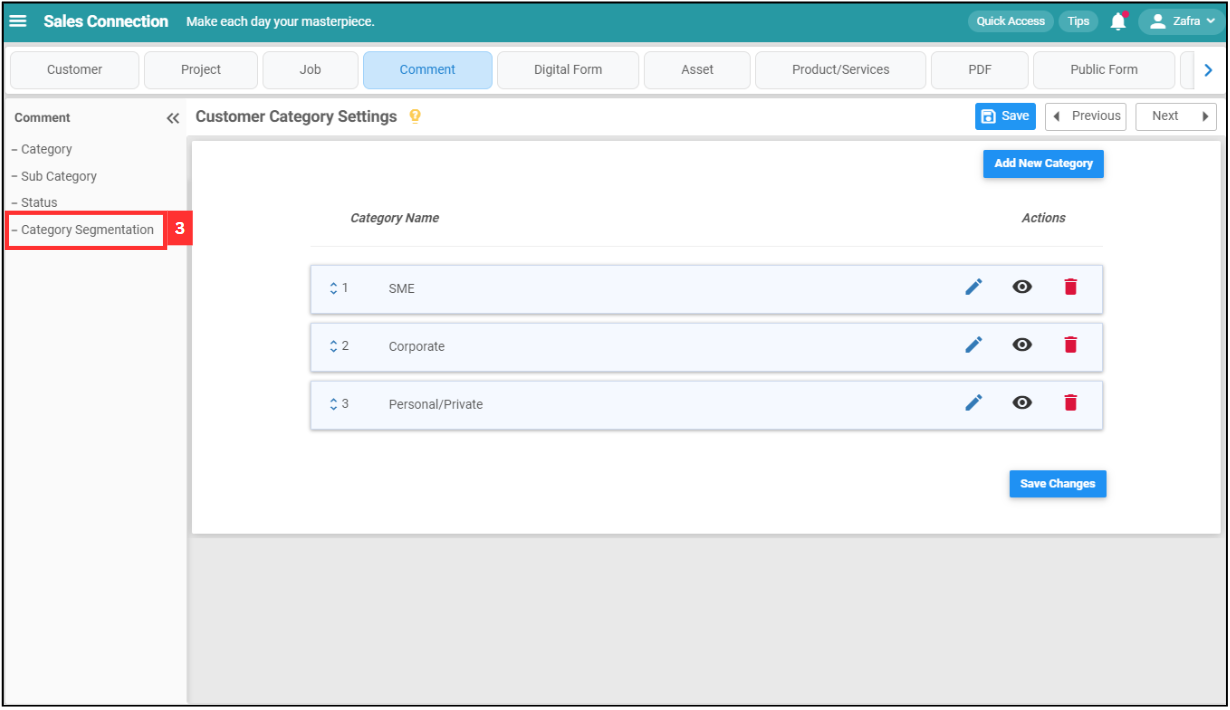
Click on “Category Segmentation”.
-
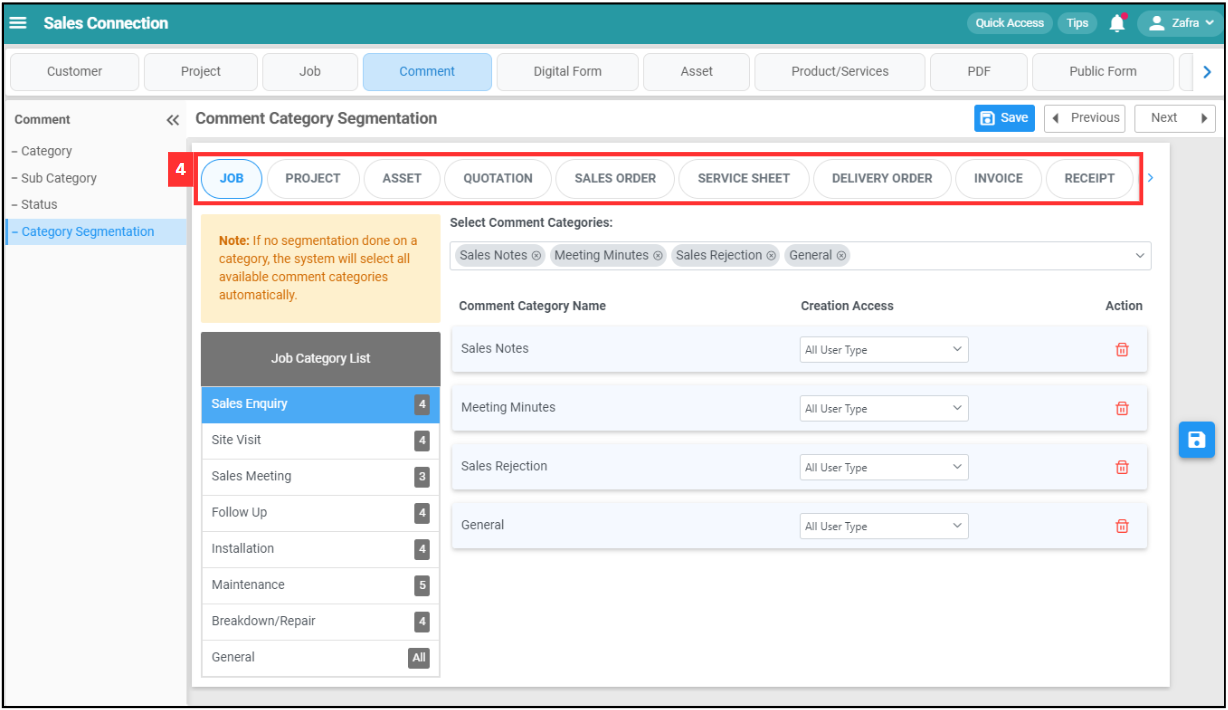
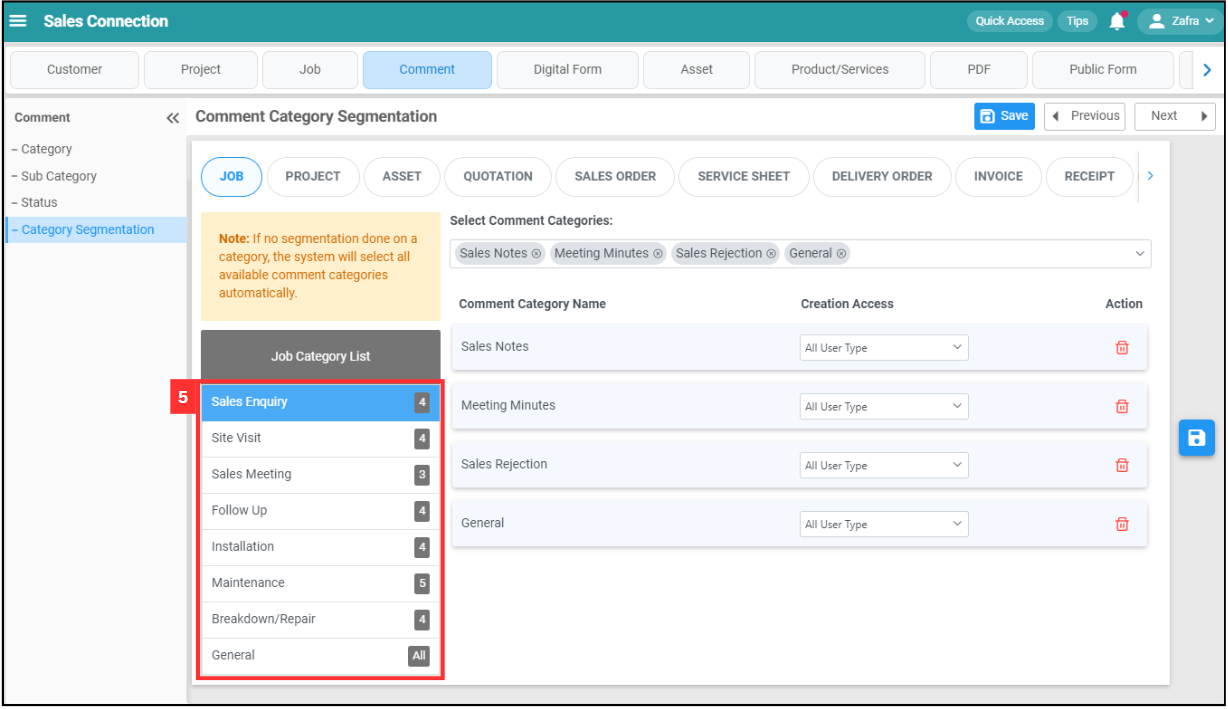
Click on the category. For example, click “Job”.
-
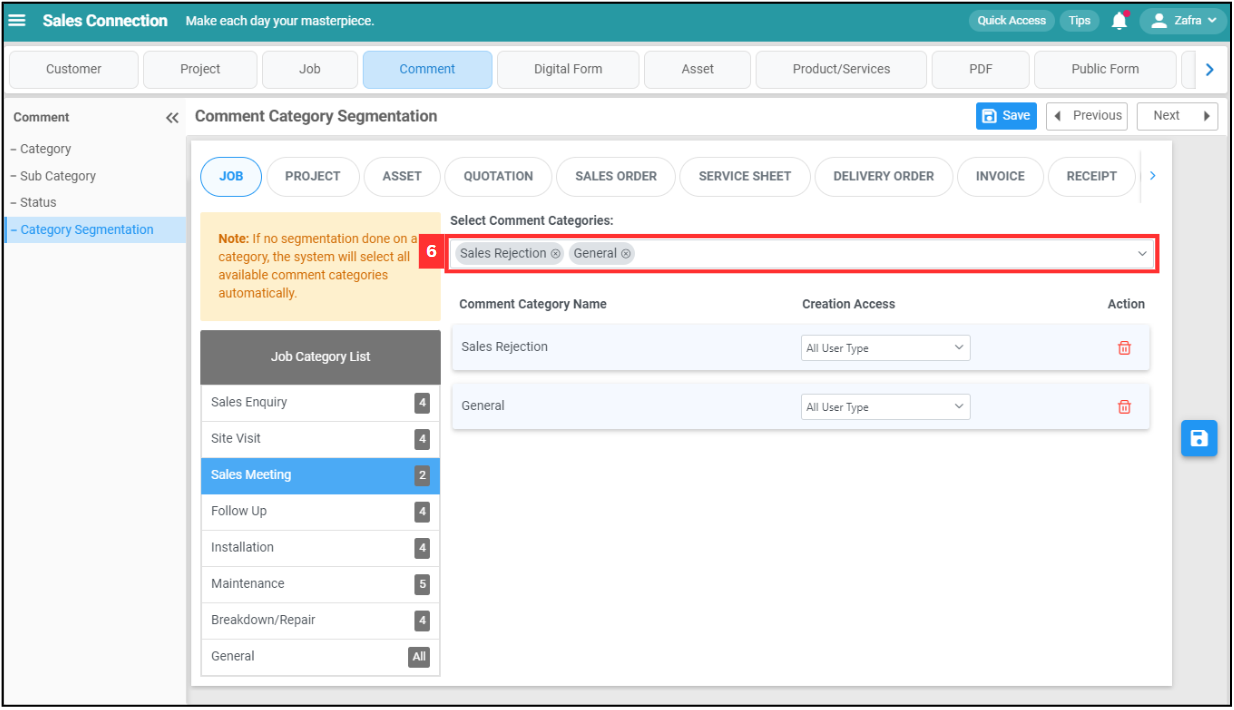
Click on the job category that you want to add comment category in.
-
Click on the comment categories.
-
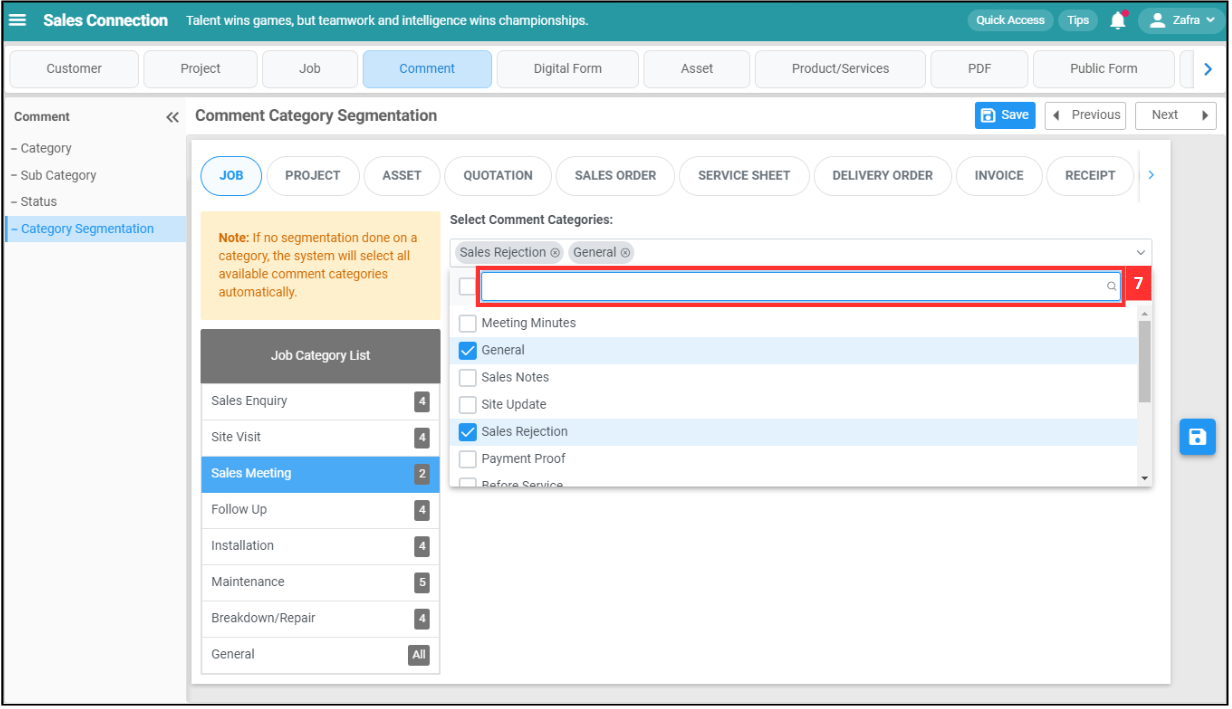
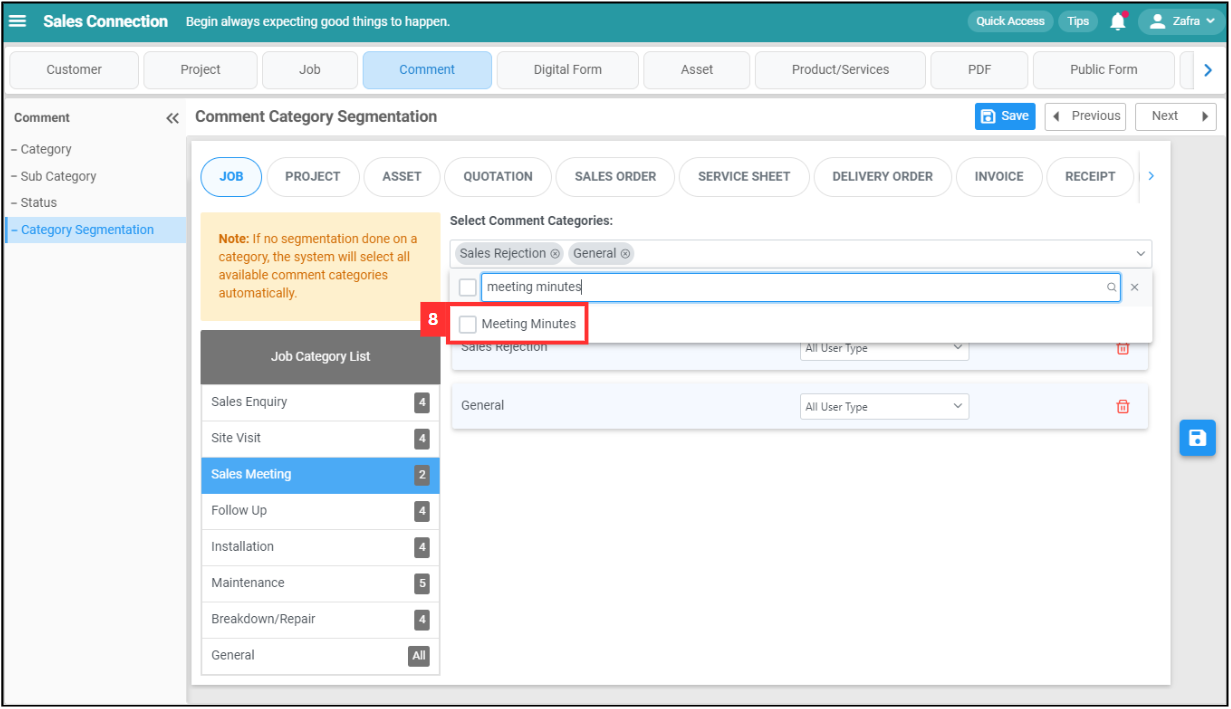
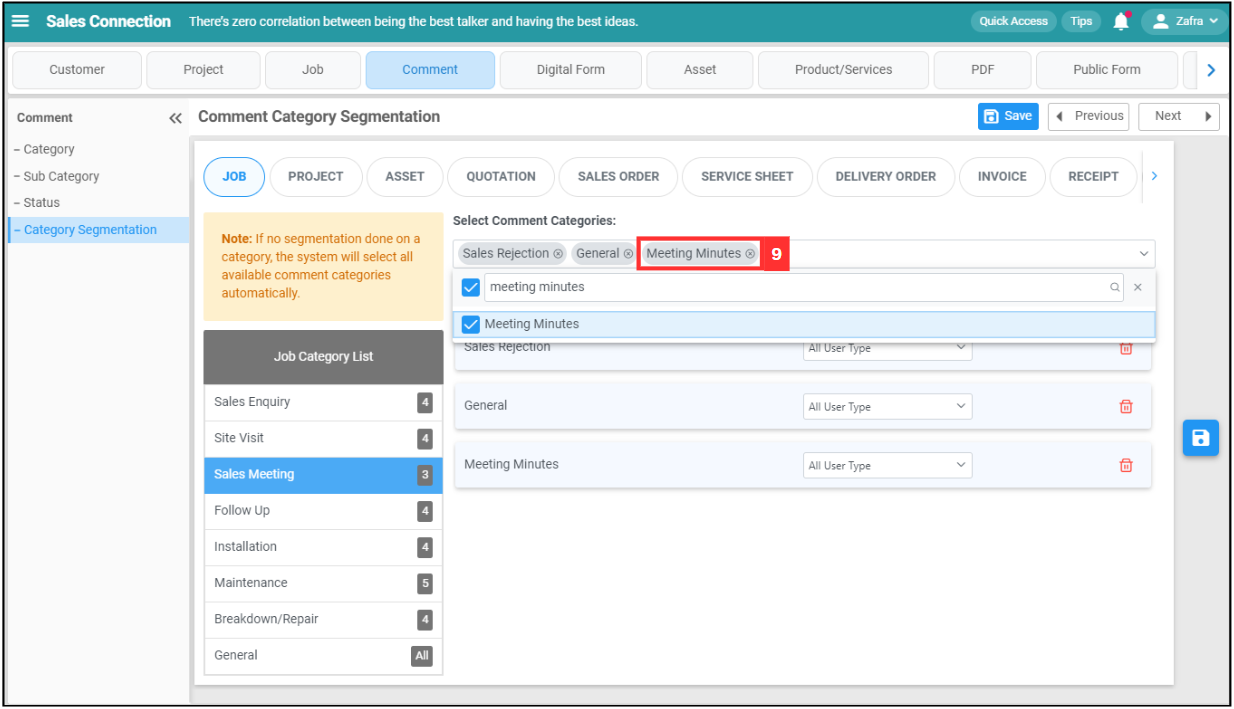
Enter the comment category that you want to add.
-
Tick the comment category you want to add.
-
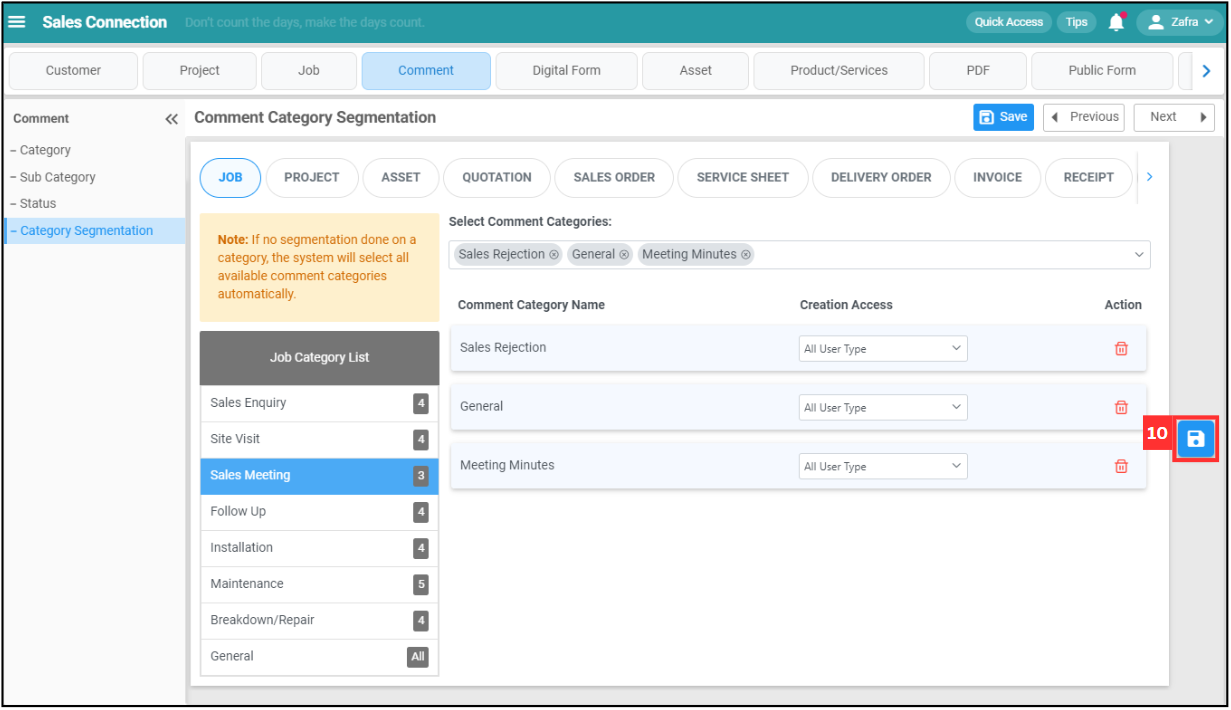
The added comment category will be shown as below.
-
Click on the “Save” icon.
-
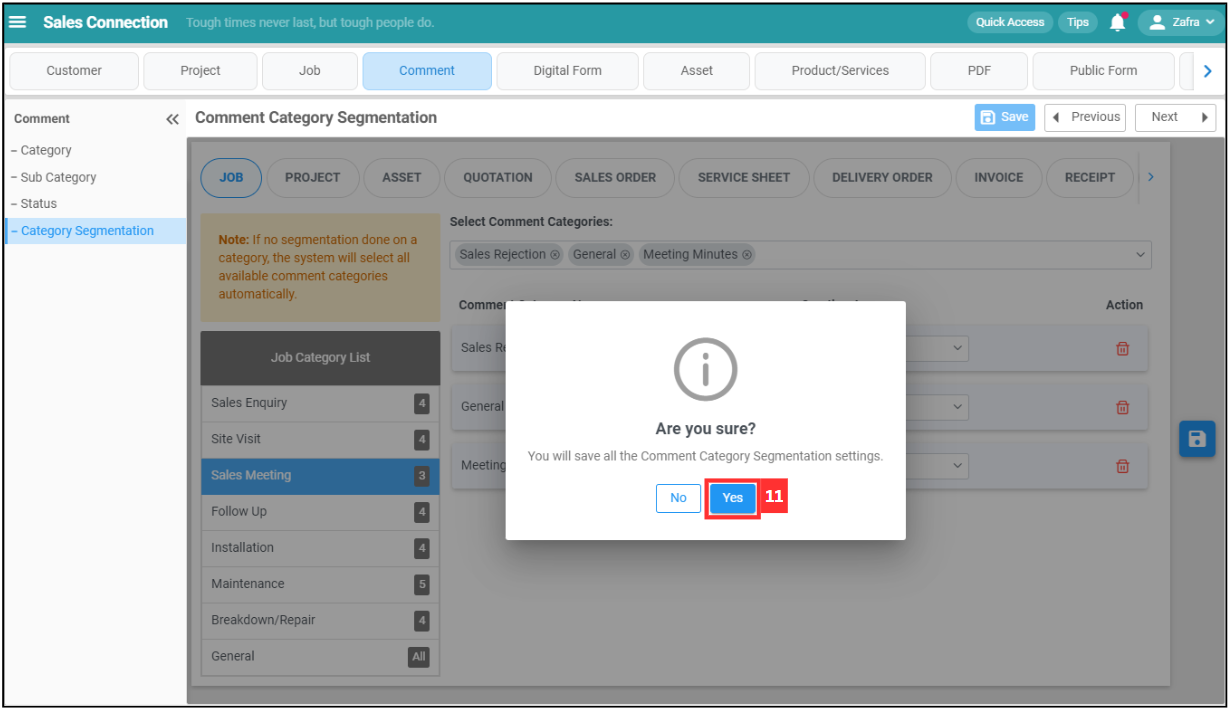
Click “Yes” to confirm.
-
The comment category has been saved when this prompt appears.

💡 Tips for Better Setup
✅ Keep It Relevant: Only assign comment categories that are actually needed for each type of work. This keeps the interface clean and user-friendly.
🏷️ Name Clearly: Use clear, intuitive names for your comment categories so users immediately understand their purpose.
🧪 Test Before Scaling: Start small ! Set up a few segmented categories first, verify they're working as expected, then expand across the system.
Related Articles